Toyota Front Brake Disc/Pad Replacement
How-To - Part 1
The following is a step by step guide with photos describing the replacement of the discs and pads for most Toyota vehicles. There may be some slight variants and some differences in models, but the basic principle remains. Various problems can be encountered and a little technical savvy may be needed to overcome these obstacles. I have written this How-to based on my experiences with MR2’s and Corolla’s.
When replacing any brake components, the work must be done “per axle” i.e. both driver and passenger sides. If for instance the pads only need changing on the passenger side, then you will also need to do the pads on the drivers’ side.
Read this How-To thoroughly from beginning to end before attempting to undertake the work yourself. If you are not technically minded or do not have the confidence take you car (along with the parts) to a garage to get it done properly. Your car will not stop without any brakes or faulty brakes and can cause serious injury or even death.
Although the work is easy for many of us, you can not hold the club or me responsible for any incompetence or lack of technical ability on your part.
I reiterate; if in doubt, get a competent person to assist or oversee the work.
Parts Needed:
* Replacement Discs
* Replacement Pads
* Copper Grease
* Tie-Wraps / Cable Ties / Bailing-Wire
* Metholated Spirits
* WD40
* LocTite Blue
* Old Rags (to catch oil)
* Clean Rags
* Jack
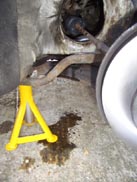
* Axle Stand
* Wire Brush
* Ratchet / Ring Spanners
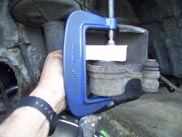
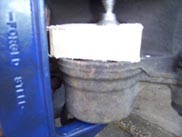
* G-Clamp
* 18mm block of wood
How-To:
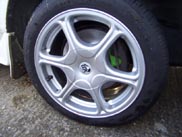
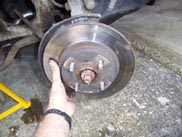
1] Park vehicle on flat surface with handbrake on securely but left out of gear. Place anti-roll wedge (included in most Toyota tool kits) or brick behind the opposite rear tyre to avoid car rolling back. Loosen slightly (but do not remove) wheel nuts. Jack car up and place on Axle Stand. Do not leave the car on the jack!!! Remove the jack and place wheel under sill (outside up to avoid scratching the wheel). Continue to remove wheel.
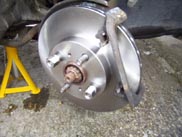
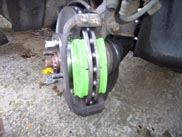
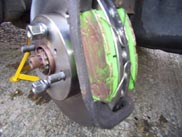
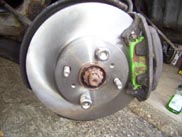
2] Remove the calliper from the calliper bracket, by loosening and removing the two bolts shown.
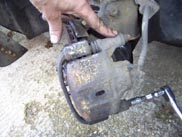 Be careful not to damage the rubber seals.
3] Suspend the calliper using cable-ties or bailing-wire from the suspension spring. Avoid putting strain on the brake hose.
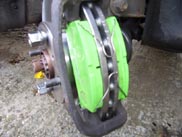
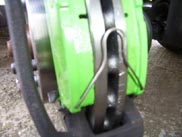
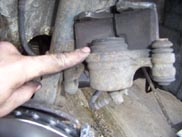
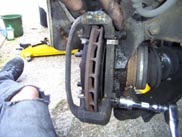
4] Remove old pads from calliper bracket. Take note of the position of the tension springs, wear indicator clips and anti-squeal shims on the pad and remove. There is no need to remove any pins or clips from the bracket. Remove any rust and dust from the calliper with the wire brush. Do not inhale any dust. Clean the calliper and inside of the piston with metholated spirits.
 If replacing the Pad only - skip to step No.13
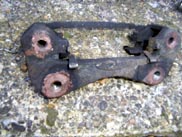
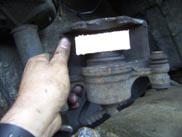
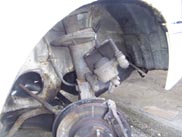
5] Remove the calliper bracket by loosening and removing the bolts shown below.
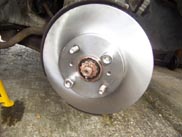
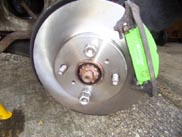
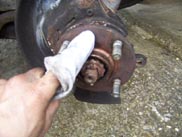
6] The disc now should be able to be pulled off easily. However, if no copper grease was used on previous installation, the disc may seem to be fixed to the hub. You can either use a special removal tool available for around £15 from Halfords or get a couple of bolts and screw them into the two threaded holes not taken up by the wheel nut threads. These holes go through the discs and when putting bolts through them, the bolts will push against the hub, pulling the disc free.
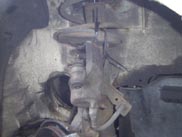
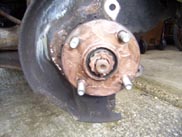
7] Clean off all rust and dust from the hub with the wire brush. Do not inhale any dust. Remove all traces of grease (copper or otherwise) from the hub with a cloth and the metholated spirits. Clean all the bolts with metholated spirits and apply a generous amount of WD40 to the two bolts that hold the bracket in place.
8] Apply a generous and even coating of copper grease to the hub. Try not get too much of the grease onto the wheel nut bolt threads.
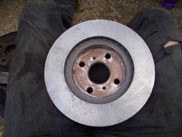
9] Clean the new replacement disc with the metholated spirits to remove any production oils or packaging agents. Apply a thin and even coating of copper grease to the inside where the disc will meet the hub when in place.