OPDS Unit Replacement
NOTE: Review the seat replacement procedure in the Body section before doing repairs or service.
Removal
| 1. | Disconnect the battery negative cable, and wait at least 3 minutes before beginning work.
|
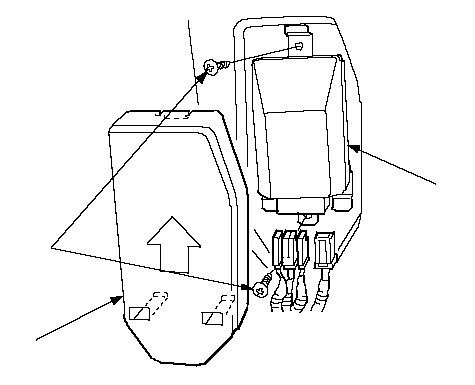
| 4. | Remove the cover (A), then disconnect the OPDS unit harness 8P and sensor connectors from the OPDS unit (C).
 ABCC ABCC |
| 5. | Remove the two screws (B) and the OPDS unit.
|
Installation
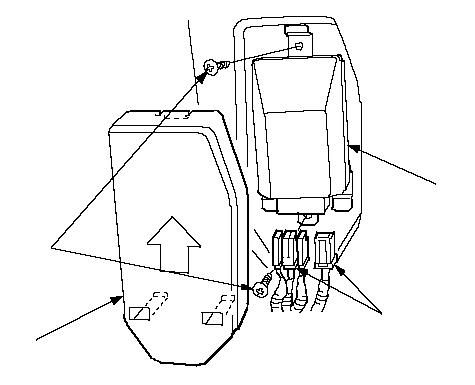
| 1. | Place the new OPDS unit (A) on the seat-back frame. Tighten the two screws (B), and connect the OPDS unit harness 8P and sensor connectors (C) to the OPDS unit. Reinstall the cover (D).
 DBCAC DBCAC |
| 2. | Install the seat-back cover in the reverse order of removal.
|
| 4. | Reconnect the battery negative cable.
|
| 5. | Set the seat-back in the normal position, and make sure there is nothing on the front passenger's seat.
|
| 7. | After installing the OPDS unit, confirm proper system operation: Turn the ignition switch ON (II); the SRS indicator should come on for about 6 seconds and then go off.
|