Driver's Dashboard Lower Cover Removal/Installation
Driver's Dashboard Lower Cover Removal/Installation
NOTE:- Take care not to scratch the dashboard and related parts.
- When prying with a flat-tip screwdriver, wrap it with protective tape to prevent damage.
- LHD is shown; RHD is symmetrical.
| 1. | Adjust the steering column upward. |
| 2. | Remove the screw (B). Starting at the left lower corner working toward the right, gently pull out the bottom to detach four clips (C) and a hook (D). Disconnect the VSA switch connector (E), and if equipped, headlight adjuster switch connector (F).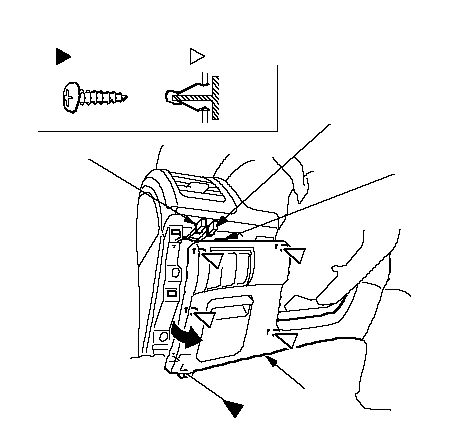 Fastener Locations: Screw, 1A: Clip, 4CABDCCCCEF Fastener Locations: Screw, 1A: Clip, 4CABDCCCCEF |
| 3. | While pulling the left of the dashboard lower cover (A) back, pry the clips (B, C) nearest the center console with a flat-tip screwdriver, then remove the cover.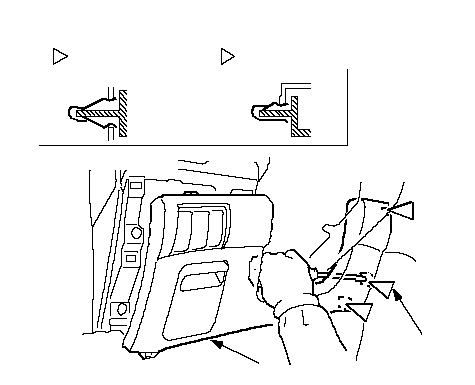 AFastener Locations: ClipLHD, 2 AFastener Locations: ClipLHD, 2RHD, 3: ClipCBRHD, 1BBLHD: B RHD: C |
| 4. | Install the cover in the reverse order of removal, and make sure the connector is plugged in properly. |