Rain Sensor Input Test
NOTE: When replacing the rain sensor, always install the rain sensor first, then connect the battery.
| 2. | Remove the cover (A) from the rain sensor (B).
|
| 3. | Disconnect the 5P connector (C) from the rain sensor.
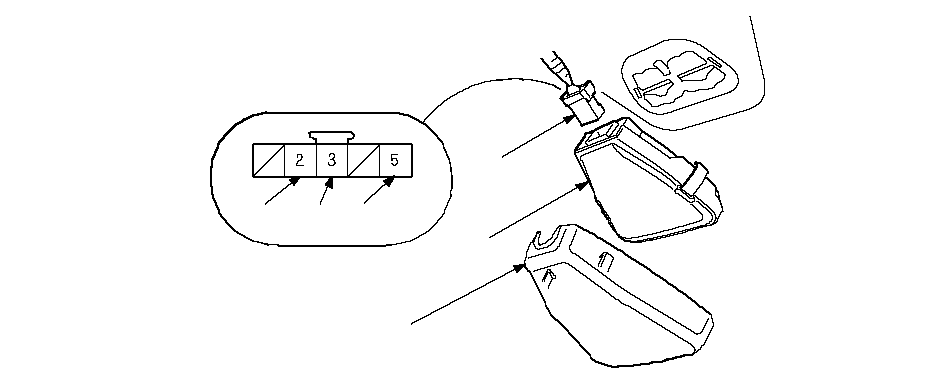 ABCYEL/ ABCYEL/
GRNLT GRN/
REDBLKWire side of female terminals |
| 4. | Inspect the connector and socket terminals to be sure they are all making good contact.
- if the terminals are bent, loose or corroded, repair them as necessary, and recheck the system.
- if the terminals look OK, go to 5.
|
| 5. | With the connector still disconnected, make these input tests at the connector.
- if any test indicates a problem, find and correct the cause, then recheck the system.
- If all the input tests prove OK, replace the rain sensor.
| Cavity | Wire | Test condition | Test: Desired result | Possible cause if result is not obtained |
|---|
| 2 | YEL/GRN | Ignition switch ON (II) | Check for voltage to ground:
There should be battery voltage. | - Blown No. 20 (7.5A) fuse in the under-dash fuse/relay box
- An open in the wire
| | 3 | BLK | Under all conditions | Check for continuity ground:
There should be continuity. | - Poor ground (G501 [G601])
- An open in the wire
| | 5 | LT GRN/RED | Under all conditions | Check for continuity between the under-dash fuse/relay box X connector terminal No. 22 and rain sensor 5P connector terminal No. 5.
There should be continuity. | |
|