M/T Mainshaft Reassembly (M/T)
M/T Mainshaft Reassembly
Exploded View
5-speed model:
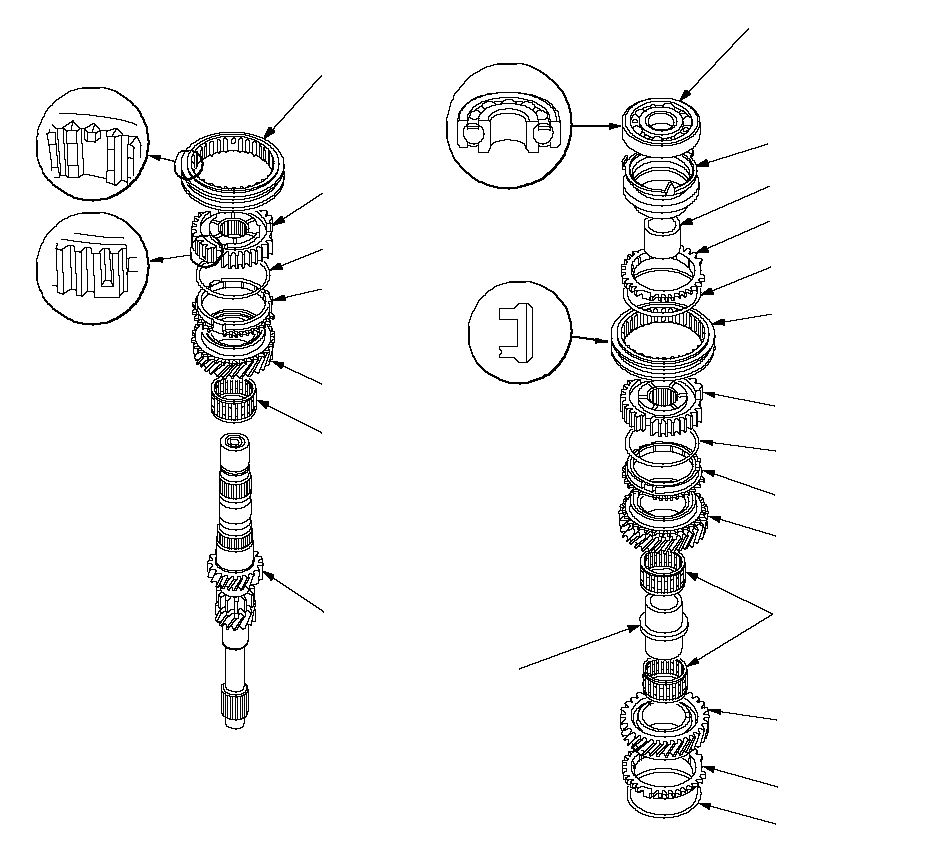 5TH SYNCHRO SLEEVE3RD/4TH
SYNCHRO
SLEEVE4TH GEAR4TH/5TH GEAR
DISTANCE COLLAR5TH GEAR5TH SYNCHRO HUBSYNCHRO SPRINGSYNCHRO RING3RD/4TH
SYNCHRO HUBSYNCHRO SPRINGSYNCHRO RINGANGULAR BALL BEARING
Check for wear and
operation.
Note the direction of
installation.TAPERED CONE RINGMBS DISTANCE COLLARSYNCHRO SPRINGNEEDLE BEARING
Check for wear and
operation.NEEDLE BEARING
Check for wear and
operation.MAINSHAFTSYNCHRO SPRING3RD GEARSYNCHRO RINGSYNCHRO RING
6-speed model:
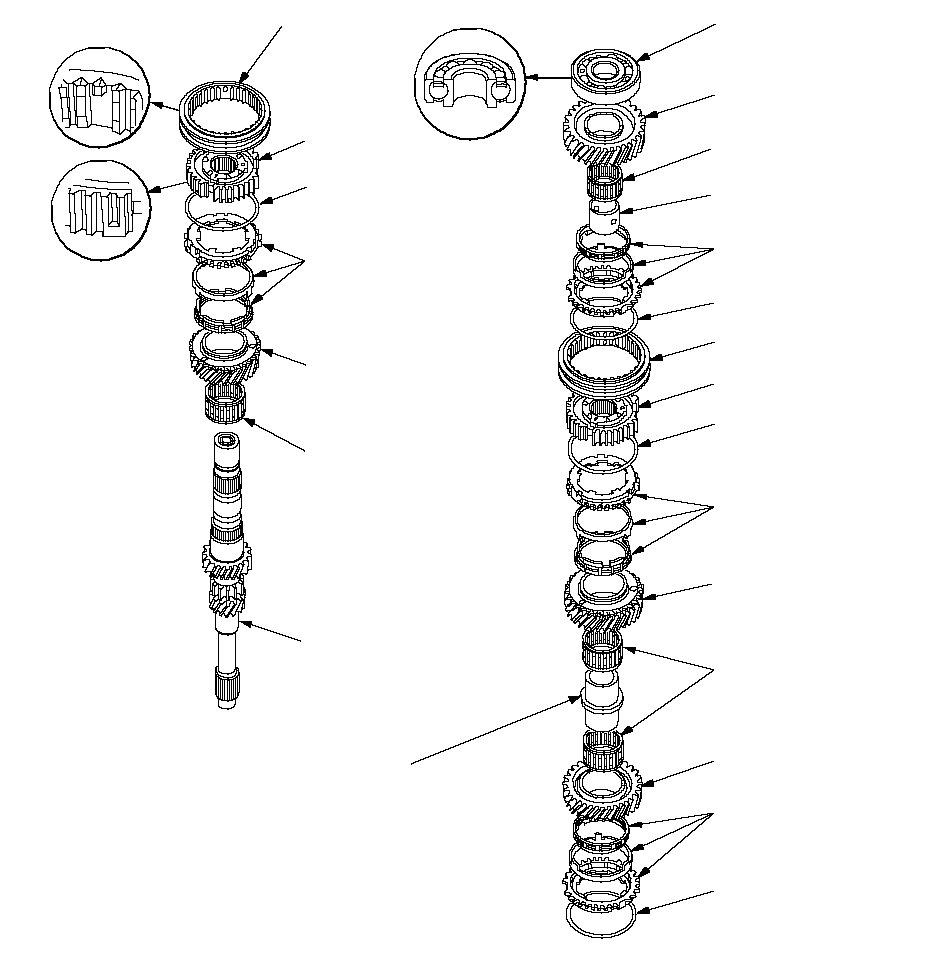 5TH/6TH SYNCHRO SLEEVE3RD/4TH
SYNCHRO
SLEEVE4TH GEAR4TH/5TH GEAR
DISTANCE COLLAR5TH GEAR5TH/6TH SYNCHRO HUBSYNCHRO
SPRING3RD/4TH
SYNCHRO HUBSYNCHRO SPRINGANGULAR BALL BEARING
Check for wear and operation.
Note the direction of
installation.DOUBLE CONE SYNCHRODISTANCE COLLARSYNCHRO SPRINGNEEDLE BEARING
Check for wear and operation.NEEDLE BEARING
Check for wear and operation.MAINSHAFTSYNCHRO SPRING3RD GEAR6TH GEARNEEDLE BEARING
Check for wear and operation.DOUBLE CONE SYNCHRODOUBLE CONE SYNCHRODOUBLE CONE SYNCHRO
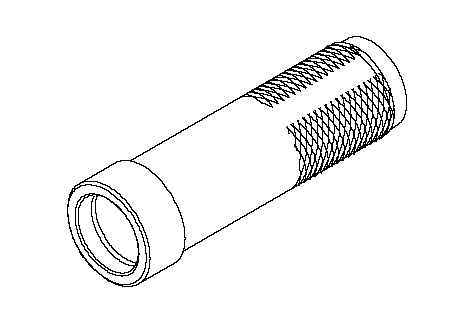
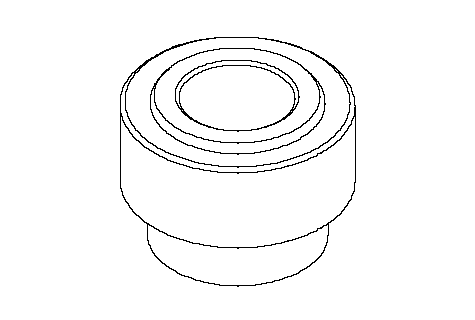
Special Tools Required
Driver, 40 mm I.D. ( 07746-0030100)
NOTE:
- Refer to the Exploded View as needed during this procedure.
- 6-speed model is shown, 5-speed model similar.
| 1. | Clean all the parts in solvent, dry them, and apply lubricant to all contact surfaces except the 3rd/4th and 5th/6th synchro hubs. |
| 2. | Install the needle bearing and 3rd gear on the mainshaft. |
| 3. | Install the double cone synchro assembly (A) by aligning the synchro cone fingers (B) with the holes in 3rd gear (C), then install the synchro spring (D).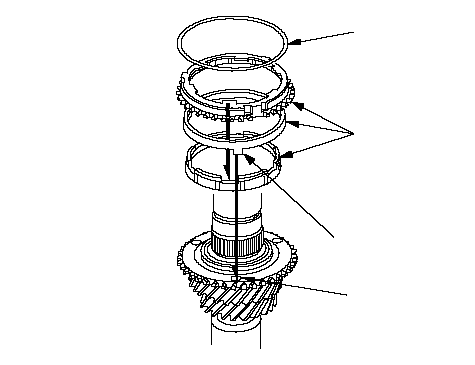 DABC DABC |
| 4. | Install the 3rd/4th synchro hub (A) by aligning the synchro cone fingers (B) with the grooves in 3rd/ 4th synchro hub (C).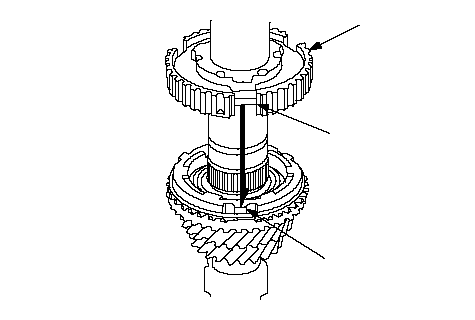 ACB ACB |
| 5. | Install the 3rd/4th synchro hub (A) using the special tool.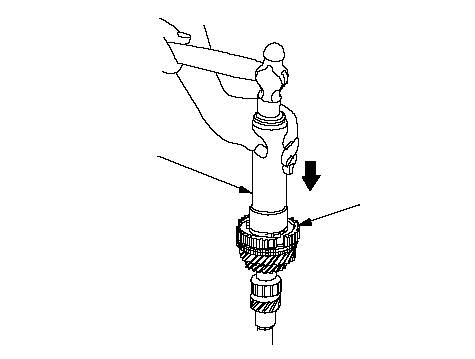 A07746-0030100 A07746-0030100 |
| 6. | Install the 3rd/4th synchro sleeve (A) by aligning the stops (B) with the 3rd/4th synchro sleeve and hub. After installing, check the operation of the 3rd/4th synchro hub set.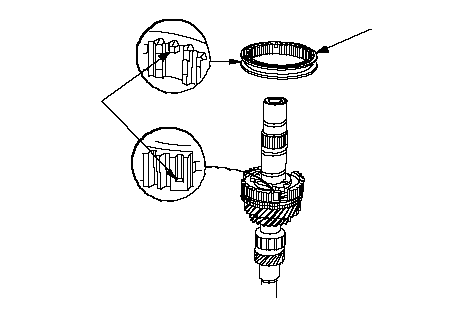 AB AB |
| 7. | Install the synchro spring (A).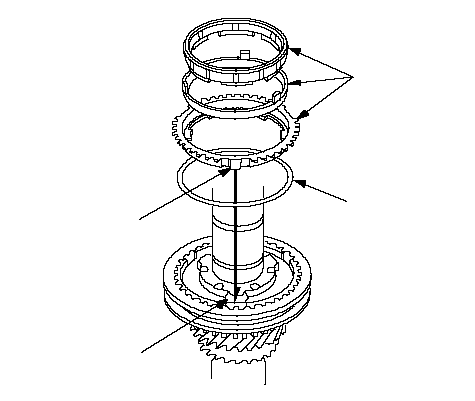 BACD BACD |
| 8. | Install the double cone synchro assembly (B) by aligning the synchro cone fingers (C) with the grooves in 3rd/4th synchro hub (D). |
| 9. | Install 4th gear (A) by aligning the synchro cone fingers (B) with holes in 4th gear (C).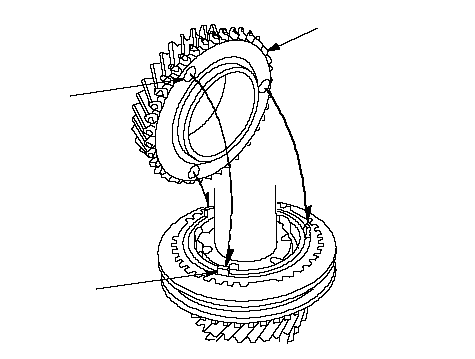 ACB ACB |
| 10. | Install the needle bearings, distance collar, and 5th gear. |
| 11. | Install the double cone synchro assembly (A) by aligning the synchro cone fingers (B) with the holes in 5th gear (C), then install the synchro spring (D).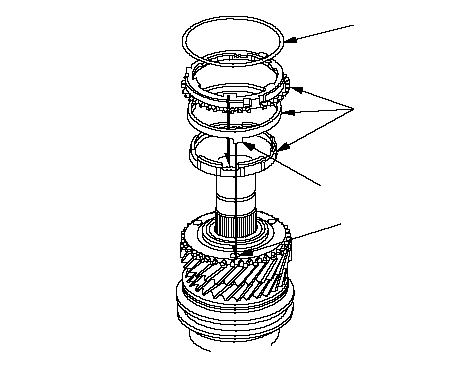 DABC DABC |
| 12. | Install the 5th/6th synchro hub (A) by aligning the synchro cone fingers (B) with the grooves in 5th/6th synchro hub (C).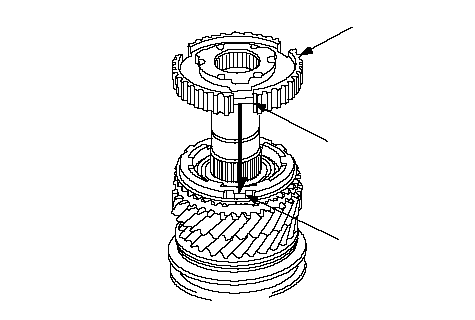 ACB ACB |
| 13. | Install the 5th/6th synchro hub (A) using the special tools.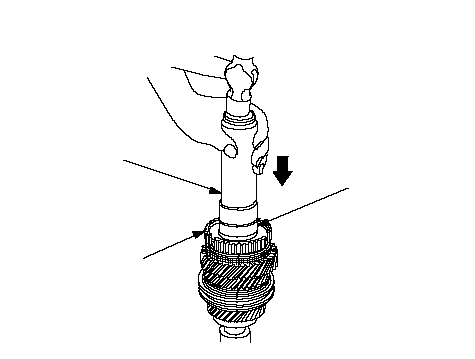 07746-003030007746-0030100A 07746-003030007746-0030100A |
| 14. | Install the 5th/6th synchro sleeve. |
| 15. | Install the distance collar and the tapered cone ring ( 5-speed model). |
| 16. | Install the synchro spring (A).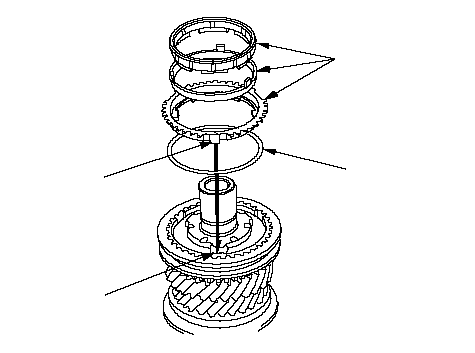 ABCD ABCD |
| 17. | Install the double cone synchro assembly (B) by aligning the synchro cone fingers (C) with the grooves in 5th/6th synchro hub (D). |
| 18. | Install the distance collar and the needle bearing. |
| 19. | Install the 6th gear (A) by aligning the synchro cone fingers (B) with the holes in 6th gear (C).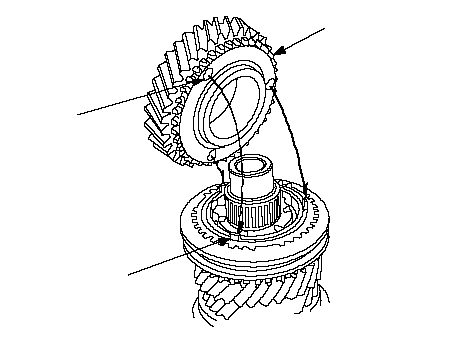 ACB ACB |
| 20. | Install the new ball bearing (A) using the special tools and a press (B).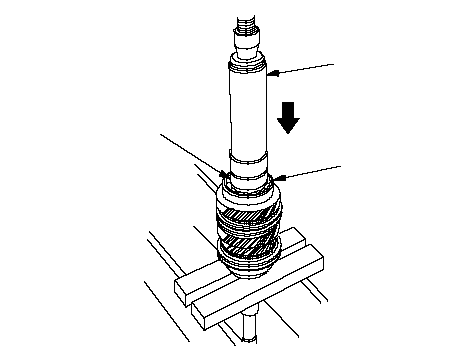 07746-003010007746-0030300A 07746-003010007746-0030300A |