Steering Rack End Removal and Installation (EPS)
Steering Rack End Removal and Installation
Exproded view
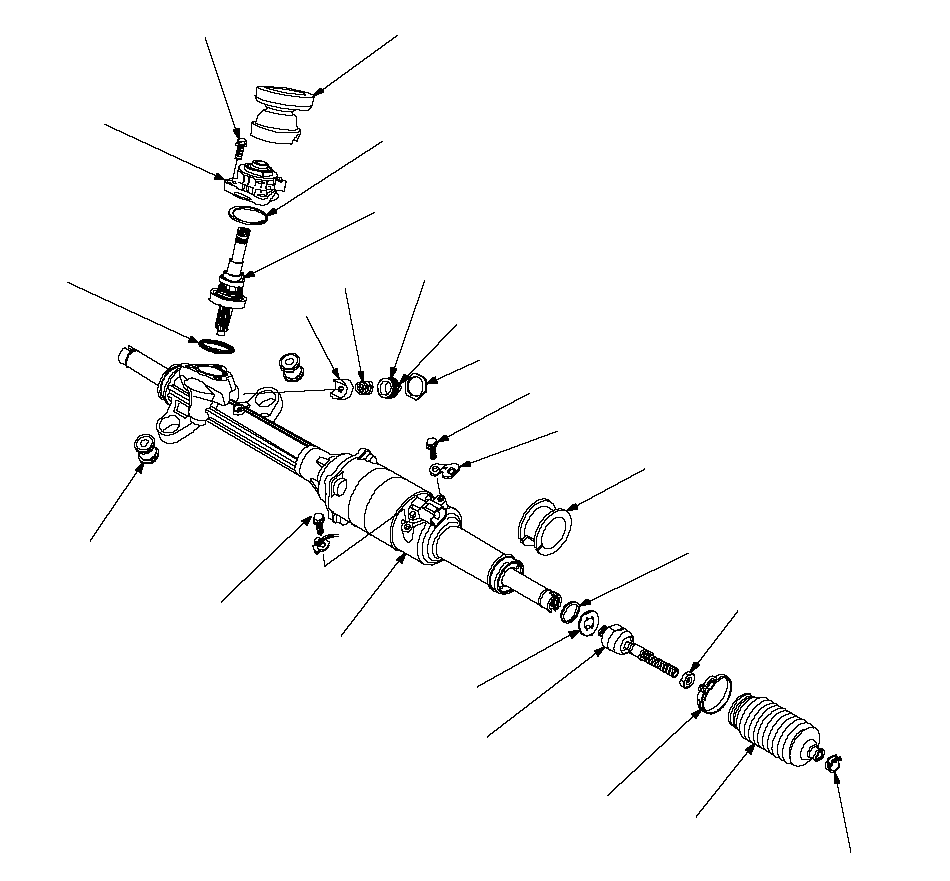 PINION DUST COVER
Inspect for damage and
deterioration.TORQUE SENSOR COIL
If the coil is faulty, replace
the torque sensor core/pinion
shaft as an assembly. The coil
is not available separately.TORQUE SENSOR CORE/PINION SHAFT
If the torque sensor core is faulty,
replace the pinion shaft as an assembly.
The core is not available separately.SNAP RING9.8 N·m (1.0 kgf·m, 7.2 lbf·ft)O-RING
Replace.O-RING
Replace.RACK GUIDE SCREWLOCKNUT9.8 N·m (1.0 kgf·m, 7.2 lbf·ft)SPRINGRACK GUIDEWIRE HARNESS BRACKETMOUNTING BUSHING
Inspect for damage and
deterioration.STOP RUBER
Replace.LOCKNUT
44 N·m (4.5 kgf·m, 33 lbf·ft)TIE-ROD CLIPBOOT
Inspect for damage and
deterioration.RACK END
Inspect for faulty movement
and damage.BOOT BAND
Replace.LOCK WASHER
Replace.STEERING GEARBOX ASSEMBLY (MOTOR)
If the gearbox is faulty, replace
it as an assembly.9.8 N·m (1.0 kgf·m, 7.2 lbf·ft)GEARBOX MOUNT CUSHION
Inspect for damage and
deterioration.
Removal
Note these items during removal/installation:
- Do not allow dust, dirt, or other foreign materials to enter the gearbox.
- Do not disassemble the steering gearbox assembly (motor). If the motor is faulty, replace it as an assembly.
| 1. | Remove the boot bands (A) and discard them. Remove the tie-rod clips (B), and pull the boots away from the ends of the gearbox.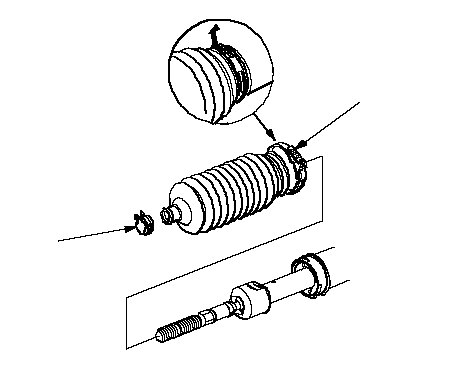 BA BA |
| 2. | Unbend the lock washer (A).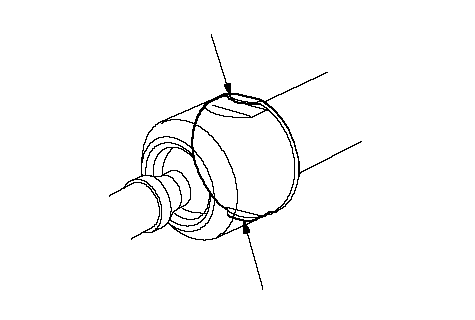 AA AA |
| 3. | Unscrew both rack ends (A) with a wrench. Be careful not to damage the rack shaft surface with the wrench. Remove the rack end, lock washer (B) and stop rubber (C) discard them.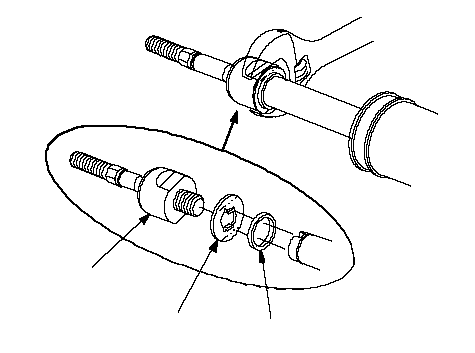 CBA CBA |
Installation
| 1. | Install the new stop rubber (A) and lock washer (B) on the rack shaft. Align the lock washer tabs (C) with slots (D) in the rack shaft. Install the rack end (E) while holding with lock washer in place. Repeat this step for the other side of the rack shaft.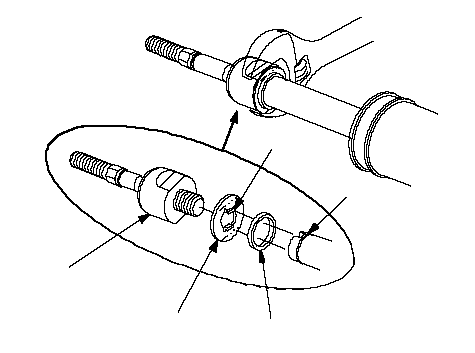 ABE ABE74 N·m (7.5 kgf·m, 54 lbf·ft)CD |
| 2. | Tighten both rack ends. Be careful not to damage the rack shaft surface with the wrench. |
| 3. | Bend the lock washer back against the flat spots on the rack end ball joint housing.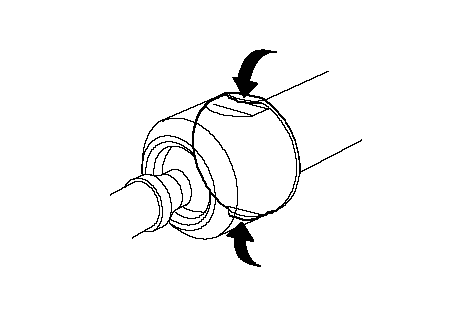 |
| 4. | Apply multipurpose grease to the circumference (A) of the rack end joint housing and lock washer.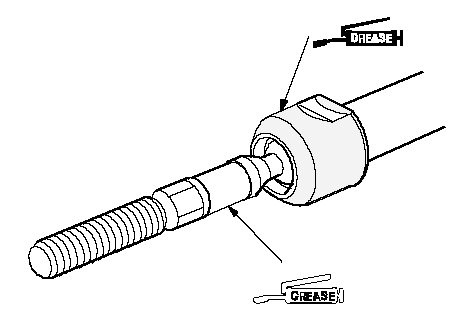 BA BA |
| 5. | Apply a light coat of silicone grease to the boot fitting grooves (B) on the rack ends. |
| 6. | Center the steering rack within its stroke. |
| 7. | Clearn off the any grease or contamination from the boot installation groves (A) around on the gearbox housing. Install the boots on the rack ends with the tie-rod clips (C), and fit the boot end in the installation grooves in the housing properly.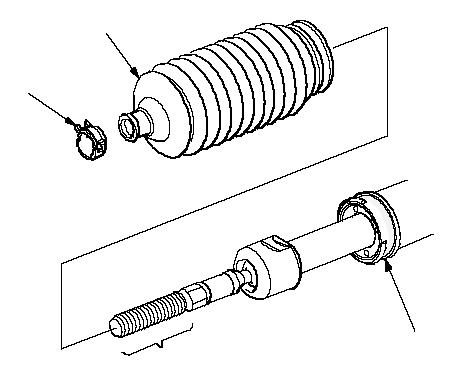 CBDA CBDA |
| 8. | After installing the boots, wipe the grease off the thread section (D) of rack end. |
| 9. | Install the new boot bands by aligning the tabs (A) with holes (B) of the band.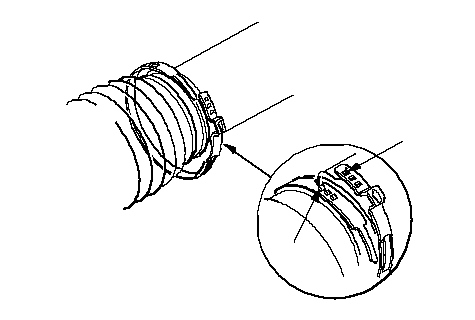 BA BA |
| 10. | Close the ear portion (A) of the band (B) with commercially available pincers, Oetiker 1098 or equivalent (C).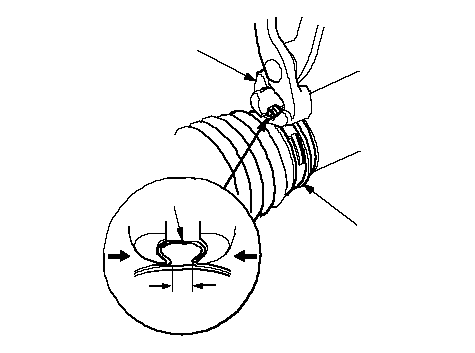 CBA2 mm CBA2 mm(0.08 in.) |
| 11. | Slide the rack shaft right and left to be certain that the boots are not deformed or twisted. |