Fuel Pump/Fuel Gauge Sending Unit Replacement (4D)
Fuel Pump/Fuel Gauge Sending Unit Replacement
Special Tools Required
Fuel sender wrench ( 07XAA-001010A)
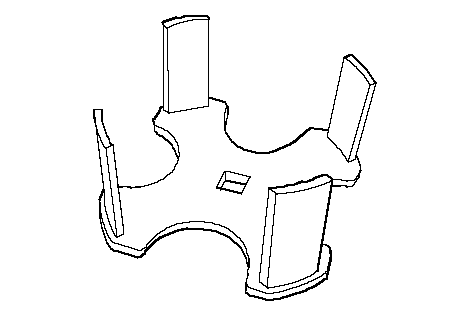
Except ECONO model:
| 1. | Relieve the fuel pressure. |
| 2. | Remove the fuel fill cap. |
| 3. | Remove the trunk floor. |
| 4. | Remove the access panel (A) from the floor.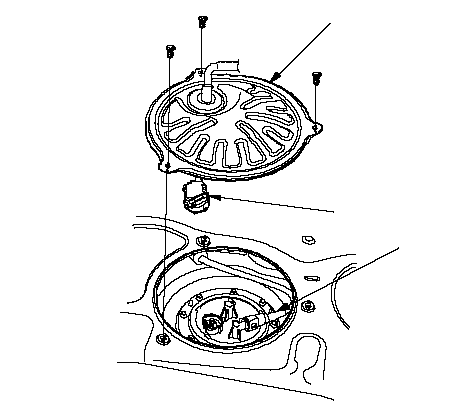 ABC ABC |
| 5. | Disconnect the fuel pump 5P connector (B). |
| 6. | Disconnect the quick-connect fitting (C) from the fuel tank unit. |
| 7. | Remove the fuel tank unit (A).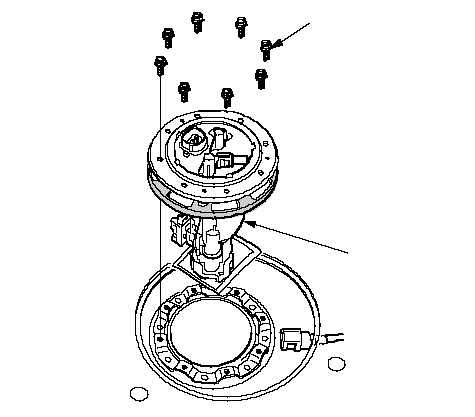 4 N·m 4 N·m (0.4 kgf·m, 3 lbf·ft)A |
| 8. | Remove the fuel filter (A), the fuel gauge sending unit (B), and the wire harness (C).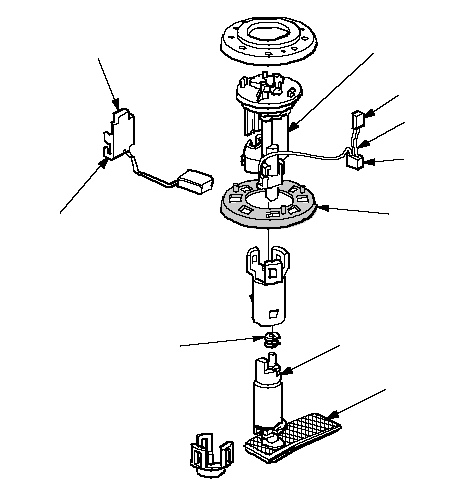 AHCHFEDGBH AHCHFEDGBH |
| 9. | When connecting the fuel tank unit, make sure the connection is secure and the suction filter (D) is firmly connected to the fuel pump (E). |
| 10. | Install the part in the revers order of removal with a new base gasket (F), then check these items:
|
ECONO model:
| 1. | Relieve the fuel pressure. |
| 2. | Remove the fuel fill cap. |
| 3. | Remove the trunk floor. |
| 4. | Remove the access panel (A) from the floor.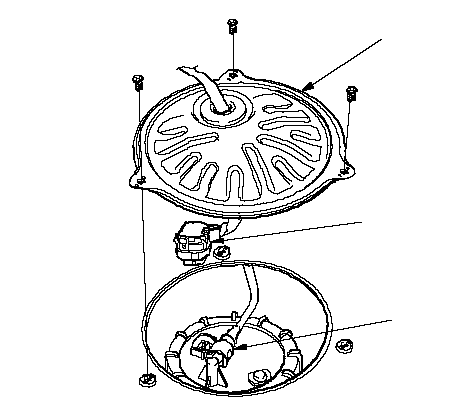 ABC ABC |
| 5. | Disconnect the fuel pump 5P connector (B). |
| 6. | Disconnect the quick-connect fitting (C) from the fuel tank unit. |
| 7. | Using the special tool, loosen the fuel pump/sender assembly locknut (A).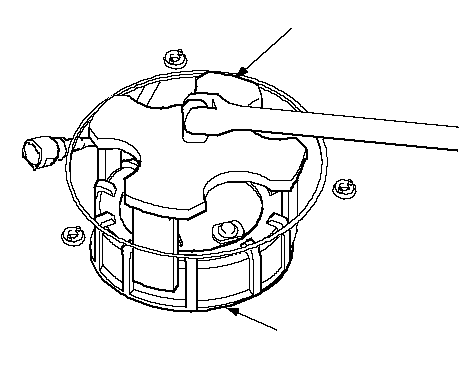 07XAA-001010AA 07XAA-001010AA93 N·m (19.5 kgf·m, 69 lbf·ft) |
| 8. | Remove the locknut (A) and the fuel pump/sender assembly.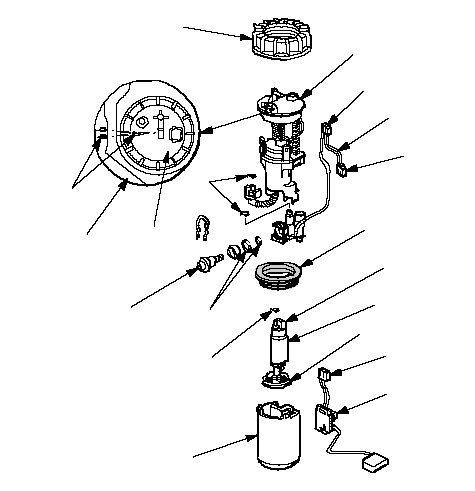 ABCDEFGHIJLMNIIIKKK ABCDEFGHIJLMNIIIKKK |
| 9. | Remove the fuel filter (B), the fuel gauge sending unit (C), the case (D), the wire harness (E), and the fuel pressure regulator (F). |
| 10. | When connecting the fuel pump assembly, make sure the connection is secure and the suction filter (G) is firmly connected to the fuel pump (H). |
| 11. | Check these items before installing the fuel tank unit:
|
| 12. | Install the parts in the reverse order of removal with a new base gasket (J) and new o-rings (K). When installng the fuel tank unit, align the marks (L) on the unit (M) and the fuel tank (N). |