Rear Upper Arm Removal/Installation (4D)
Rear Upper Arm Removal/Installation
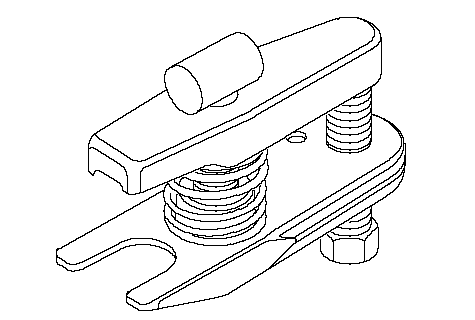
Special Tools Required
Ball joint remover, 28 mm ( 07MAC-SL00200)
| 1. | Remove the clip (A) from the upper arm ball joint, and loosen the nut (B). NOTE: During installation, install the new clip after tightening the nut as shown. 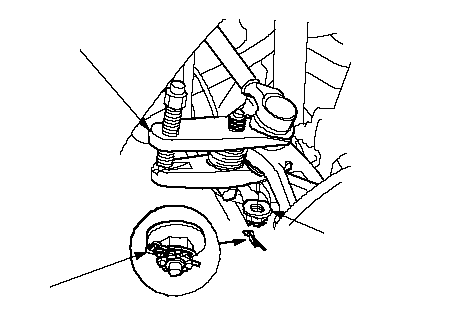 07MAC-SL00200AB 07MAC-SL00200AB12 x 1.25 mm 54-64 N·m (5.5-6.5 kgf·m, 40-47 lbf·ft) |
| 2. | Disconnect the upper arm ball joint from the knuckle using the special tool. |
| 3. | Remove the brake hose mounting bracket (A). Do not disconnect the brake line.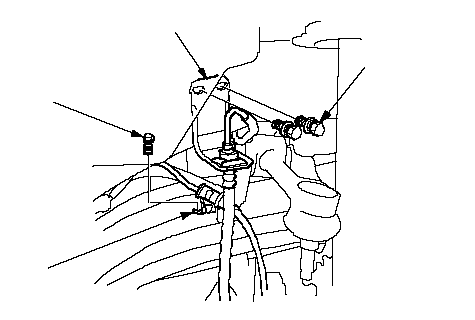 6 x 1.0 mm 6 x 1.0 mm9.8 N·m (1.0 kgf·m, 7.2 lbf·ft)BA8 x 1.25 mm 22 N·m (2.2 kgf·m, 16 lbf·ft) |
| 4. | Remove the wheel sensor harness mounting bracket (B). |
| 5. | Remove the flange bolt (A), and remove the upper arm (B).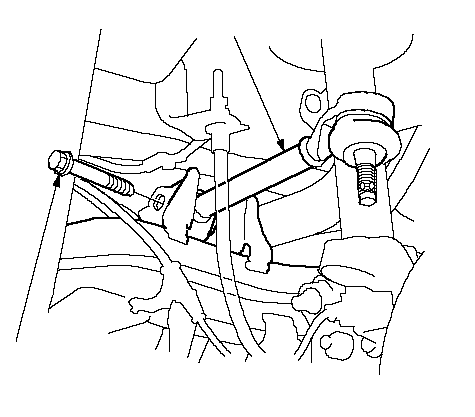 BA BA12 x 1.25 mm 59 N·m (6.0 kgf·m, 43 lbf·ft) |
| 6. | Install the upper arm in the reverse order of removal, and note these items;
|