Interior Trim Removal/Installation - Rear Shelf Area (4D)
Interior Trim Removal/Installation - Rear Shelf Area
SRS components are located in this area. Review the SRS component locations LHD, SRS components locations RHD and the precautions and procedures in the SRS section before performing repairs or service.Without Side Curtain Airbag
NOTE:
- Put on gloves to protect your hands.
- When prying with a flat-tip screwdriver, wrap it with protective tape to prevent damage.
- Take care not to bend or scratch the trim and panels.
| 1. | Remove the trim as shown. To remove the high mount brake light, first disconect the bulb socket. |
| 2. | Install the trim in the reverse order of removal, and note these items:
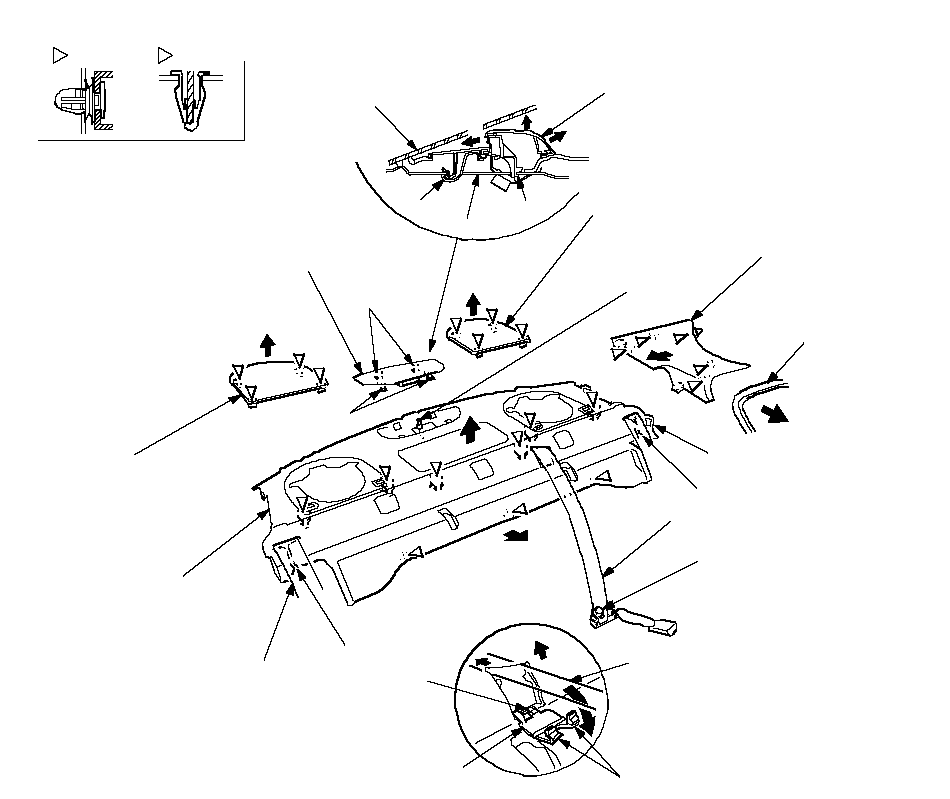 Fastener LocationsA: Clip, 18B: Clip, 4BHOOKSREAR CENTER SEAT BELT Fastener LocationsA: Clip, 18B: Clip, 4BHOOKSREAR CENTER SEAT BELTCENTER ANCHOR BOLT 7/16-20 UNF 32 N·m (3.3 kgf·m, 24 lbf·ft)BODYHOOK(1)(2)(3)REAR SPEAKER GRILLEREAR PILLAR TRIMREAR CENTER SEAT BELTSLITREAR SHELFHIGH MOUNT BRAKE LIGHTREAR SPEAKER GRILLEHIGH MOUNT BRAKE LIGHT BULB SOCKETREAR DOOR OPENING TRIMREAR SEAT BELTSLITREAR CENTER SEAT BELTAAAAAAAAAAAAAAAAAABBBLIDHOOKREAR SHELFHOOKSHIGH MOUNT BRAKE LIGHTREAR SEAT BELTHOOKHOOKS(1)(2) |
Rear pillar-With Side Curtain Airbag
NOTE:
- Put on gloves to protect your hands.
- When prying with a flat-tip screwdriver, wrap it with protective tape to prevent damage.
- Take care not to bend or scratch the trim and panels.
| 1. | Remove the trim as shown: |
| 2. | Install the trim in the reverse order of removal, and note these items:
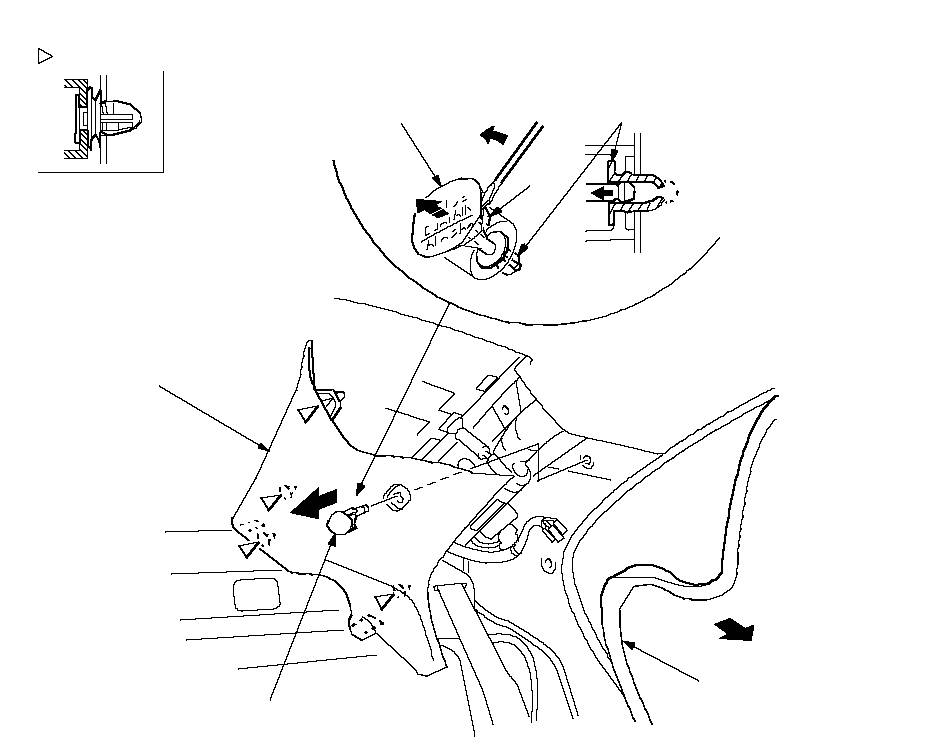 Fastener Locations: Clip, 4REAR PILLAR CAPGROMMETREAR PILLAR TRIMREAR PILLAR CAPREAR DOOR Fastener Locations: Clip, 4REAR PILLAR CAPGROMMETREAR PILLAR TRIMREAR PILLAR CAPREAR DOOROPENING TRIMHOOK |