Rear Door Panel Removal/Installation (5D)
Rear Door Panel Removal/Installation
Special Tools Required
Trim pad remover, ( Snap-on A 177A
or equivalent, commercially available.)
| 1. | Lower the glass fully. |
| 2. | Using a flat-tip screwdriver wrapped with protective tape, push on the rear hook (A) and pivot the cover (B) on the front hook (C), then remove the cover and the screws securing the inner handle (D).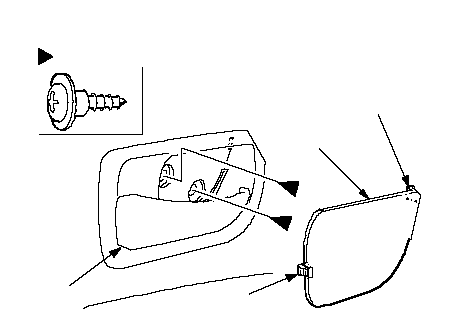 Fastener Locations: Screw, 7ABDC Fastener Locations: Screw, 7ABDC |
| 3. | Remove the switch panel (A).
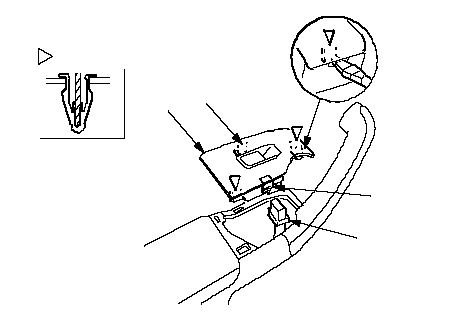 Fastener Locations: Clip, 2ABCB Fastener Locations: Clip, 2ABCB |
| 4. | Pry out the front lower edge of the grip cover (A) at a gap between the cover and the grip base (B) to release the hooks (C), pull out the cover to release the upper hooks (D) then remove it.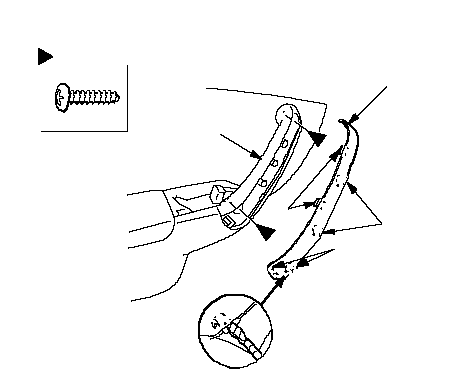 Fastener Locations: Clip, 2BADCD Fastener Locations: Clip, 2BADCD |
| 5. | Remove the screws from the grip base. |
| 6. | Remove the door quarter inner trim (A). Take care not to scratch the door.
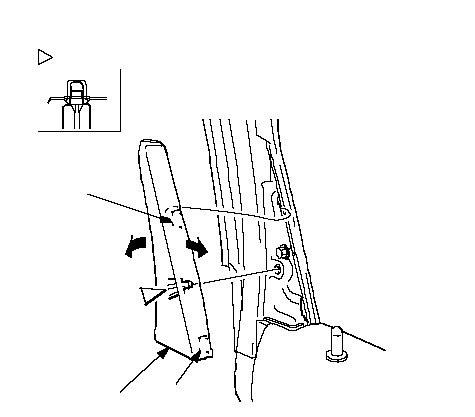 Fastener Location: Pin, 1ABB(1)(2) Fastener Location: Pin, 1ABB(1)(2) |
| 7. | Remove the door panel (A) with as little bending as possible to avoid creasing or breaking it.
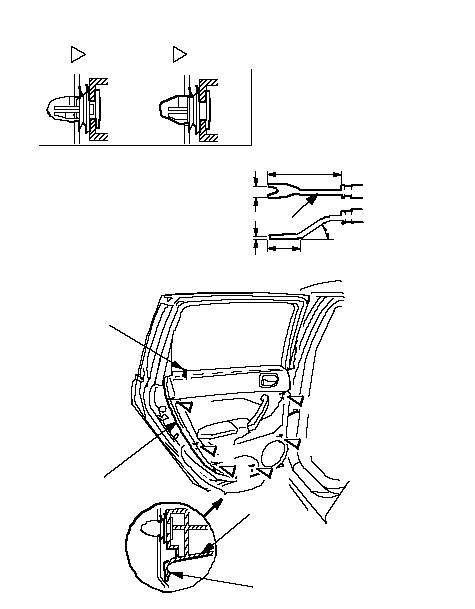 Fastener Locations: Clip, 595 mm (3.74 in.)45 mm (1.77 in.)1 mm Fastener Locations: Clip, 595 mm (3.74 in.)45 mm (1.77 in.)1 mm(0.04 in.)12 mm (0.47 in.)45°DAACEB, E: Clip, 1FEBBFBG |
| 8. | Disconnect the inner handle cable (A). Remove the inner handle (B) by releasing the hooks (C, D).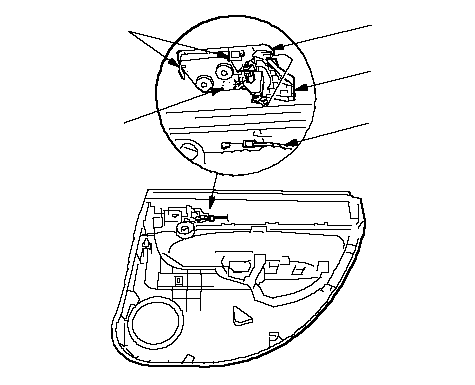 DBACC DBACC |
| 9. | If necessary, remove the door glass inner weatherstrip (A) from the door panel (B).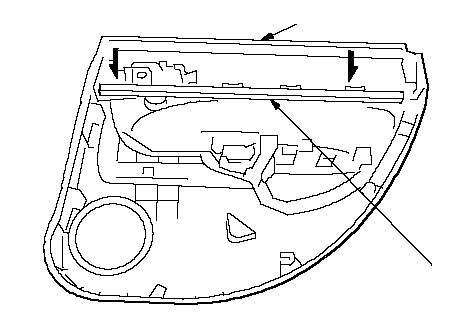 BA BA |
| 10. | Install the panel in the reverse order of removal, and note these items:
|