Interior Trim Removal/Installation - Trunk Floor and Side Area
Interior Trim Removal/Installation - Trunk Floor and Side Area
NOTE:
- Put on gloves to protect your hands.
- When prying with a flat-tip screwdriver, wrap it with protective tape to prevent damage.
- Take care not to bend or scratch the trim and panels.
Remove the trim as shown.
Install the trim in the reverse order of removal, and note these items:
- Replace any damaged clips.
- Make sure the trunk compartment light connector is plugged in properly.
- When installing the rear side trim panel, make sure there are no pinches in the belt.
- Before installing the anchor bolt, make sure there are no twists or kinks in the belt.
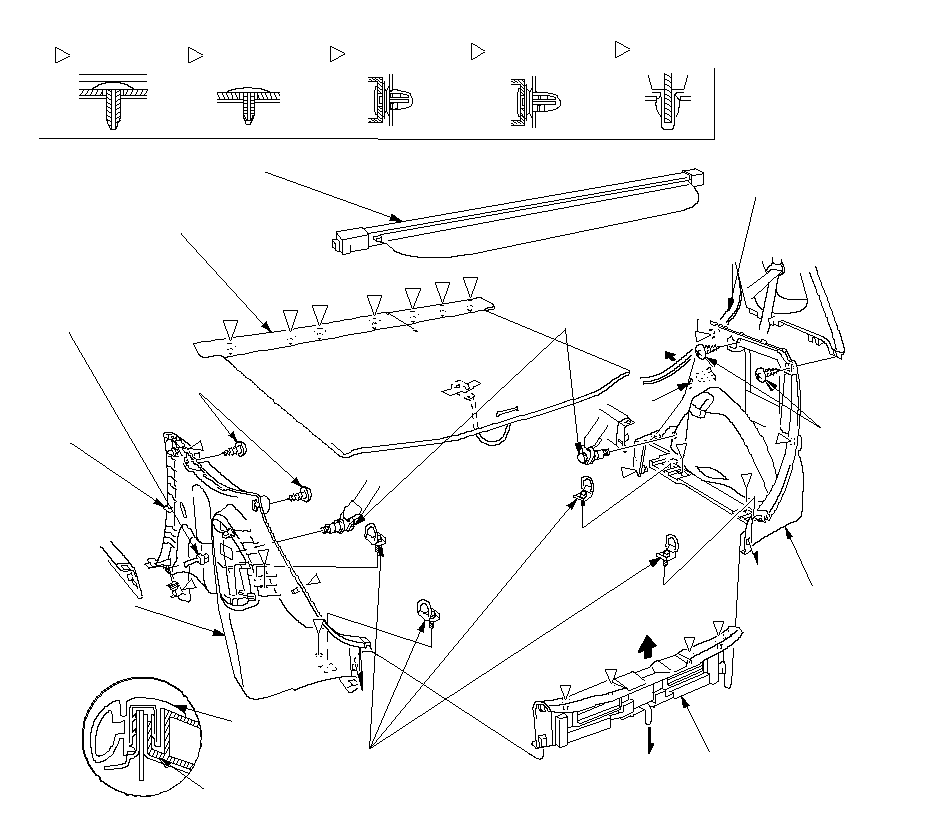 AA[A] PortionsSPARE TIRE LIDTRUNK COMPARTMENT
LIGHT CONNECTOR
(For some models)RIGHT TRUNK SIDE
TRIM PANELBDETONNEAU COVERAAA[A]SCREWSDOOR
INNER
SEALHOOKREAR DOOR
INNER SEALBCCCCREAR TRIM PANELAABCD[A]CEBSCREWSLEFT TRUNK
SIDE TRIM
PANELFastener Locations: Clip, 7A: Clip, 4B: Clip, 6C: Clip, 2DRAER SEAT BELT
LOWER ANCHOR BOLT
7/16-20 UNF
32 N·m (3.3 kgf·m,
24 lbf·ft): Clip, 2ETIE-DOWN HOOKS
6 x 1.0 mm
9.8 N·m (1.0 kgf·m, 7.2 lbf·ft)