Engine Oil Filter Replacement
Special Tools Required
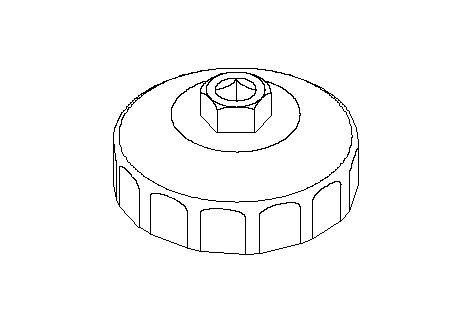
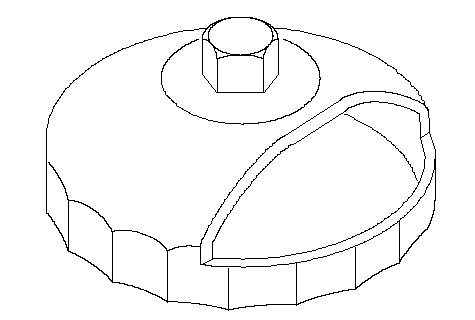
Oil filter wrench ( 07HAA-PJ70100)
Oil filter wrench ( 07912-6110001)
JAPAN-MADE Engine Oil Filter (3/4-turn type)
| 1. | Remove the oil filter with the special oil filter wrench.
|
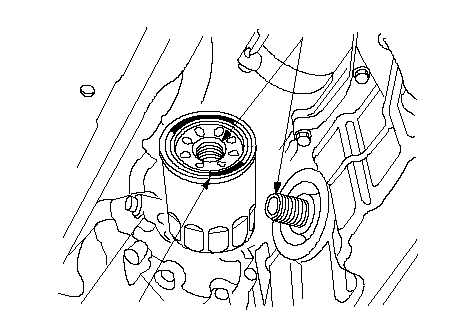
| 2. | Inspect the threads (A) and rubber seal (B) on the new filter. Wipe off the seat on the oil pan, then apply a light coat of oil to the filter rubber seal. Use only filters with a built-in bypass system.
 AB AB |
| 3. | Install the oil filter by hand.
|
| 4. | After the rubber seal seats, tighten the oil filter clockwise with the special tool.
| Tighten: | 3/4 turn clockwise. |
|---|
| Tightening torque: | 12 N·m (1.2 kgf·m, 8.7 lbf·ft) |
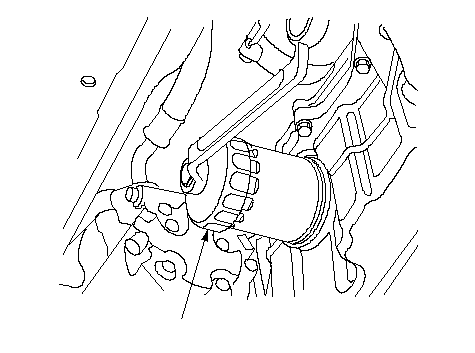 07HAA-PJ70100 07HAA-PJ70100 |
| 5. | If 4 numbers or marks (1 to 4 or 6 to 6666) are printed around the outside of the filter, use the following procedure to tighten the filter.
- Spin the filter on until its seal lightly seats against the oil pan, and note which number or mark is at the bottom.
- Tighten the filter by turning it clockwise 3 numbers or marks from the one you noted. For example, if number 2 is at the bottom when the seal is seated, tighten the filter until the number 1 comes around the bottom.
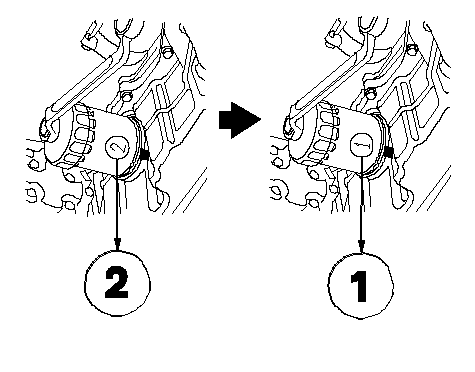 Number when rubber Number when rubber
seal is seated.Number after tightening.| Number or Mark when rubber seal is seated | 1
or
6 | 2
or
66 | 3
or
666 | 4
or
6666 | | Number or Mark after tightening | 4
or
6666 | 1
or
6 | 2
or
66 | 3
or
666 |
|
| 6. | After installation, fill the engine with oil up to the specified level, run the engine for more than 3 minutes, then check for oil leakage.
|
JAPAN-MADE Engine Oil Filter (7/8-turn type)
| 1. | Remove the oil filter with the special oil filter wrench.
|
| 2. | Inspect the threads (A) and rubber seal (B) on the new filter. Wipe off the seat on the oil pan, then apply a light coat of oil to the filter rubber seal. Use only filters with a built-in bypass system.
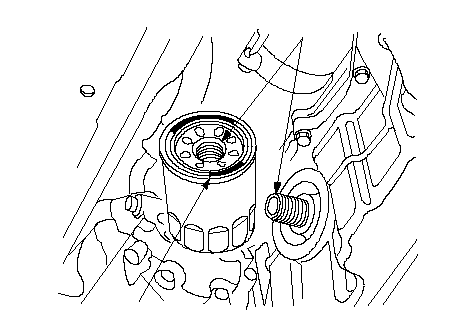 AB AB |
| 3. | Install the oil filter by hand.
|
| 4. | After the rubber seal seats, tighten the oil filter clockwise with the special tool.
| Tighten: | 7/8 turn clockwise. |
|---|
| Tightening torque: | 22 N·m (2.2 kgf·m, 16 lbf·ft) |
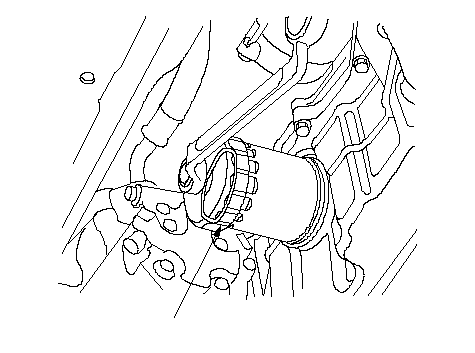 07912-6110001 07912-6110001 |
| 5. | If 8 numbers (1 to 8) are printed around the outside of the filter, use the following procedure to tighten the filter.
- Spin the filter on until its seal lightly seats against the oil pan, and note which number is at the bottom.
- Tighten the filter by turning it clockwise 7 numbers from the one you noted. For example, if number 2 is at the bottom when the seal is seated, tighten the filter until the number 1 comes around the bottom.
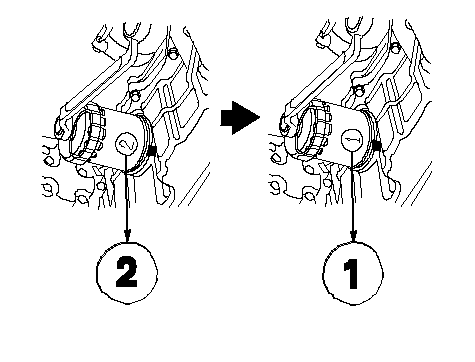 Number when rubber Number when rubber
seal is seated.Number after tightening.| Number when rubber seal is seated | 1 | 2 | 3 | 4 | 5 | 6 | 7 | 8 | | Number after tightening | 8 | 1 | 2 | 3 | 4 | 5 | 6 | 7 |
|
| 6. | After installation, fill the engine with oil up to the specified level, run the engine for more than 3 minutes, then check for oil leakage.
|
FRANCE-MADE Engine Oil Filter (3/4-turn type)
| 1. | Remove the oil filter with the commercially available oil filter wrench (LABINAL-Purflux 76).
|
| 2. | Inspect the threads (A) and rubber seal (B) on the new filter. Wipe off the seat on the oil pan, then apply a light coat of oil to the filter rubber seal. Use only filters with a built-in bypass system.
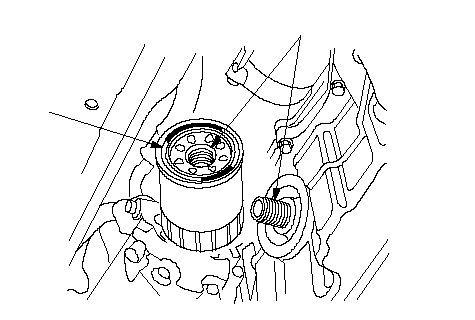 BA BA |
| 3. | Install the oil filter by hand.
|
| 4. | After the rubber seal seats, tighten the oil filter clockwise with the commercially available oil filter wrench (LABINAL-Purflux 76) (A).
| Tighten: | 3/4 turn clockwise. |
|---|
| Tightening torque: | 22 N·m (2.2 kgf·m, 16 lbf·ft) |
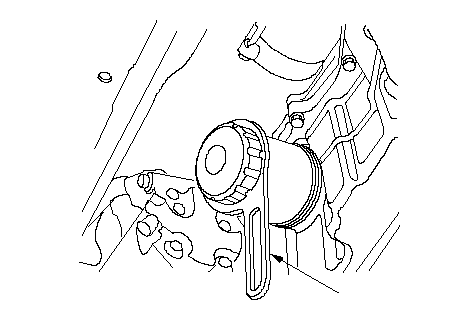 A A |
| 5. | If 4 numbers (1 to 4) are printed around the outside of the filter, use the following procedure to tighten the filter.
- Spin the filter on until its seal lightly seats against the oil pan, and note which number is at the bottom.
- Tighten the filter by turning it clockwise 3 numbers from the one you noted. For example, if number 1 is at the bottom when the seal is seated, tighten the filter until the number 4 comes around the bottom.
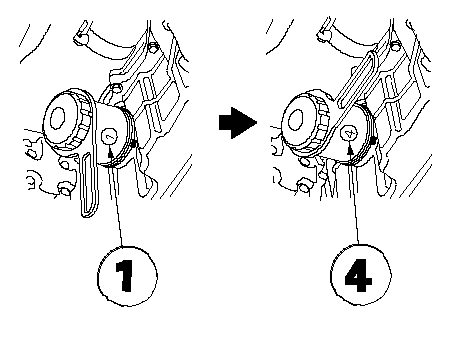 Number when rubber Number when rubber
seal is seated.Number after tightening.| Number when rubber seal is seated | 1 | 2 | 3 | 4 | | Number after tightening | 4 | 1 | 2 | 3 |
|
| 6. | After installation, fill the engine with oil up to the specified level, run the engine for more than 3 minutes, then check for oil leakage.
|