Radiator and Fan Replacement
Radiator and Fan Replacement
| 1. | Drain the engine coolant. |
| 2. | Remove the front bumper, and front bumper beam. |
| 3. | Remove the condenser upper mount brackets. |
| 4. | Remove the upper bracket and cushions. |
| 5. | Remove the upper radiator hose, lower radiator hose and automatic transmission fluid (ATF) cooler hose.
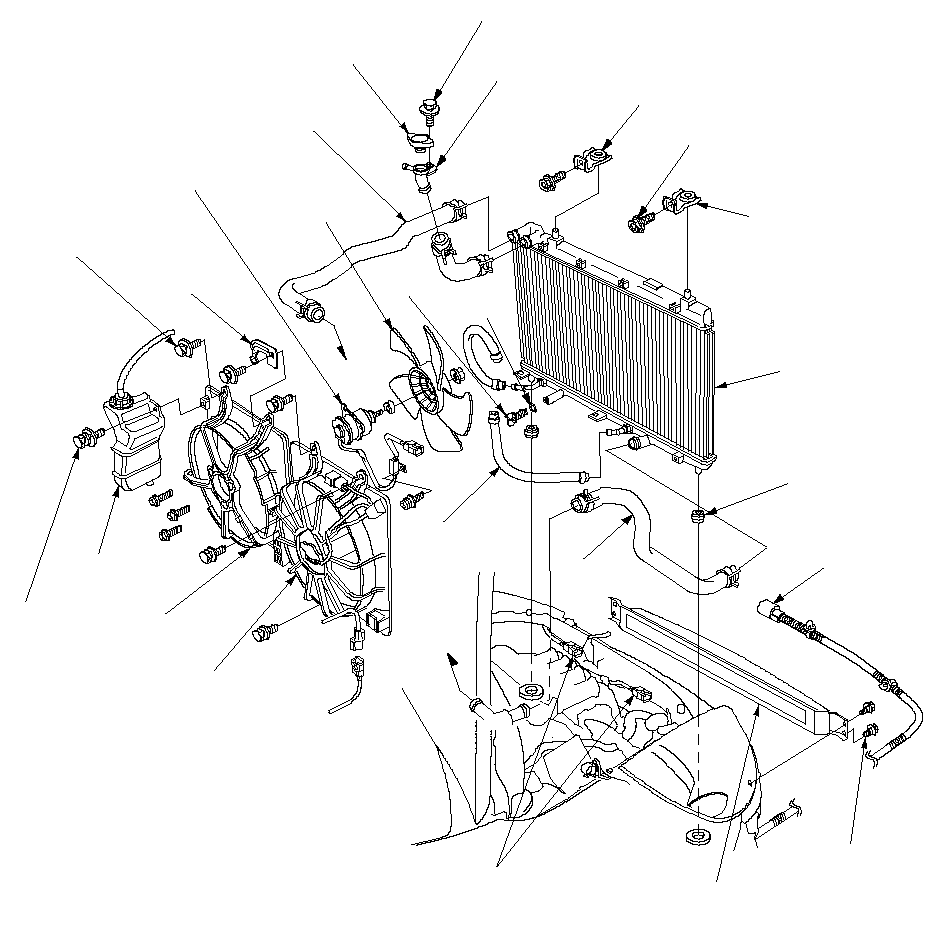 RADIATOR CAP BASE6 x 1.0 mm RADIATOR CAP BASE6 x 1.0 mm12 N·m (1.2 kgf·m, 8.7 lbf·ft)UPPER BRACKET AND CUSHION6 x 1.0 mm 9.8 N·m (1.0 kgf·m, 7.2 lbf·ft)UPPER BRACKET AND CUSHIONRADIATORLOWER CUSHIONO-RING Replace.DRAIN PLUGTHERMISTOR CONNECTORUPPER RADIATOR HOSERADIATOR CAPRADIATOR FANRADIATOR FAN MOTOR6 x 1.0 mm 9.8 N·m (1.0 kgf·m, 7.2 lbf·ft)6 x 1.0 mm 7 N·m (0.7 kgf·m, 5 lbf·ft)COUPLER STAYRESERVE TANKRADIATOR FAN SHROUDCONDENSER FAN SHROUD ASSEMBLYATF COOLER HOSESFAN MOTOR CONNECTORSLOWER RADIATOR HOSE8 x 1.25 mm 22 N·m (2.2 kgf·m, 16 lbf·ft)FRONT BUMPER BEAM |
| 6. | Disconnect the fan motor connector, and remove the upper bracket and cushion, then pull up the radiator. |
| 7. | Remove the fan shroud assemblies and other parts from the radiator. |
| 8. | Install the radiator in the reverse order of removal. Make sure the upper and lower cushions are set securely. |
| 9. | Install the condenser upper mount brackets. |
| 10. | Install the front bumper beam, and apply body paint to the mounting bolts, then install the front bumper. |
| 11. | Fill the radiator with engine coolant and bleed the air. |