Front Lower Arm Replacement
Front Lower Arm Replacement
| 1. | Raise the front of the vehicle, and make sure it is securely supported. |
| 2. | Remove the front wheels. |
| 3. | Remove the spindle nut. |
| 4. | Remove the clip (A) from the lower ball joint, and loosen the castle nut.
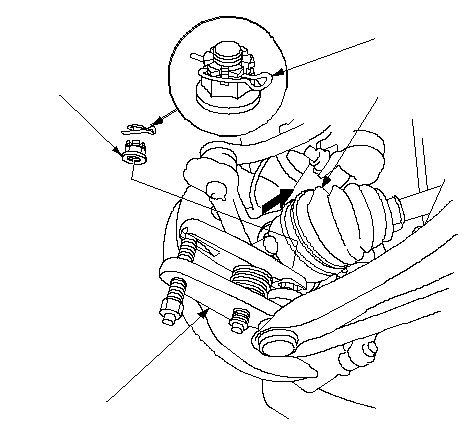 C C12 x 1.25 mm 49-59 N·m (5.0-6.0 kgf·m, 36-43 lbf·ft)A07MAC-SL00200B |
| 5. | Remove the driveshaft outboard joint (B) from the knuckle by tapping the driveshaft end with a plastic hammer. Remove the castle nut (C), and install the hex nut on the ball joint pin.
|

| 6. | Set the special tool over the ball joint securely while drawing the driveshaft outboard joint. Disconnect the lower arm and knuckle. |
| 7. | Remove the flange bolts and remove the lower arm (A).
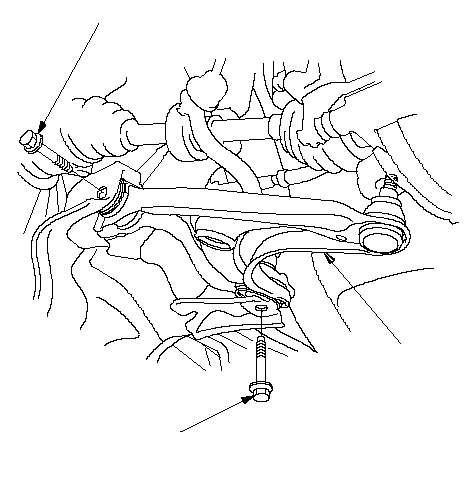 12 x 1.25 mm 12 x 1.25 mm69 N·m (7.0 kgf·m, 51 lbf·ft)14 x 1.5 mm 93 N·m (9.5 kgf·m, 69 lbf·ft)A |
| 8. | Install the lower arm in the reverse order of removal, and note these items:
|