CVT Removal (CVT)
CVT Removal
| 1. | Remove the splash shield. |
| 2. | Remove the drain plug (A), and drain the automatic transmission fluid (ATF). Reinstall the drain plug with a new sealing washer (B).
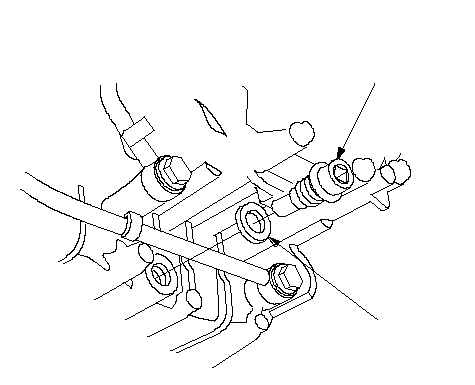 A A18 x 1.5 mm 49 N·m (5.0 kgf·m, 36 lbf·ft)B |
| 3. | Disconnect the battery negative terminal first, then disconnect the positive terminal. |
| 4. | Remove the battery hold-down bracket, then remove the battery and battery tray. |
| 5. | Remove the air cleaner housing and intake air duct. |
| 6. | Remove the battery cable clamp from the battery base, then remove the battery base. |
| 7. | Disconnect the inhibitor solenoid connector (A) and CVT drive pulley speed sensor connector (B).
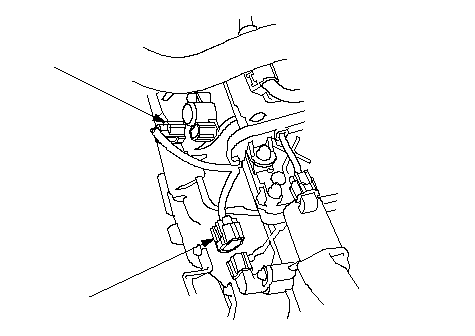 AB AB |
| 8. | Disconnect the CVT start clutch pressure control valve connector (A), CVT pulley pressure control valve connector (B) and CVT speed change control valve connector (C).
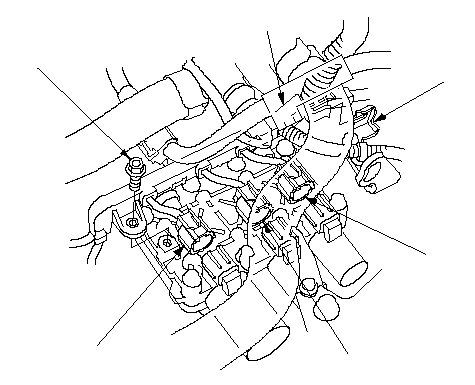 DCABEF DCABEF |
| 9. | Remove the bolt (D) securing the harness cover (E), pull the harness cover, and remove it from its bracket (F). |
| 10. | Remove the battery cable clamps (A) from the clamp brackets (B), then remove the clamp bracket (C) on the transmission housing.
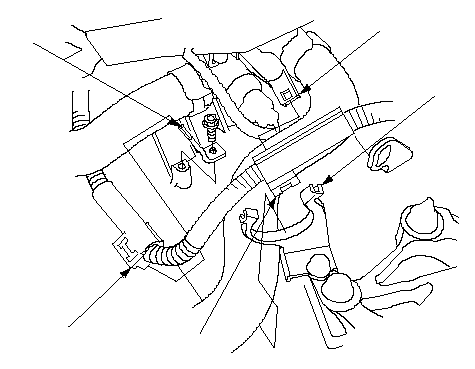 DACBA DACBA |
| 11. | Remove the radiator hose from the hose clamp (D). |
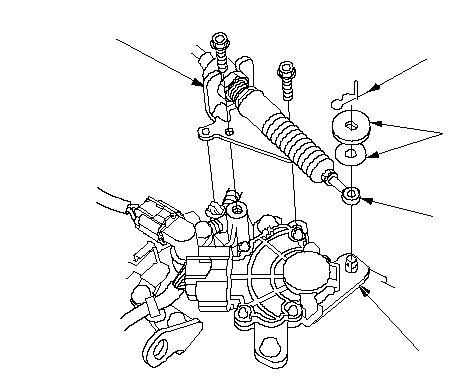
| 12. | Remove the spring clip (A) and washers (B).
 EDBCA EDBCA |
| 13. | Remove the bolts securing the shift cable bracket (C), then separate the shift cable (D) from the control lever (E). |
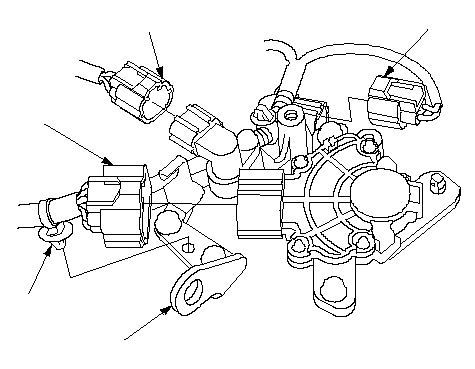
| 14. | Disconnect the transmission range switch connector (A), and remove the harness clamp (B) from the bracket (C).
 CDBAE CDBAE |
| 15. | Disconnect the CVT driven pulley speed sensor connector (D) and CVT speed sensor connector (E). |
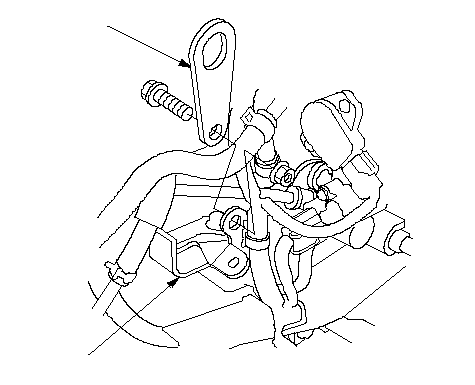
| 16. | Disconnect the vacuum hose from the evaporative emission canister purge valve, and remove the bolt securing the intake manifold, then move the water line.
 AB AB |
| 17. | Install the engine hanger (A) to the air cleaner housing bracket (B). |
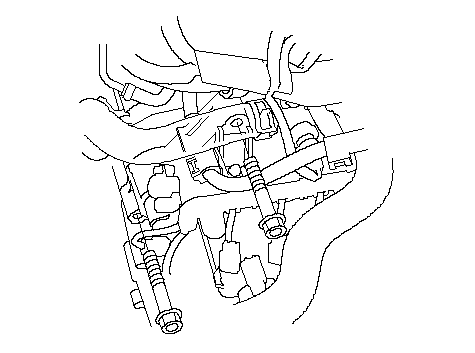
| 18. | Remove the transmission housing mounting bolts.
 |
| 19. | Disconnect the ATF cooler hoses (A) from the ATF cooler lines (B). Turn the ends of the ATF cooler hoses up to prevent ATF from flowing out, then plug the ATF cooler hoses and lines. Check for any signs of leakage at the hose joints.
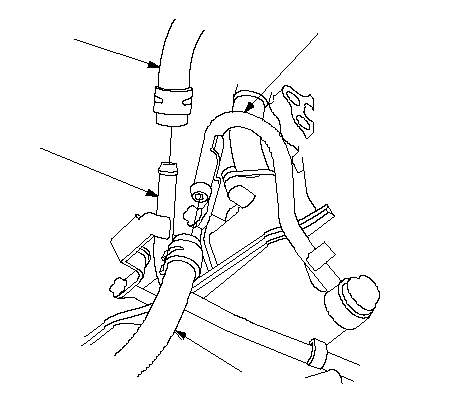 ABBA ABBA |
| 20. | Remove the spindle nut (A), and tap the driveshaft (B) inward with a plastic hammer to allow the special tool on the lower arm ball joint.
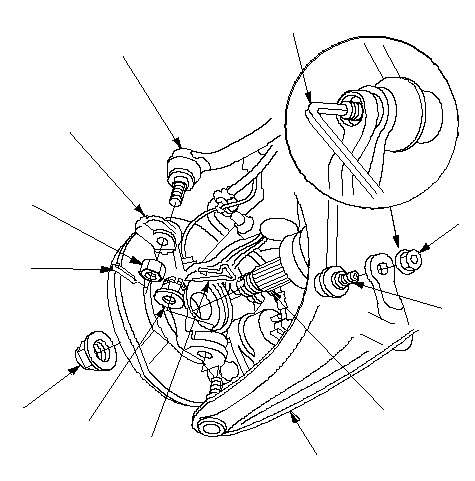 FCIJHLKBEDAG FCIJHLKBEDAG |
| 21. | Insert a 5 mm Allen wrench (C) in the top of the ball joint pin (D), and remove the nuts (E), then separate the front stabilizer link from the stabilizer. |
| 22. | Remove the cotter pins (F) and ball joint nuts (G) on the tie-rod ends (H), then separate the steering tie-rod ends from the knuckles (I). |
| 23. | Remove the spring clips (J) and castle nuts (K), then separate the lower arms (L) from the knuckles.. |
| 24. | Remove the steering gearbox mounting bolts, bracket and stiffener located on the right side of the gearbox.
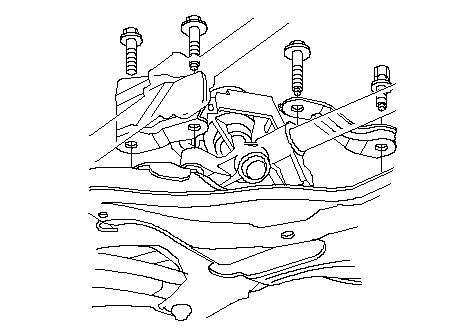 |
| 25. | Remove the gearbox mounting bolts and bracket on the left side of the gearbox.
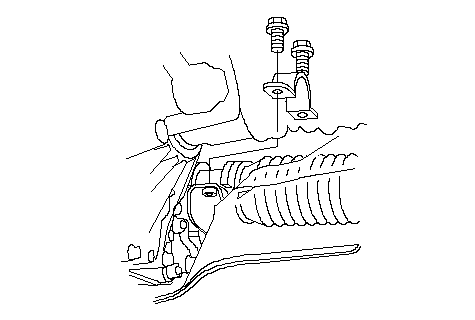 |
| 26. | Remove the rear mount bracket bolts.
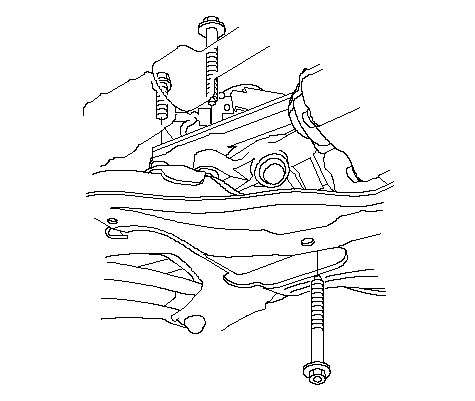 |
| 27. | Hang the steering gearbox with a rope to the body. |
| 28. | Support the front sub-frame with a 4 x 4 x 40 in. piece of wood and jack.
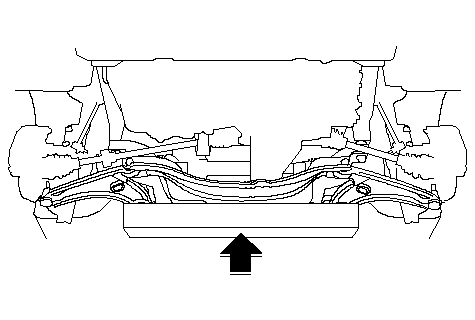 |
| 29. | Remove the four front sub-frame mounting bolts, then lower the front sub-frame.
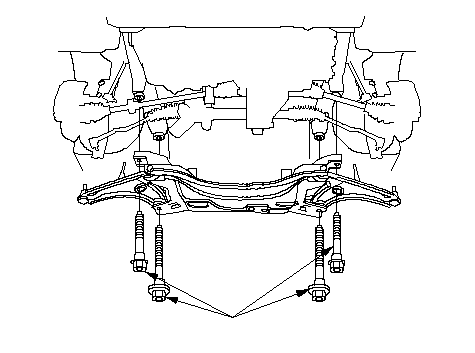 Replace. Replace. |
| 30. | Remove the driveshaft boot cover.
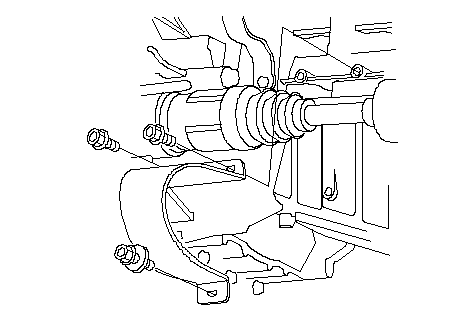 |
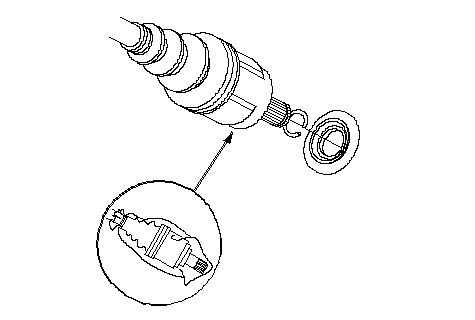
| 31. | Pry the driveshafts, and remove them from the differential. Coat all precision finished surfaces with clean engine oil, then tie plastic bags over the driveshaft ends.
 |
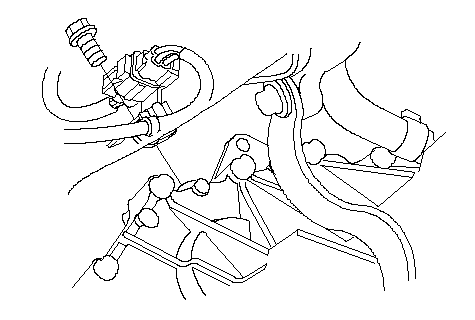
| 32. | Remove the Heated Oxygen Sensor (HO2S) connector and its bracket from the flywheel housing.
 |
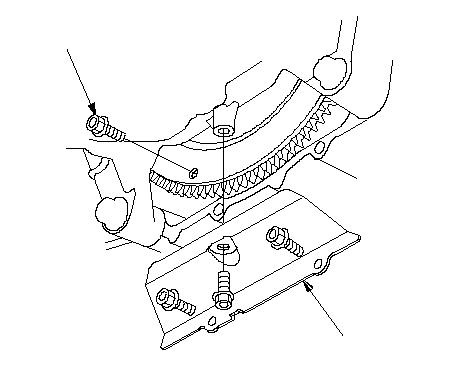
| 33. | Remove the flywheel cover (A), and remove the drive plate bolts (6) (B) while rotating the crankshaft pulley.
 BA BA |
| 34. | Place a jack under the transmission. |
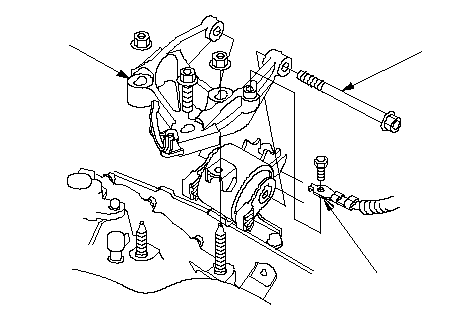
| 35. | Remove the transmission ground cable terminal (A).
 ABC ABC |
| 36. | Remove the transmission mount bracket bolt and nuts, and mount bolt (B), then remove the transmission mount bracket (C). |
| 37. | Remove the transmission housing mounting bolts.
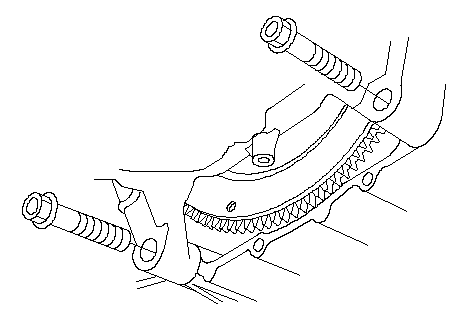 |
| 38. | Remove the transmission housing mounting bolts located on the rear lower of the transmission.
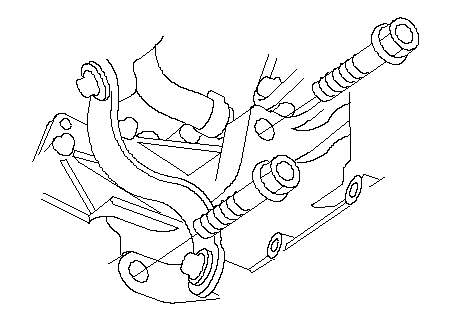 |
| 39. | Slide the transmission away from the engine to remove it from the vehicle. |
| 40. | Remove the flywheel assembly.
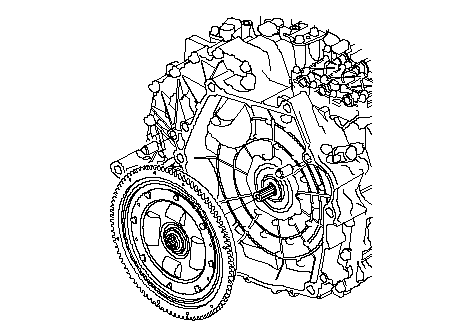 |
| 41. | Remove the air cleaner housing bracket.
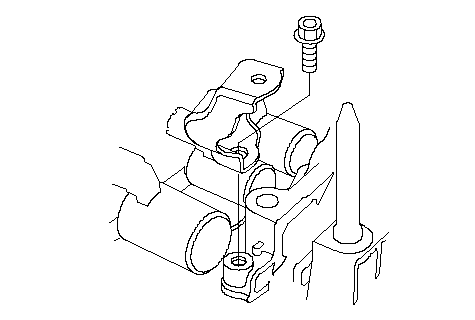 |
| 42. | Remove the rear mount/bracket.
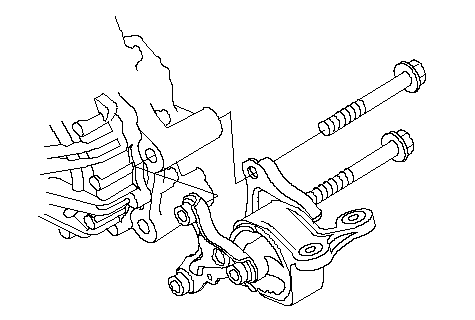 |
| 43. | Inspect the drive plate (A), and replace it if it's damaged.
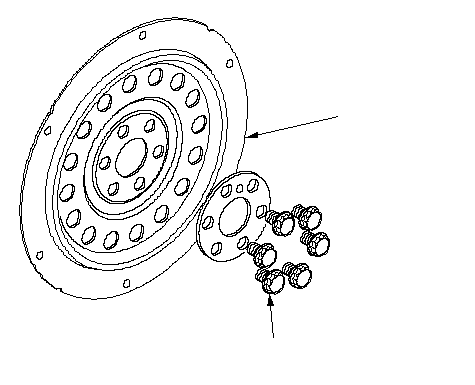 A12 x 1.25 mm A12 x 1.25 mm74 N·m (7.5 kgf·m, 54 kbf·ft) |