Steering Gearbox Overhaul (Except HATC Model)
Steering Gearbox Overhaul
Exploded View
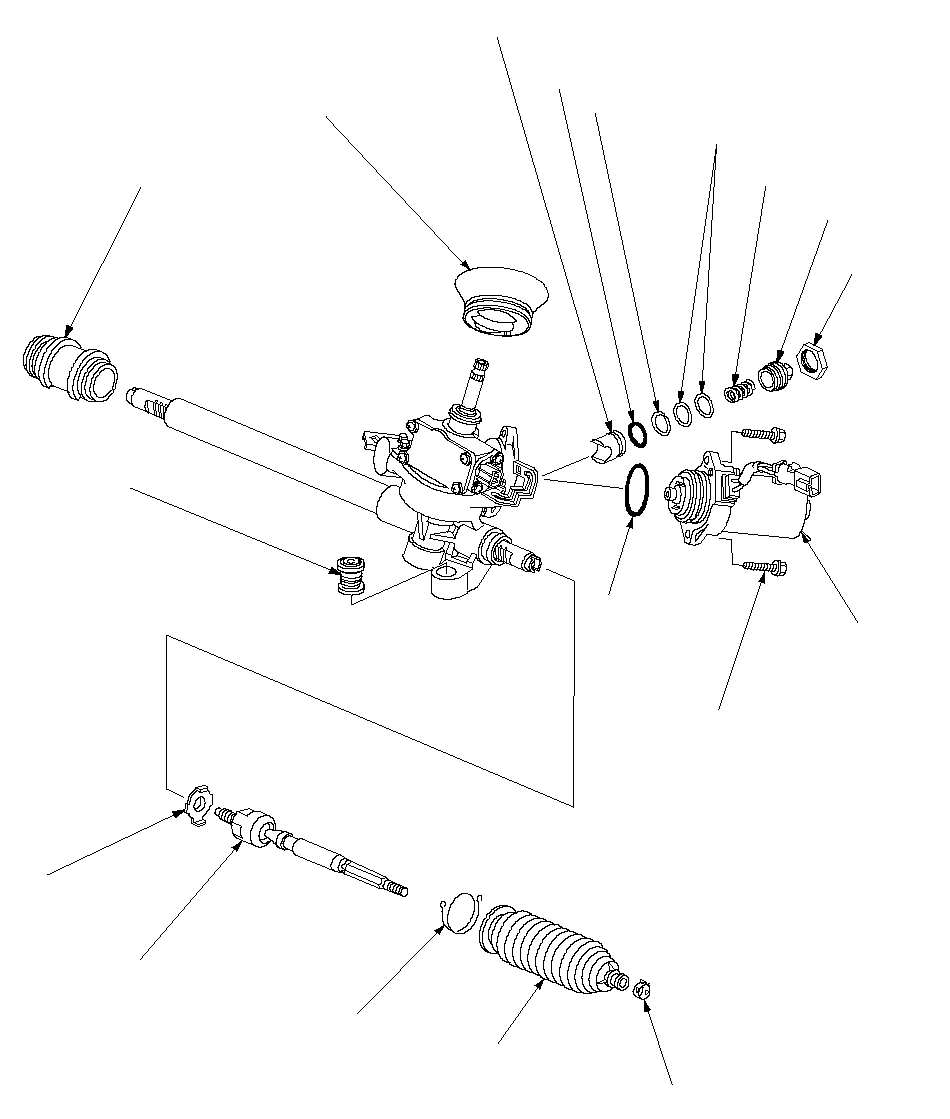 MOUNTING CUSHION BPINION SHAFT GROMMETMOUNTING CUSHION ALOCK WASHER
Replace.RACK END
74 N·m (7.5 kgf·m, 54 lbf·ft)WIRE CLAMP
Replace.BOOTTIE-ROD CLIPMOTORO-RING
Replace.20 N·m (2.0 kgf·m, 14 lbf·ft)RACK GUIDEO-RING
Replace.PLANE WASHERWAVE WASHERSSPRINGRACK GUIDE SCREWLOCK NUT
Note these items during overhaul:
- Refer to the Exploded View as needed during this procedure.
- Do not allow dust dirt, or other foreign materials to enter the gearbox.
- Do not try to disassemble the torque sensor. If the torque sensor is faulty, replace the steering gearbox as an assembly.
| 1. | Remove the tie-rod end and locknut from the both rack ends. |
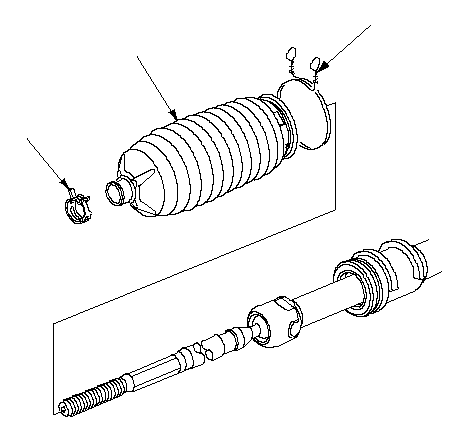
| 2. | Untie the wire clamps (A), and discard them.
 BCA BCA |
| 3. | Remove the tie-rod clips (B), and pull the boots (C) away from the ends of the gearbox. |
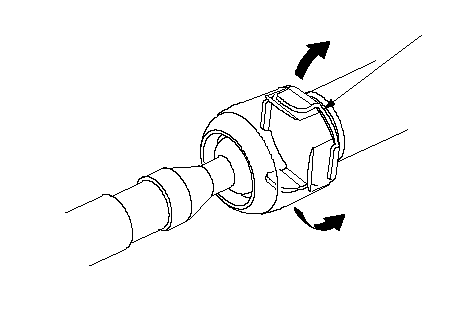
| 4. | Unbend the lock washer (A).
 A A |
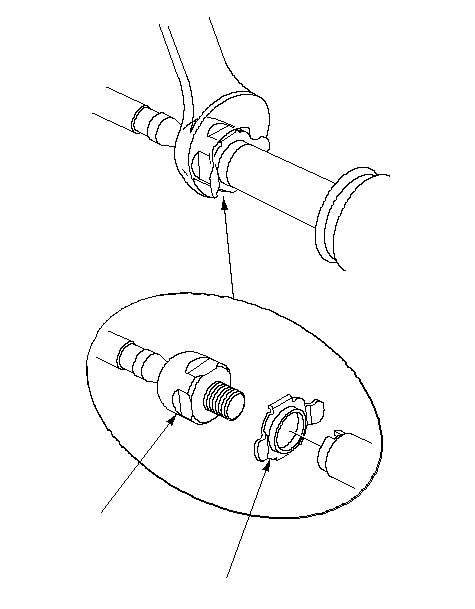
| 5. | Unscrew the both rack ends (A) with a wrench. Be careful not to damage the rack surface with the wrench. Remove the lock washers (B) and discard it.
 BA BA |
| 6. | Install the new lock washer (A) on the rack end. Align the lock washer tabs (B) and flat spots (C) on the rack end joint housing.
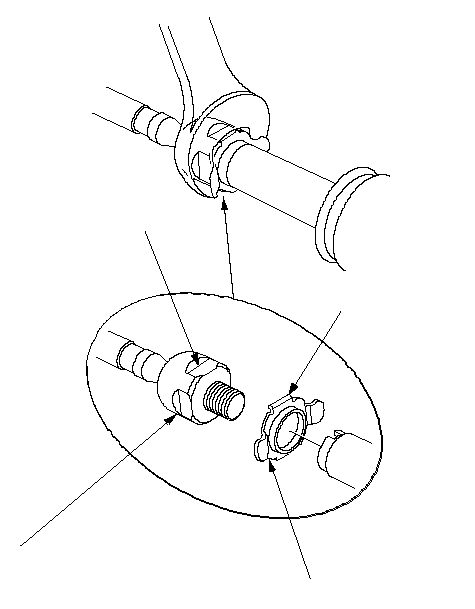 AD AD74 N·m (7.5 kgf·m, 54 lbf·ft)CB |
| 7. | Install the rack end (D) while holding with lock washer in place. Repeat this step for the other side of the rack. |
| 8. | Tighten both rack ends with a wrench. Be careful not to damage the rack surface with the wrench. |
| 9. | Bend the lock washer (A) back against the flat spots on the rack end joint housing.
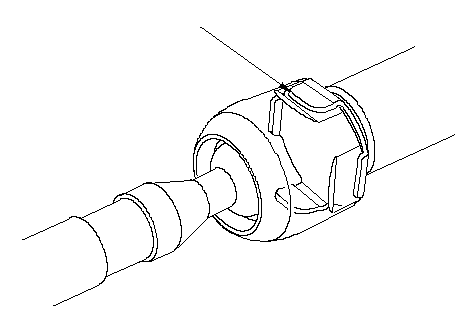 A A |
| 10. | Stake the lock washer at the stake point (A) on the rack.
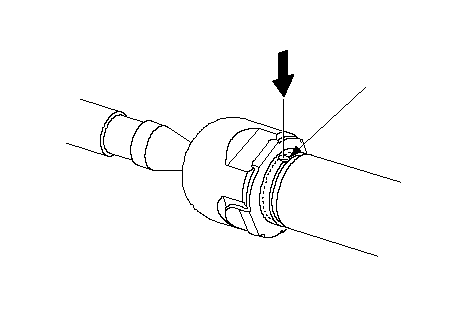 A A |
| 11. | Apply a light coat of the silicone grease to the grooves (A) on the rack end.
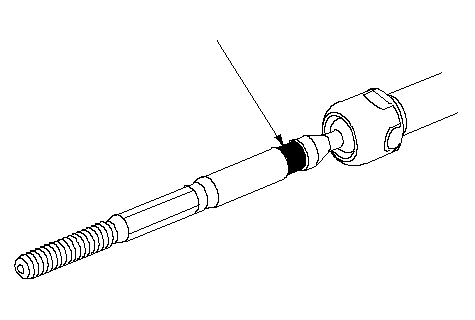 A A |
| 12. | Clean off any grease or contamination from the groove around (A) on the mounting cushion and gearbox housing.
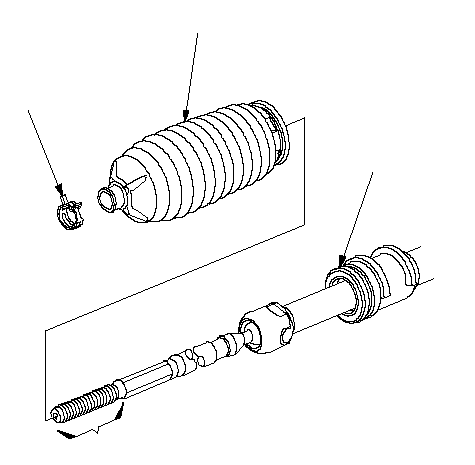 DABC DABC |
| 13. | Center the steering rack within its stroke. Install the boots (B) in the rack ends with the tie-rod clips (C). Wipe the grease off the threaded section (D) of the rack end. |
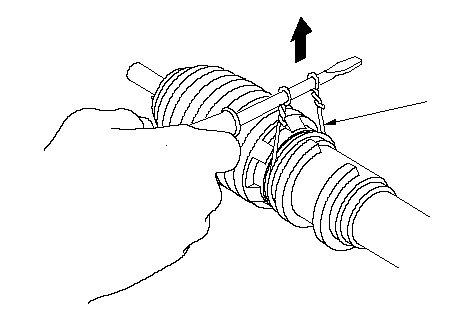
| 14. | Wind a new wire clamp (A) two turns around the boot and tighten it by pulling both ends of the wire clamp with about 39 N (4.0 kgf, 8.8 lbf) of force using a screwdriver or equivalent tool as shown. Take care not to cross the wire.
 A A |
| 15. | Twist the ends of the wire clamp four or five turns while pulling the ends with about 39 N (4.0 kgf, 8.8 lbf) of force.
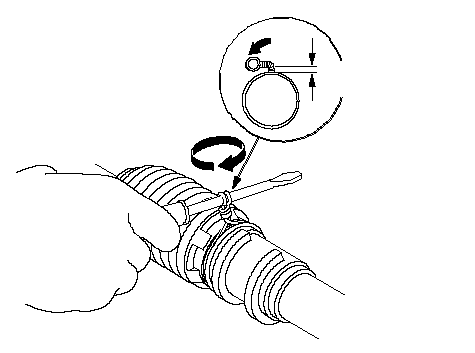 5-10 mm 5-10 mm (0.2-0.4 in.) |
| 16. | After tightening, bend the wire clamp ends at 5-6 mm (0.2-0.4 in. ) from the base as shown. |
| 17. | Slide the rack right and left to be certain that the boots are not deformed or twisted. Check that the wire clamps are not loose, either. If the boot turn, retighten the wire clamp securely. |