FRONT LOWER BALL JOINT > REMOVAL

for Preparation Click here


HINT:
  1. Use the same procedure for the RH side and LH side.
  2. The procedure listed below is for the LH side.


1. REMOVE FRONT AXLE ASSEMBLY
(Click here)


2. REMOVE FRONT LOWER BALL JOINT ASSEMBLY
  1. Secure the front axle assembly in a vise.
    NOTICE:
    When using a vise, do not overtighten it.


    C207005
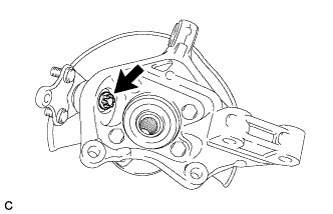
  1. Remove the clip and nut.


    C207007E01
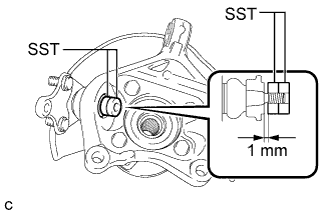
  1. Install SST to the front lower ball joint assembly as shown in the illustration.
    SST
    09960-20010   (09961-02050, 09961-02050)

    NOTICE:
    Check that the clearance measurement between SST and the front axle assembly is 1 mm (0.0394 in.).


    C232265E01
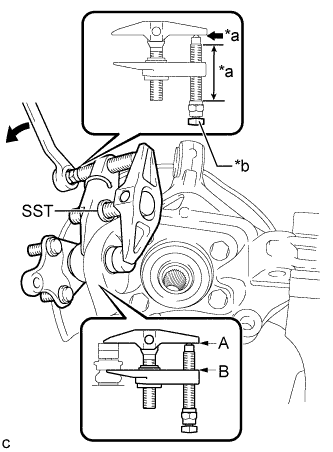
  1. Using SST, remove the front lower ball joint assembly from the front axle assembly as shown in the illustration.
    Text in Illustration 
    *a
    Apply grease
    *b
    Place the wrench here.

    SST
    09960-20010   (09961-02010, 09961-02050, 09961-02050)

    CAUTION:
    Apply grease to the threads and end of the SST bolt.

    NOTICE:
    1. Install SST so that A and B are parallel.
    2. Be sure to place the wrench on the part indicated in the illustration.
    3. Do not damage the front lower ball joint dust cover.