FRONT STABILIZER BAR > REMOVAL |
| 1. REMOVE FRONT WHEELS |
| 2. REMOVE NO. 1 ENGINE UNDER COVER |
| 3. REMOVE FRONT STABILIZER LINK ASSEMBLY LH |
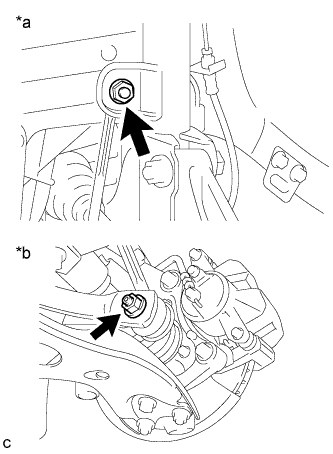 |
Remove the 2 nuts and front stabilizer link assembly LH.
| *a | Upper Side |
| *b | Lower Side |
| 4. REMOVE FRONT STABILIZER LINK ASSEMBLY RH |
| 5. SEPARATE FRONT LOWER NO. 1 SUSPENSION ARM SUB-ASSEMBLY LH |
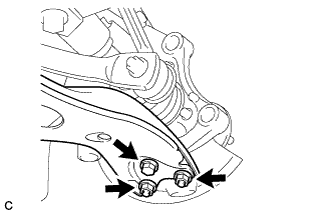 |
Remove the bolt and 2 nuts, and separate the front lower No. 1 suspension arm sub-assembly from the front lower ball joint assembly.
| 6. REMOVE FRONT LOWER NO. 1 SUSPENSION ARM SUB-ASSEMBLY LH |
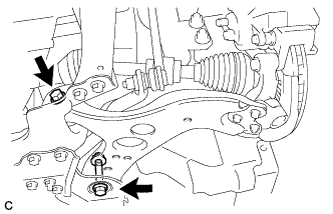 |
Remove the 2 bolts, nut, and front lower No. 1 suspension arm sub-assembly LH from the front suspension crossmember sub-assembly.
| 7. REMOVE FRONT SUSPENSION MEMBER BRACE |
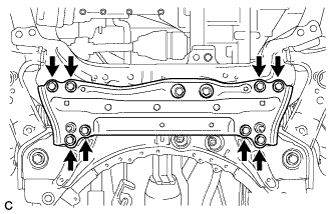 |
Remove the 8 bolts and front suspension member brace from the front suspension crossmember sub-assembly.
| 8. REMOVE FRONT STABILIZER BAR |
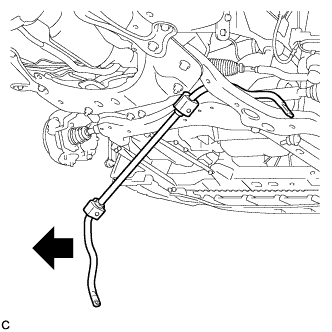 |
Remove the front stabilizer bar with 2 front stabilizer bar bushings from the front suspension crossmember sub-assembly.
| 9. REMOVE FRONT STABILIZER BAR BUSHING LH |
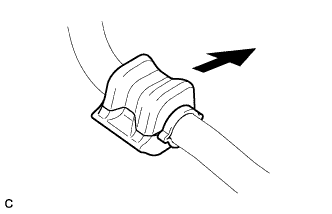 |
Remove the front stabilizer bar bushing LH from the front stabilizer bar.
| 10. REMOVE FRONT STABILIZER BAR BUSHING RH |
