RADIATOR > REMOVAL |
| 1. PRECAUTION |
| 2. REMOVE REAR NO. 2 FLOOR BOARD |
Remove the rear No. 2 floor board.
| 3. REMOVE REAR DECK FLOOR BOX |
Remove the rear deck floor box.
| 4. REMOVE REAR NO. 3 FLOOR BOARD |
Remove the rear No. 3 floor board.
| 5. REMOVE DECK FLOOR BOX RH |
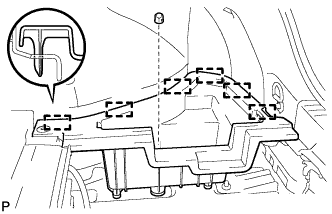 |
Remove the clip.
Disengage the 6 guides and remove the deck floor box RH.
| 6. REMOVE REAR FLOOR BOARD UPPER NO. 3 PLATE |
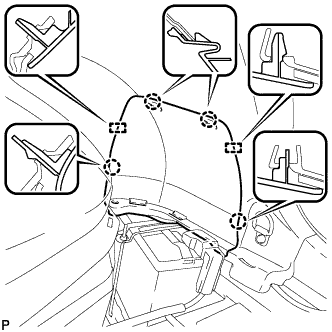 |
Disengage the 4 claws and 2 guides, and remove the rear floor board upper No. 3 plate.
| 7. DISCONNECT CABLE FROM NEGATIVE BATTERY TERMINAL |
| 8. REMOVE NO. 2 CYLINDER HEAD COVER |
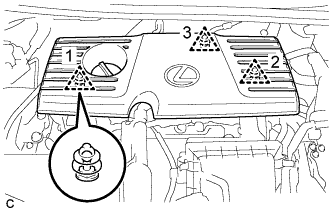 |
Remove the 3 clips and No. 2 cylinder head cover.
| 9. REMOVE INVERTER COVER ASSEMBLY LH (w/ Cover) |
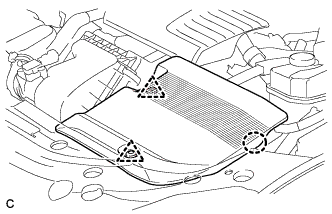 |
Remove the 2 clips
Disengage the claw and remove the inverter cover assembly LH.
| 10. REMOVE RADIATOR SUPPORT OPENING COVER |
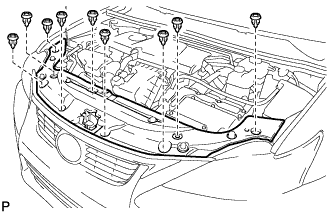 |
Remove the 9 clips and radiator support opening cover.
| 11. REMOVE NO. 1 ENGINE UNDER COVER |
| 12. DRAIN COOLANT (for Engine) |
Loosen the radiator drain cock plug.
Remove the reserve tank cap and drain the coolant.
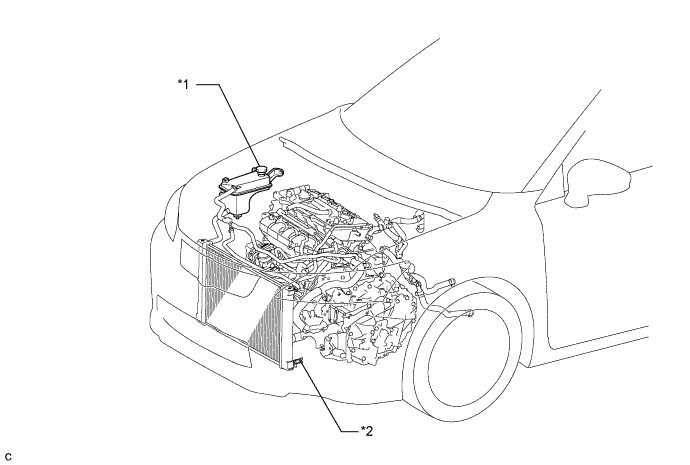
| *1 | Reserve Tank Cap | *2 | Radiator Drain Cock Plug |
| 13. REMOVE AIR CLEANER CAP SUB-ASSEMBLY |
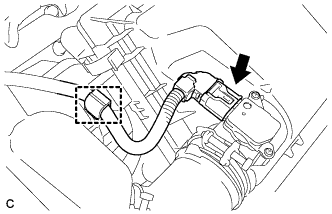 |
Disconnect the mass air flow meter connector.
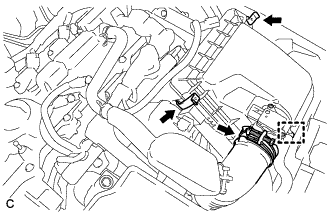 |
Separate the water hose from the hose clamp.
Release the 2 clamps.
Loosen the hose clamp and remove the air cleaner cap.
| 14. REMOVE INLET AIR CLEANER ASSEMBLY |
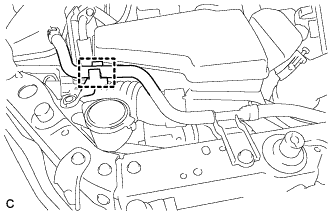 |
Separate the water hose from the hose clamp.
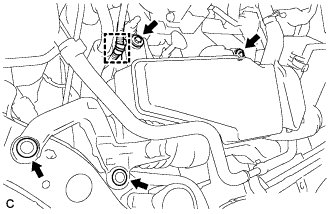 |
Separate the wire harness clamp from the inlet air cleaner assembly.
Remove the 2 bolts, 2 clips and inlet air cleaner assembly.
| 15. REMOVE AIR CLEANER CASE |
Remove the air cleaner filter element sub-assembly.
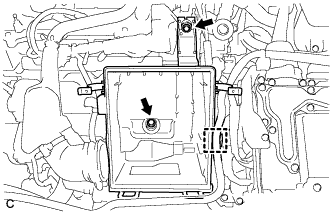 |
Separate the hose from the hose clamp.
Remove the 2 bolts and air cleaner case.
| 16. REMOVE FRONT BUMPER ASSEMBLY |
| 17. REMOVE HIGH PITCHED HORN ASSEMBLY |
Disconnect the connector.
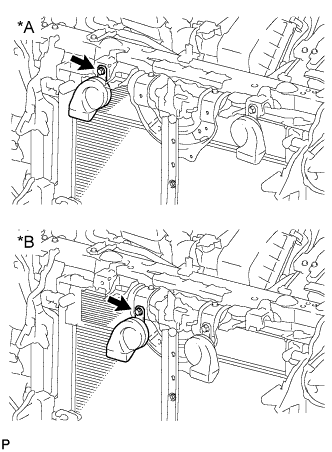 |
Remove the bolt and high pitched horn assembly.
| *A | for Outer Mounted Type |
| *B | for Inner Mounted Type |
| 18. REMOVE LOW PITCHED HORN ASSEMBLY |
Disconnect the connector.
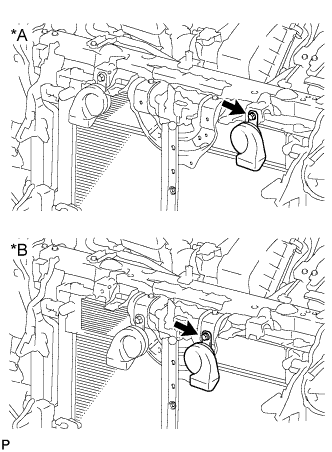 |
Remove the bolt and low pitched horn assembly.
| *A | for Outer Mounted Type |
| *B | for Inner Mounted Type |
| 19. REMOVE MILLIMETER WAVE RADAR SENSOR ASSEMBLY (w/ Dynamic Radar Cruise Control System) |
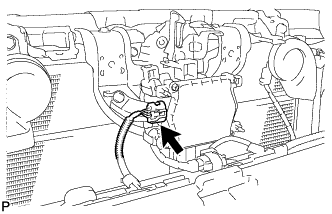 |
Disconnect the connector.
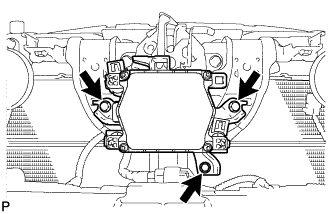 |
Remove the 3 bolts and the millimeter wave radar sensor assembly.
| 20. REMOVE HOOD LOCK ASSEMBLY (w/o Engine Hood Courtesy Switch) |
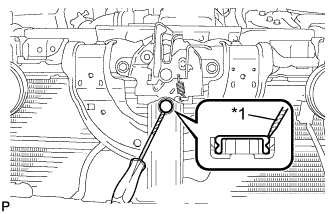 |
Using a screwdriver, remove the hood lock nut cap.
| *1 | Protective Tape |
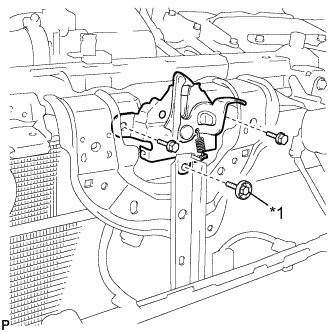 |
Remove the 2 bolts and hood lock bolt.
| *1 | Hood Lock Bolt |
for LHD:
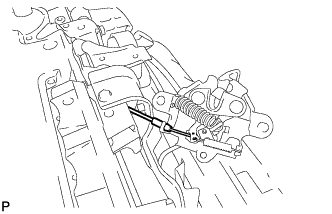 |
Disconnect the hood lock control cable and remove the hood lock assembly.
For RHD:
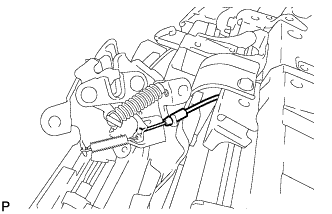 |
Disconnect the hood lock control cable and remove the hood lock assembly.
| 21. REMOVE HOOD LOCK ASSEMBLY (w/ Engine Hood Courtesy Switch) |
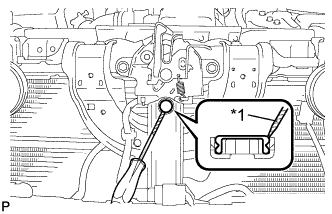 |
Using a screwdriver, remove the hood lock nut cap.
| *1 | Protective Tape |
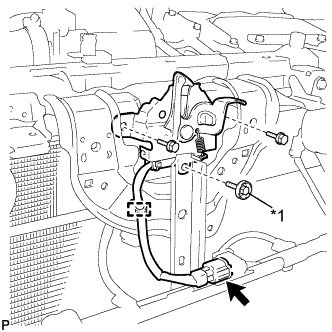 |
Disconnect the connector.
| *1 | Hood Lock Bolt |
Disengage the clamp.
Remove the 2 bolts and hood lock bolt.
for LHD:
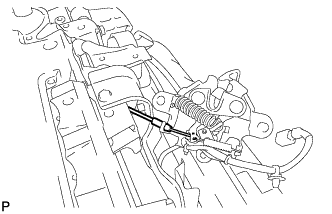 |
Disconnect the hood lock control cable and remove the hood lock assembly.
For RHD:
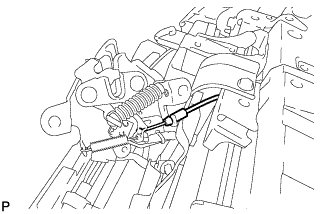 |
Disconnect the hood lock control cable and remove the hood lock assembly.
| 22. REMOVE COOL AIR INTAKE DUCT RETAINER SUB-ASSEMBLY |
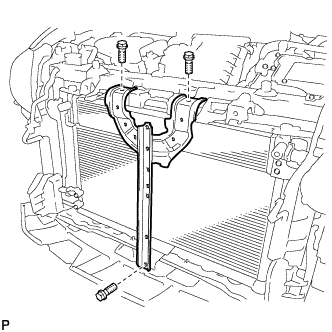 |
Remove the 3 bolts and cool air intake duct retainer sub-assembly.
| 23. REMOVE NO. 1 INVERTER BRACKET |
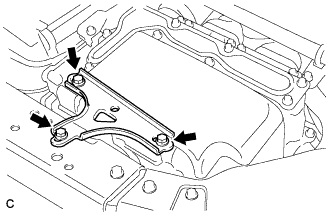 |
Remove the 3 bolts and No. 1 inverter bracket.
| 24. REMOVE HOOD LOCK SUPPORT SUB-ASSEMBLY |
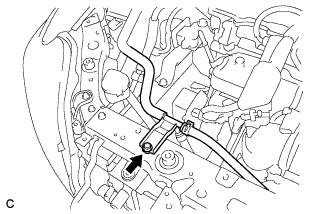 |
Remove the bolt and No. 2 water by-pass hose from the hood lock support sub-assembly.
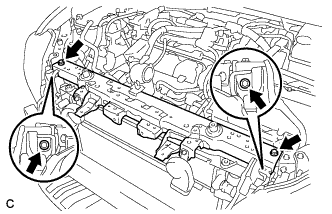 |
Remove the 4 bolts and hood lock support sub-assembly.
| 25. REMOVE RADIATOR SUPPORT CUSHION |
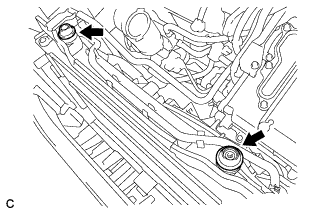 |
Remove the 2 radiator support cushions.
| 26. DISCONNECT NO. 1 RADIATOR HOSE |
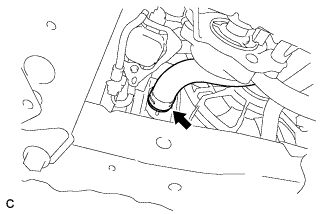 |
Disconnect the No. 1 radiator hose.
| 27. DISCONNECT NO. 2 RADIATOR HOSE |
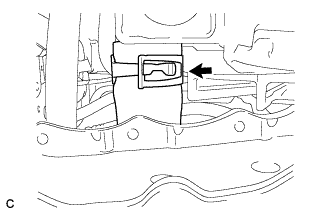 |
Disconnect the No. 2 radiator hose.
| 28. DISCONNECT NO. 5 INVERTER COOLING HOSE |
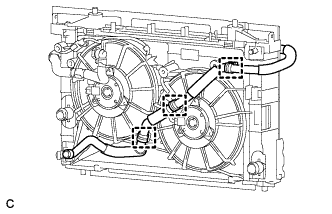 |
Disconnect the 3 clamps and No. 5 inverter cooling hose from the fan shroud.
| 29. DISCONNECT NO. 1 WATER BY-PASS HOSE |
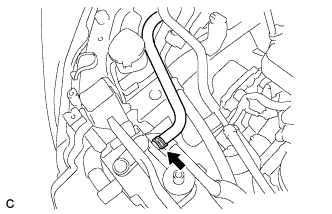 |
Disconnect the No. 1 water by-pass hose.
| 30. DISCONNECT NO. 3 WATER BY-PASS HOSE |
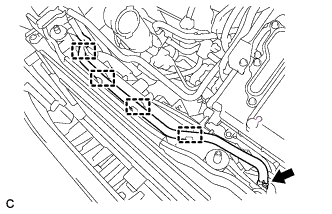 |
Disconnect the 4 clamps and No. 3 water by-pass hose.
| 31. REMOVE NO. 2 FAN SHROUD |
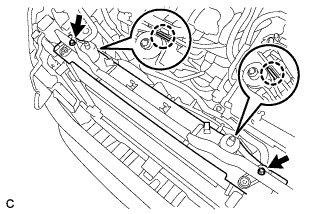 |
Remove the 2 bolts, 2 claws and No. 2 fan shroud.
| 32. REMOVE RADIATOR ASSEMBLY |
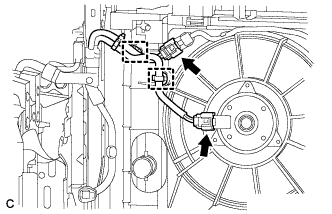 |
Disconnect the 2 clamps and 2 connectors.
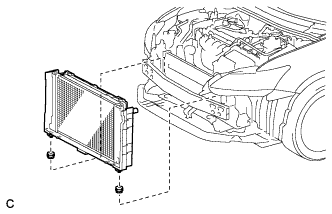 |
Remove the radiator assembly with the fan shroud.
Remove the 2 lower radiator supports.
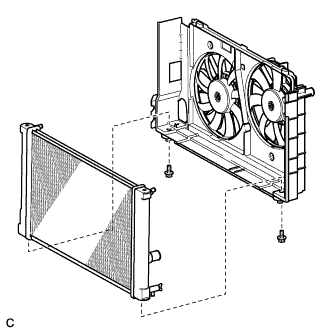 |
Remove the 2 bolts and radiator assembly.
