HEADLIGHT ASSEMBLY (for LED Headlight) > ADJUSTMENT |
| 1. PREPARE VEHICLE FOR HEADLIGHT AIM ADJUSTMENT |
Prepare the vehicle:
| 2. PREPARE FOR HEADLIGHT AIMING |
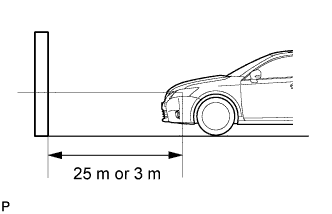 |
Prepare the vehicle:
Prepare a piece of thick white paper (approximately 2 m (6.6 ft.) (height) x 4 m (13.1 ft.) (width)) to use as a screen.
Draw a vertical line down the center of the screen (V line).
Set the screen as shown in the illustration.
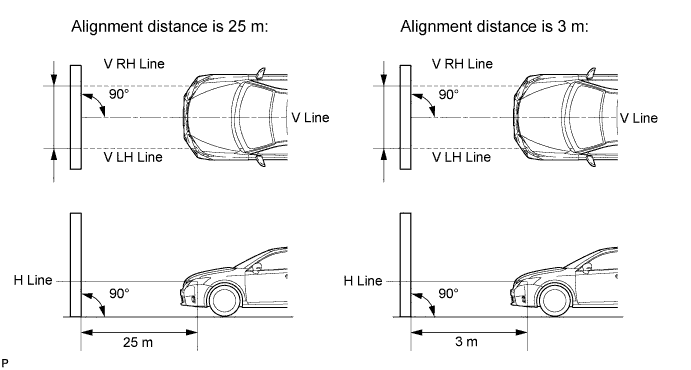
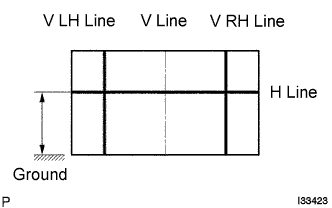 |
Draw base lines (H, V LH, and V RH lines) on the screen as shown in the illustration.
H Line (Headlight height):
Draw a horizontal line across the screen so that it passes through the center marks. The H line should be at the same height as the headlight bulb center marks of the low beam headlights.
V LH Line, V RH Line (Center mark position of left-hand (LH) and right-hand (RH) headlights):
Draw two vertical lines so that they intersect the H line at each center mark (aligned with the center of the low beam headlight bulbs).
| 3. INSPECT HEADLIGHT AIMING |
Cover the headlight or disconnect the connector of the headlight ECU on the opposite side to prevent light from the headlight that is not being inspected from affecting the headlight aiming inspection.
Start the engine.
Turn on the headlights and check if the cutoff line for each low beam matches the preferred cutoff line in the illustration.
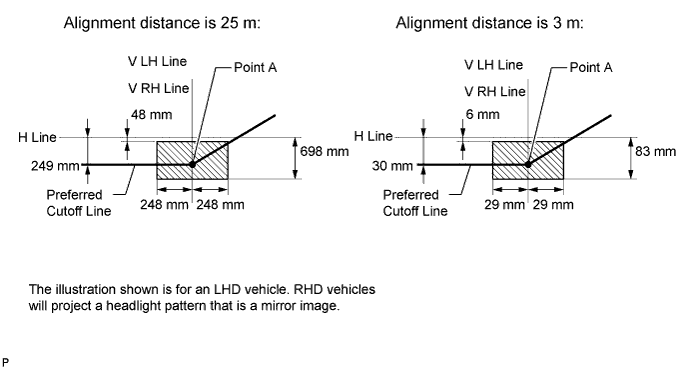
Turn on the high beams and check if the center of intensity for each high beam matches the preferred center of the intensity in the illustration.
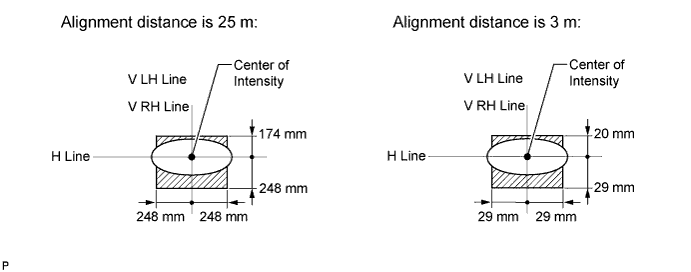
| 4. ADJUST HEADLIGHT AIMING |
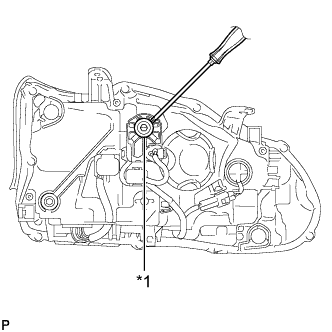 |
Adjust the aim vertically:
| *1 | Aiming Screw A |
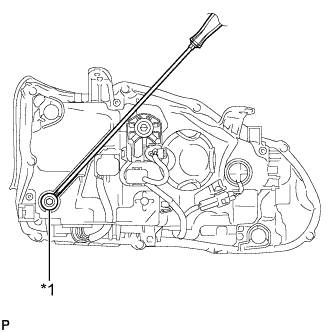 |
Adjust the aim horizontally:
| *1 | Aiming Screw B |
