BACK DOOR GLASS > INSTALLATION |
| 1. INSTALL BACK DOOR GLASS ADHESIVE DAM |
Apply Primer G to the installation part of the back door glass adhesive dam.
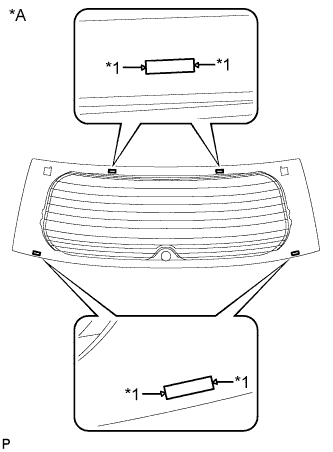 |
Install 4 new back door glass adhesive dams onto the back door glass as shown in the illustration.
| *A | Back Side |
| *1 | Marking for Dam Pasting |
| 2. INSTALL BACK WINDOW LOWER MOULDING |
Apply Primer G to the installation part of the back window lower moulding.
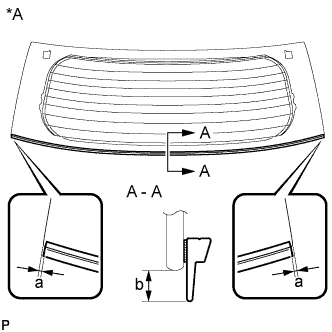 |
Install a new back window lower moulding onto the back door glass as shown in the illustration.
| *A | Back Side |
| Area | Dimension |
| a | 0 to 3.0 mm (0 to 0.118 in.) |
| b | 4.8 to 6.4 mm (0.189 to 0.252 in.) |
| 3. INSTALL BACK WINDOW OUTSIDE MOULDING LH |
Apply Primer G to the installation part of the back window outside moulding LH.
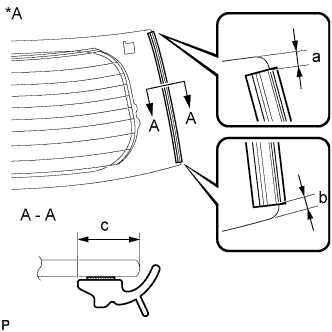 |
Install a new back window outside moulding LH onto the back door glass as shown in the illustration.
| *A | Back Side |
| Area | Dimension |
| a | 7.0 mm (0.276 in.) |
| b | 6.0 to 7.5 mm (0.236 to 0.295 in.) |
| c | 9.7 to 12.7 mm (0.382 to 0.500 in.) |
| 4. INSTALL BACK WINDOW OUTSIDE MOULDING RH |
| 5. INSTALL NO. 1 BACK WINDOW GLASS SPACER |
Apply Primer G to the installation part of the No. 1 back window glass spacer.
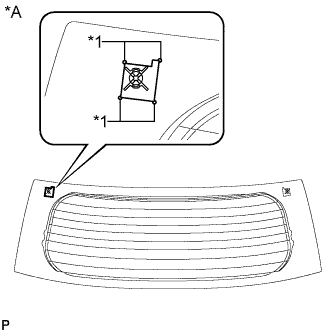 |
Install a new No. 1 back window glass spacer onto the back door glass as shown in the illustration.
| *A | Back Side |
| *1 | Marking for Spacer Pasting |
| 6. INSTALL NO. 2 BACK WINDOW GLASS SPACER |
Apply Primer G to the installation part of the No. 2 back window glass spacer.
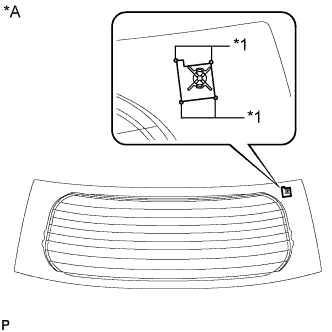 |
Install a new No. 2 back window glass spacer onto the back door glass as shown in the illustration.
| *A | Back Side |
| *1 | Marking for Spacer Pasting |
| 7. INSTALL BACK DOOR GLASS SUB-ASSEMBLY |
Using a brush, coat the installation surface on the vehicle body with Primer M.
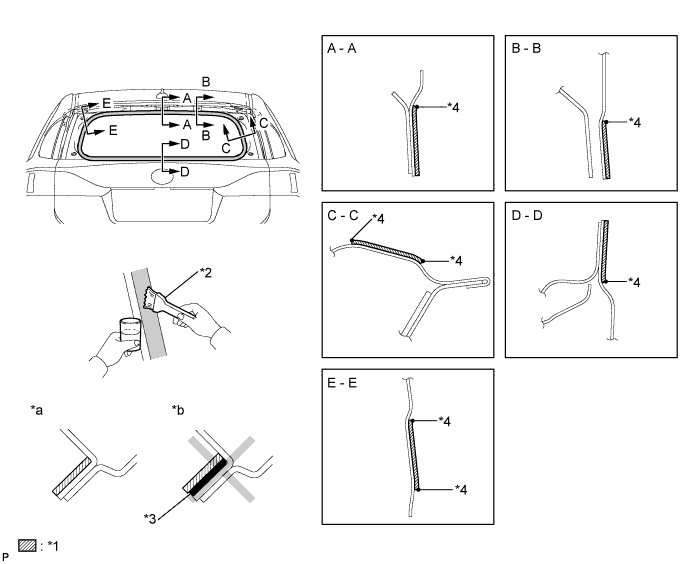
| *1 | Primer M | *2 | Brush |
| *3 | Adhesive | *4 | Edge of Curved Surface |
| *a | CORRECT | *b | WRONG |
Using a brush or a sponge, coat the application area of the adhesive with Primer G.
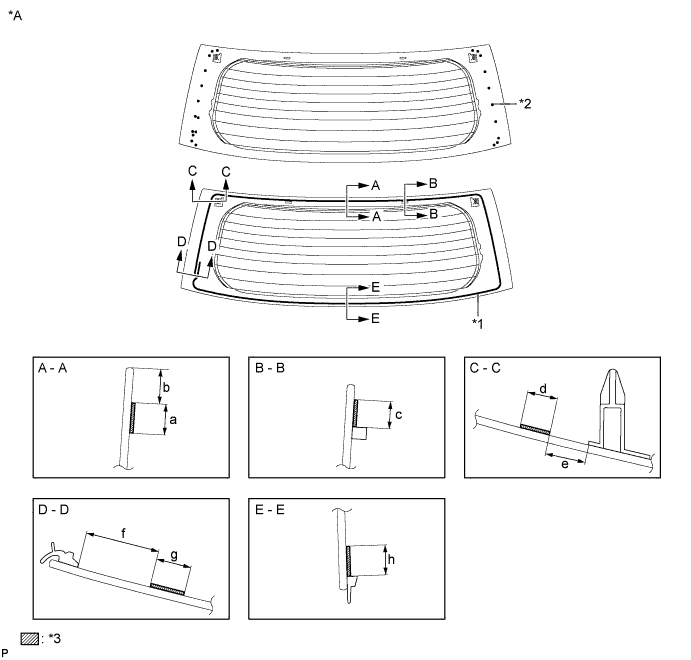
| *A | Back Side | - | - |
| *1 | Adhesive Center | *2 | Ceramic Notch |
| *3 | Primer G | - | - |
| Area | Dimension |
| a | 8.0 mm (0.315 in.) |
| b | 9.0 mm (0.354 in.) |
| c | 8.0 mm (0.315 in.) |
| d | 8.0 mm (0.315 in.) |
| e | 12.4 mm (0.488 in.) |
| f | 37.6 mm (1.480 in.) |
| g | 16.0 mm (0.630 in.) |
| h | 8.0 mm (0.315 in.) |
Apply adhesive to the back door glass.
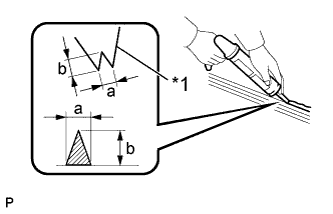 |
Cut off the tip of the cartridge nozzle as shown in the illustration.
| *1 | Nozzle |
| Area | Dimension |
| a | 8.0 mm (0.315 in.) or more |
| b | 12.0 mm (0.472 in.) or more |
| Temperature | Usage Time Frame |
| 35°C (95°F) | 15 minutes |
| 20°C (68°F) | 1 hour and 40 minutes |
| 5°C (41°F) | 8 hours |
Load the sealer gun with the cartridge.
Apply adhesive to the back door glass as shown in the illustration.
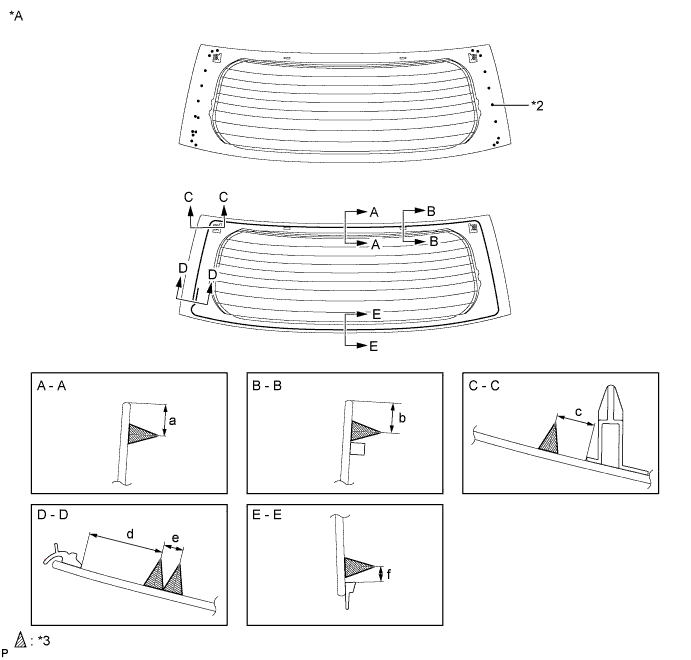
| *A | Back Side | - | - |
| *1 | Adhesive Center | *2 | Ceramic Notch |
| *3 | Adhesive | - | - |
| Area | Dimension |
| a | 13.0 mm (0.512 in.) |
| b | 13.0 mm (0.512 in.) |
| c | 16.4 mm (0.646 in.) |
| d | 41.6 mm (1.638 in.) |
| e | 7.8 mm (0.307 in.) |
| f | 5.7 mm (0.224 in.) |
Install the back door glass.
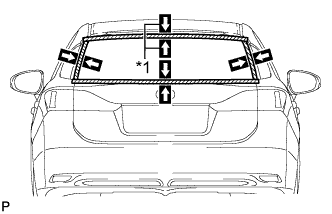 |
Position the back door glass so that the matchmarks are aligned, and press it in gently along the rim (when glass without a clip is used).
| *1 | Matchmark |
Lightly press the back door glass to ensure that the back door glass is securely fit to the vehicle body (when glass without a clip is used).
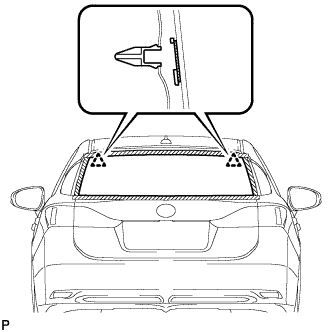 |
Using suction cups, engage the 2 clips to install the back door glass (when glass with all clips is used).
Lightly press the front surface of the back door glass to ensure that the back door glass is securely fit to the vehicle body.
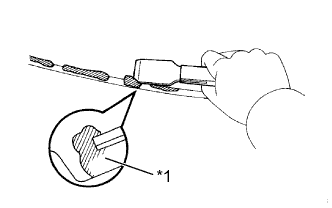 |
Using a scraper, remove any excess or protruding adhesive.
| *1 | Adhesive |
Hold the back door glass using protective tape until applied adhesive becomes hard.
| Temperature | Minimum Time prior to Driving Vehicle |
| 35°C (95°F) | 1 hour and 30 minutes |
| 20°C (68°F) | 5 hours |
| 5°C (41°F) | 24 hours |
Engage the 2 clamps.
Connect each connector.
| 8. INSTALL REAR WIPER MOTOR ASSEMBLY (w/ Rear Wiper) |
| 9. INSTALL REAR SPOILER SUB-ASSEMBLY |
Install the 4 new clips to the rear spoiler sub-assembly as shown in the illustration.
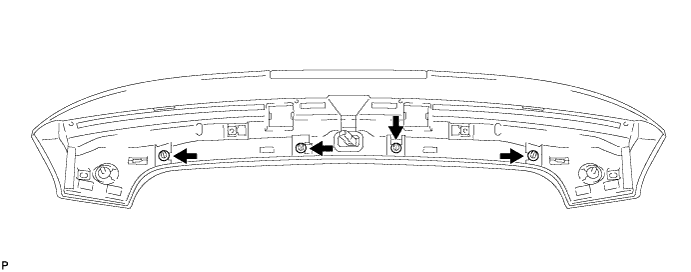
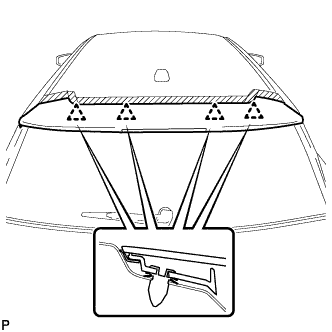 |
Engage the 4 clips and install the rear spoiler sub-assembly.
Connect the connector.
Install the 2 nuts and 2 bolts.
Install the 2 hole plugs.
| 10. INSTALL BACK DOOR TRIM BOARD ASSEMBLY |
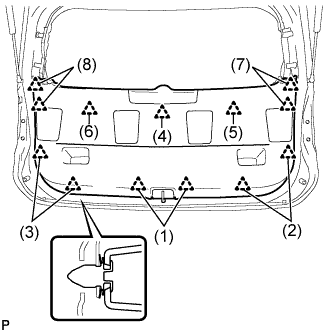 |
Engage the 13 clips to install the back door trim board assembly.
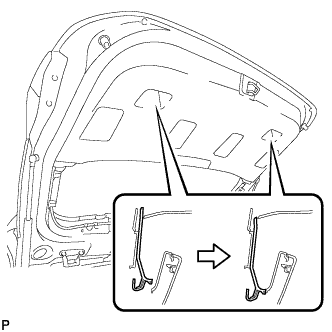 |
Slide the handle plate of the back door trim board to engage it.
| 11. INSTALL BACK DOOR SIDE GARNISH LH |
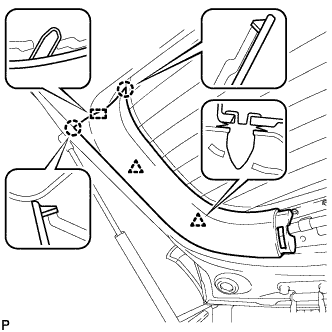 |
Engage the 2 clips, 2 claws and guide to install the back door side garnish LH.
| 12. INSTALL BACK DOOR SIDE GARNISH RH |
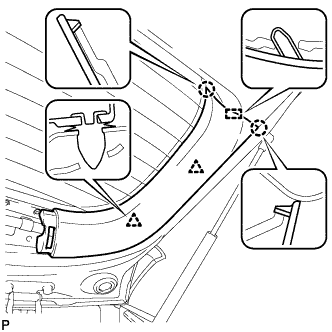 |
Engage the 2 clips, 2 claws and guide to install the back door side garnish RH.
| 13. INSTALL UPPER BACK DOOR TRIM PANEL ASSEMBLY |
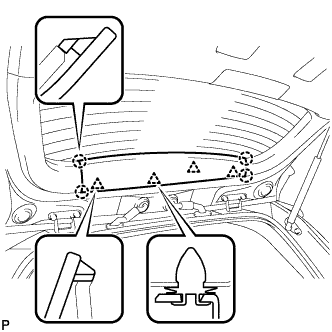 |
Engage the 4 clips and 4 claws to install the upper back door trim panel assembly.
| 14. INSPECT FOR LEAK AND REPAIR |
After the adhesive has hardened, apply water from the outside of the vehicle. Check that no water leaks into the cabin.
If water leaks into the cabin, allow the water to dry and add adhesive.
Remove the protective tape.
