BACK DOOR GLASS > REMOVAL |
| 1. REMOVE UPPER BACK DOOR TRIM PANEL ASSEMBLY |
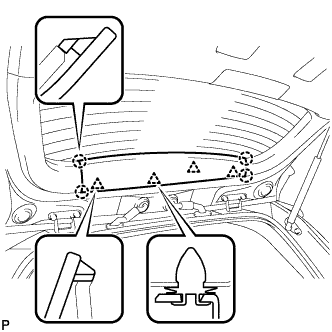 |
Using a moulding remover, disengage the 4 clips and 4 claws, and remove the upper back door trim panel assembly.
| 2. REMOVE BACK DOOR SIDE GARNISH LH |
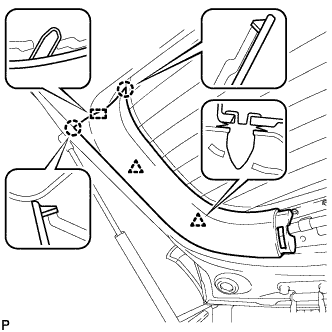 |
Disengage the 2 clips, 2 claws and guide, and remove the back door side garnish LH.
| 3. REMOVE BACK DOOR SIDE GARNISH RH |
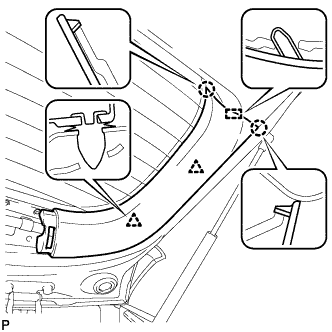 |
Disengage the 2 clips, 2 claws and guide, and remove the back door side garnish RH.
| 4. REMOVE BACK DOOR TRIM BOARD ASSEMBLY |
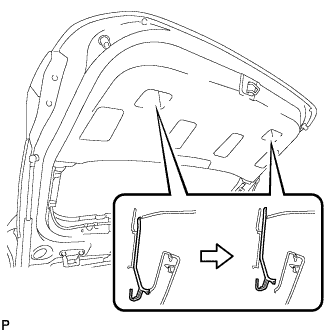 |
Using a screwdriver with its tip wrapped in protective tape, slide the handle plate of the back door trim board to disengage it.
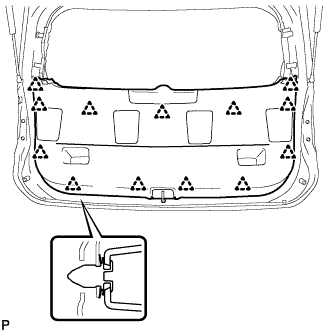 |
Disengage the 13 clips and remove the back door trim board assembly.
| 5. REMOVE REAR SPOILER SUB-ASSEMBLY |
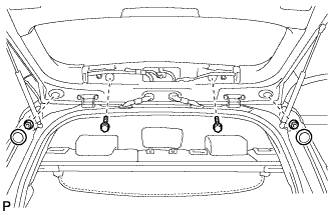 |
Remove the 2 hole plugs and 2 screws.
Remove the 2 nuts.
Disconnect the connector.
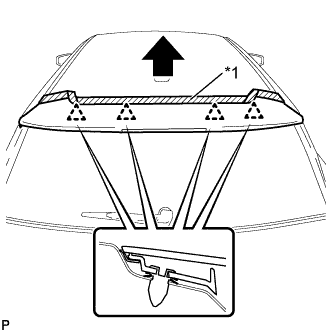 |
Put protective tape around the rear spoiler sub-assembly.
| *1 | Protective Tape |
Disengage the 4 clips and remove the rear spoiler sub-assembly.
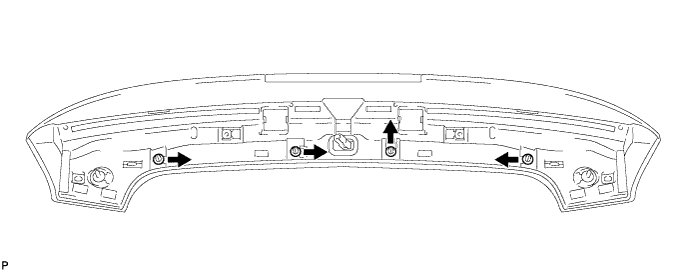
Remove the 4 clips as shown in the illustration.
| 6. REMOVE REAR WIPER MOTOR ASSEMBLY (w/ Rear Wiper) |
| 7. REMOVE BACK DOOR GLASS SUB-ASSEMBLY |
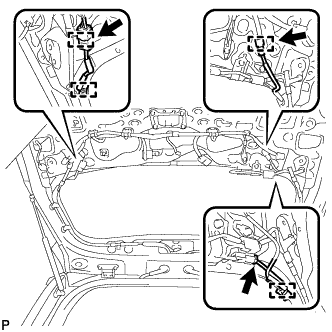 |
Disengage the 4 clamps.
Disconnect each connector.
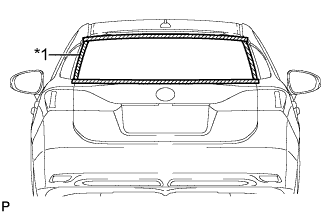 |
Apply protective tape to the outer surface of the vehicle body to prevent scratches.
| *1 | Protective Tape |
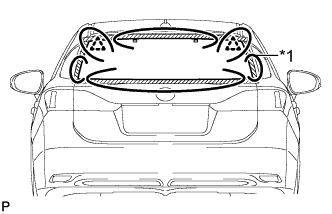 |
Pass a piano wire between the vehicle body and back door glass sub-assembly from the interior as shown in the illustration.
| *1 | Piano Wire |
Tie both wire ends to wooden blocks or similar objects that can serve as handles.
Cut off the adhesive by pulling the piano wire around the back door glass sub-assembly.
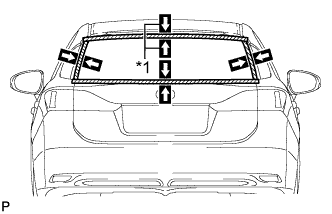 |
Place matchmarks on the back door glass sub-assembly and vehicle body on the locations indicated in the illustration.
| *1 | Matchmark |
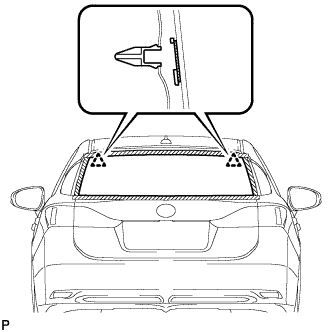 |
Using suction cups, disengage the 2 clips and remove the back door glass sub-assembly.
| 8. REMOVE NO. 1 BACK WINDOW GLASS SPACER |
When reusing the back door glass sub-assembly:
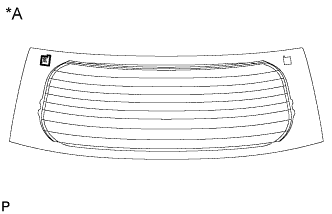 |
Using a scraper, remove the No. 1 back window glass spacer.
| *A | Back Side |
| 9. REMOVE NO. 2 BACK WINDOW GLASS SPACER |
| 10. REMOVE BACK WINDOW LOWER MOULDING |
When reusing the back door glass sub-assembly:
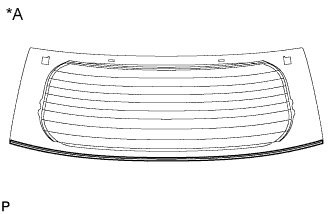 |
Using a scraper, remove the back window lower moulding.
| *A | Back Side |
| 11. REMOVE BACK WINDOW OUTSIDE MOULDING LH |
When reusing the back door glass sub-assembly:
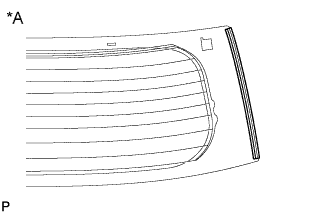 |
Using a scraper, remove the back window outside moulding LH.
| *A | Back Side |
| 12. REMOVE BACK WINDOW OUTSIDE MOULDING RH |
| 13. REMOVE BACK DOOR GLASS ADHESIVE DAM |
When reusing the back door glass sub-assembly:
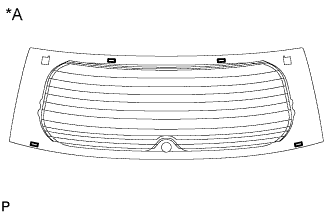 |
Using a scraper, remove the 4 back door glass adhesive dams.
| *A | Back Side |
| 14. CLEAN BACK DOOR GLASS |
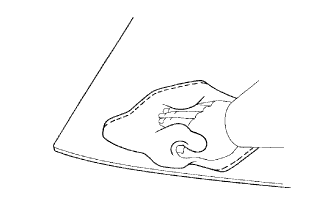 |
Clean the outer edge of the back door glass with a non-residue solvent.
| 15. CLEAN VEHICLE BODY |
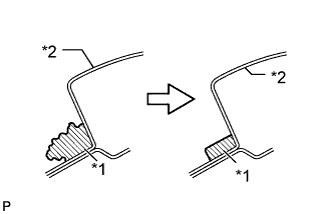 |
Using a scraper, remove the moulding and adhesive from the back door glass sub-assembly.
| *1 | Adhesive |
| *2 | Body |
Clean and shape the contact surfaces of the vehicle body.
Using a knife, cut away excess adhesive on the contact surfaces of the vehicle body as shown in the illustration.
Clean the contact surfaces of the vehicle body with a piece of cloth saturated with cleaner.
