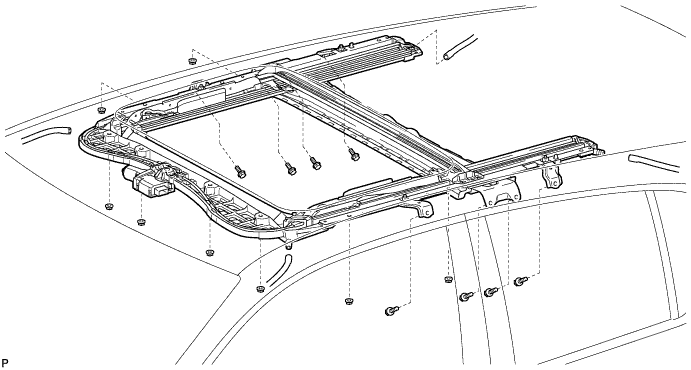
SLIDING ROOF HOUSING > REMOVAL |
| 1. REMOVE NO. 2 SLIDING ROOF SIDE GARNISH LH |
Press the TILT UP switch to tilt the roof glass up until it is fully tilted upward.
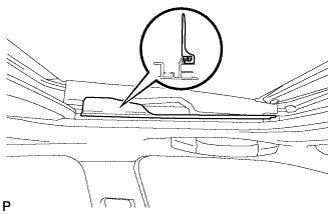 |
Remove the No. 2 sliding roof side garnish LH.
| 2. REMOVE NO. 2 SLIDING ROOF SIDE GARNISH RH |
| 3. REMOVE NO. 1 SLIDING ROOF SIDE GARNISH LH |
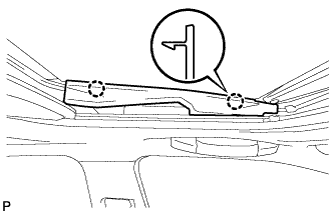 |
Disengage the 2 claws and remove the No. 1 sliding roof side garnish LH.
| 4. REMOVE NO. 1 SLIDING ROOF SIDE GARNISH RH |
| 5. REMOVE SLIDING ROOF GLASS SUB-ASSEMBLY |
Press the TILT UP switch to tilt the roof glass down until it is fully tilted down.
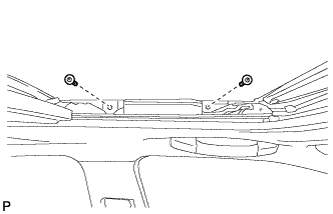 |
Using a T25 "TORX" socket wrench, remove the 4 screws and sliding roof glass sub-assembly.
| 6. REMOVE SLIDING ROOF WEATHERSTRIP |
Remove the sliding roof weatherstrip from the sliding roof panel sub-assembly.
| 7. REMOVE ROOF HEADLINING ASSEMBLY |
| 8. REMOVE CURTAIN SHIELD AIRBAG ASSEMBLY LH |
Check that the power switch is off.
Check that the cable is disconnected from the negative (-) auxiliary battery terminal.
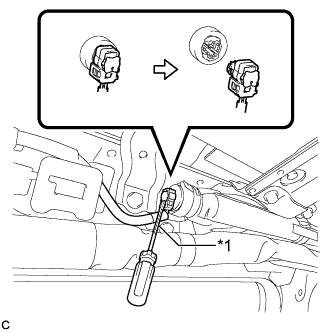 |
Using a screwdriver with the tip wrapped with protective tape, release the airbag connector lock and disconnect the curtain shield airbag connector.
| *1 | Protective Tape |
Remove the 5 bolts.
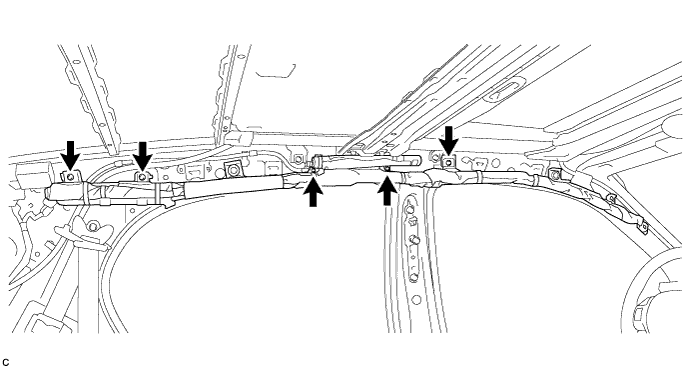
Using a clip remover, pull the 4 pins.
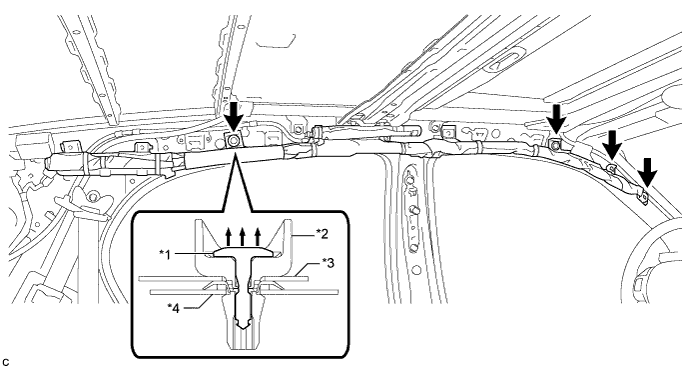
| *1 | Pin | *2 | Clip |
| *3 | Airbag | *4 | Body |
Using a screwdriver, disengage the 2 claws and separate the clip and curtain shield airbag assembly from the body as shown in the illustration.
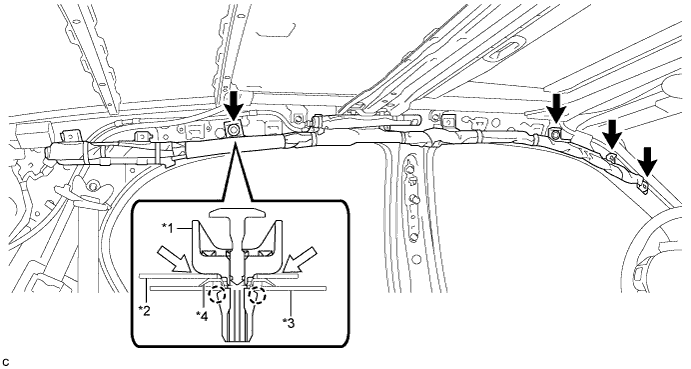
| *1 | Clip | *2 | Airbag |
| *3 | Body | *4 | Spacer |
Disengage the 5 hooks to remove the curtain shield airbag assembly.
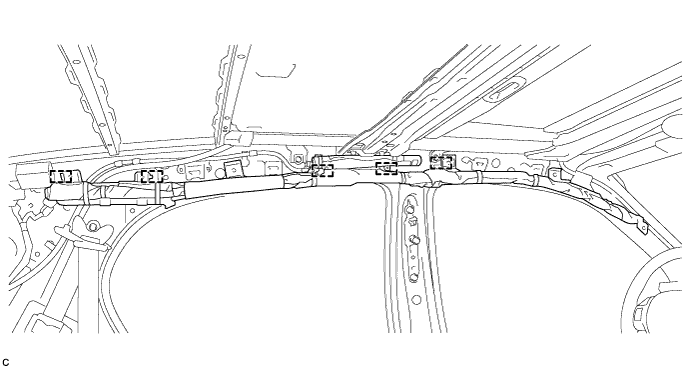
Remove the 4 clips and 4 spacers from the curtain shield airbag assembly.
| 9. REMOVE CURTAIN SHIELD AIRBAG ASSEMBLY RH |
| 10. REMOVE REAR NO. 2 SIDE RAIL SPACER LH |
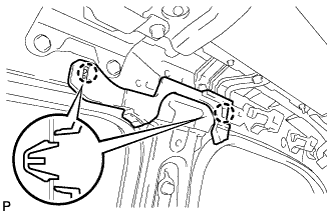 |
Disengage the 2 claws and remove the rear No. 2 side rail spacer LH.
| 11. REMOVE REAR NO. 2 SIDE RAIL SPACER RH |
| 12. REMOVE SLIDING ROOF HOUSING ASSEMBLY |
Disconnect the 4 sliding roof drain hoses.
Remove the 8 bolts, 8 nuts and sliding roof housing assembly.