ELECTRICAL KEY OSCILLATOR (for Front Floor) > REMOVAL |
| 1. REMOVE REAR CONSOLE BOX ASSEMBLY |
| 2. REMOVE SHIFT LEVER KNOB SUB-ASSEMBLY |
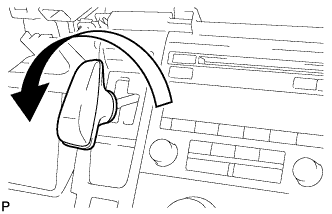 |
Turn the shift lever knob counterclockwise and remove the shift lever knob sub-assembly.
| 3. REMOVE INTEGRATION CONTROL AND PANEL ASSEMBLY |
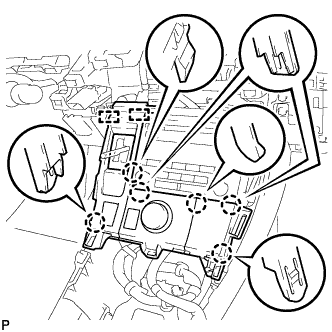 |
Disengage the 6 claws and 2 guides.
Disengage the clamp.
Disconnect each connector and remove the integration control and panel assembly.
| 4. REMOVE CONSOLE BOX INSERT |
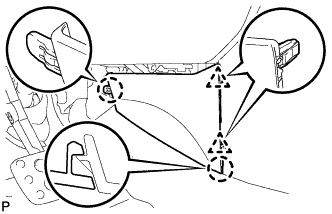 |
Disengage the 2 clips and 2 claws, and remove the console box insert.
| 5. REMOVE CONSOLE BOX LH |
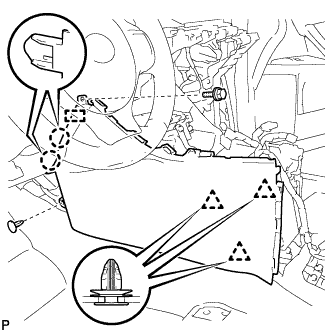 |
Remove the bolt <A>.
Using a clip remover, remove the clip.
Using a clip remover, disengage the 3 clips.
Disengage the 2 claws and guide, and remove the console box LH.
| 6. REMOVE NO. 1 ELECTRICAL KEY OSCILLATOR |
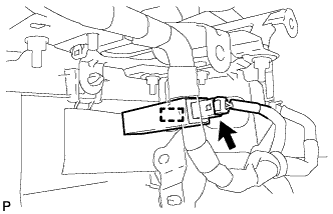 |
Disconnect the connector.
Disengage the clamp and remove the No. 1 electrical key oscillator.
