INSTRUMENT PANEL SPEAKER > REMOVAL |
| 1. REMOVE NO. 2 INSTRUMENT PANEL SPEAKER PANEL SUB-ASSEMBLY (for LH Side) |
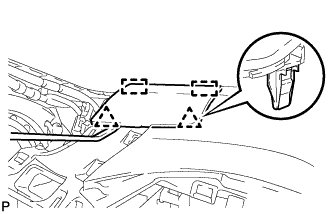 |
Using a moulding remover, disengage the 2 clips and 2 guides, and remove the No. 2 instrument panel speaker panel sub-assembly.
| 2. REMOVE NO. 1 INSTRUMENT PANEL SPEAKER PANEL SUB-ASSEMBLY (for RH Side) |
| 3. REMOVE FRONT NO. 2 SPEAKER ASSEMBLY |
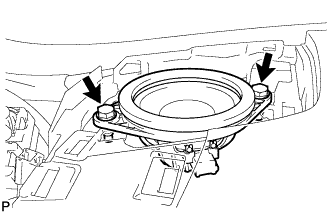 |
Remove the 2 bolts.
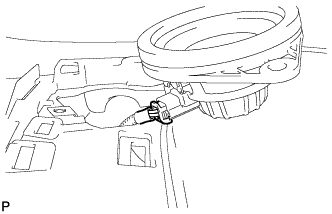 |
Lift the front No. 2 speaker assembly and disconnect the connector to remove the speaker.
| 4. REMOVE NO. 1 SPEAKER OPENING COVER ASSEMBLY (w/ Front Center Speaker) |
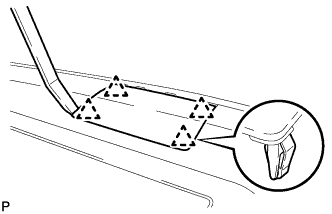 |
Using a moulding remover, disengage the 4 clips and remove the No. 1 speaker opening cover assembly.
| 5. REMOVE FRONT NO. 4 SPEAKER ASSEMBLY (w/ Front Center Speaker) |
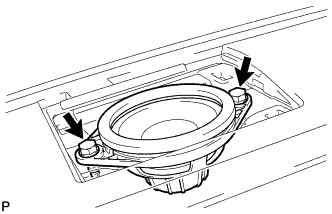 |
Remove the 2 bolts.
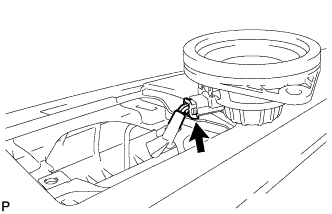 |
Lift the front No. 4 speaker assembly and disconnect the connector to remove the speaker.
