PCV VALVE > REMOVAL |
| 1. REMOVE NO. 2 CYLINDER HEAD COVER |
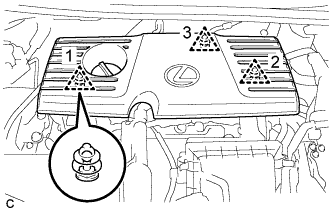 |
Remove the 3 clips and No. 2 cylinder head cover.
| 2. REMOVE AIR CLEANER CAP SUB-ASSEMBLY |
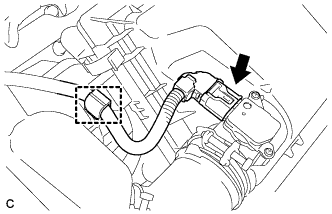 |
Disconnect the mass air flow meter connector.
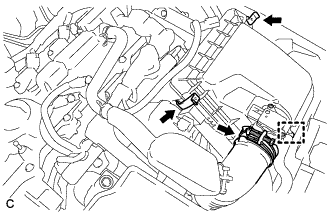 |
Separate the water hose from the hose clamp.
Release the 2 clamps.
Loosen the hose clamp and remove the air cleaner cap.
| 3. REMOVE INLET AIR CLEANER ASSEMBLY |
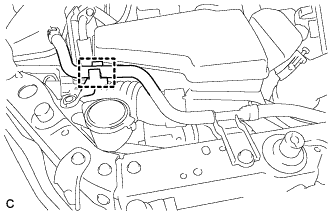 |
Separate the water hose from the hose clamp.
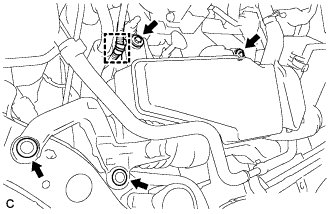 |
Separate the wire harness clamp from the inlet air cleaner assembly.
Remove the 2 bolts, 2 clips and inlet air cleaner assembly.
| 4. REMOVE AIR CLEANER CASE |
Remove the air cleaner filter element sub-assembly.
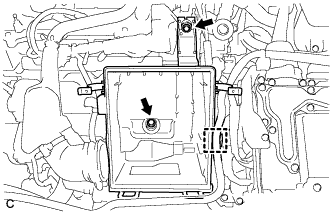 |
Separate the hose from the hose clamp.
Remove the 2 bolts and air cleaner case.
| 5. REMOVE NO. 1 ENGINE UNDER COVER |
| 6. REMOVE VENTILATION VALVE SUB-ASSEMBLY |
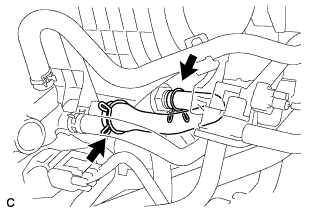 |
Remove the ventilation hose from the ventilation valve sub-assembly.
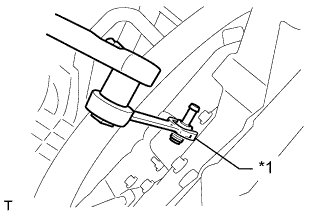 |
Using a ball joint lock nut wrench (22 mm), remove the ventilation valve sub-assembly.
| *1 | Ball Joint Lock Nut Wrench (22 mm) |
