STEREO JACK ADAPTER ASSEMBLY > REMOVAL |
| 1. REMOVE LOWER CENTER INSTRUMENT PANEL FINISH PANEL |
Open the glove compartment door.
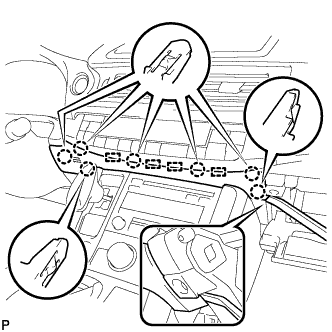 |
Using a moulding remover, disengage the 7 claws and 4 guides, and remove the lower center instrument panel finish panel as shown in the illustration.
| 2. REMOVE UPPER NO. 2 CONSOLE PANEL GARNISH |
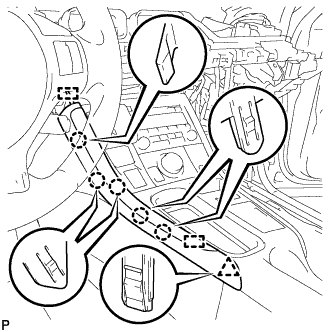 |
Disengage the 5 claws, clip and 2 guides, and remove the upper No. 2 console panel garnish.
| 3. REMOVE UPPER NO. 1 CONSOLE PANEL GARNISH |
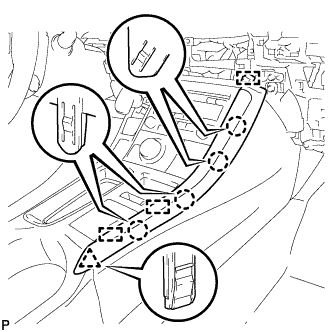 |
Disengage the 4 claws, clip and 3 guides, and remove the upper No. 1 console panel garnish.
| 4. REMOVE UPPER CONSOLE PANEL SUB-ASSEMBLY |
Open the console compartment door.
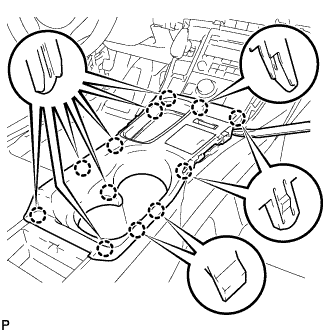 |
Using a moulding remover, disengage the 12 claws.
Disengage the clamp.
Disconnect each connector and remove the upper console panel sub-assembly.
| 5. REMOVE NO. 1 STEREO JACK ADAPTER ASSEMBLY |
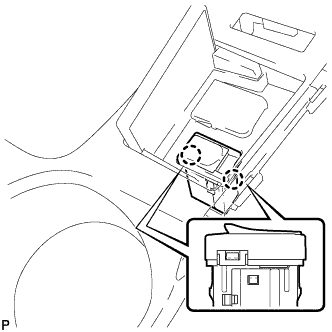 |
Disengage the 2 claws and remove the No. 1 stereo jack adapter assembly.
