RADIO ANTENNA CORD > INSTALLATION |
| 1. INSTALL NO. 4 ANTENNA CORD SUB-ASSEMBLY |
Engage the 2 grommets.
Engage the 5 clamps.
Connect the connector for back door.
Install the bolt for back door.
Connect the connector for roof.
w/ Rear Wiper:
Connect the washer hose.
Install the bolt and No. 4 antenna cord subassembly.
| 2. INSTALL BACK DOOR TRIM BOARD ASSEMBLY |
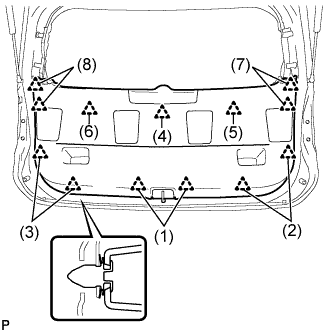 |
Engage the 13 clips to install the back door trim board assembly.
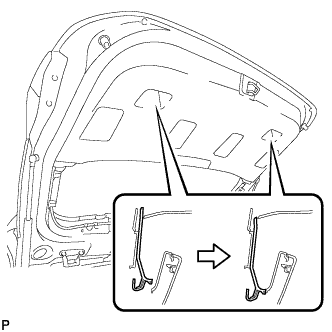 |
Slide the handle plate of the back door trim board to engage it.
| 3. INSTALL BACK DOOR SIDE GARNISH LH |
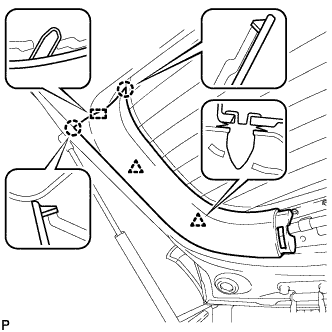 |
Engage the 2 clips, 2 claws and guide to install the back door side garnish LH.
| 4. INSTALL BACK DOOR SIDE GARNISH RH |
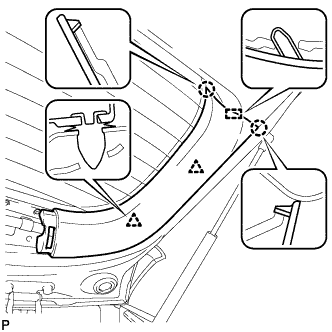 |
Engage the 2 clips, 2 claws and guide to install the back door side garnish RH.
| 5. INSTALL UPPER BACK DOOR TRIM PANEL ASSEMBLY |
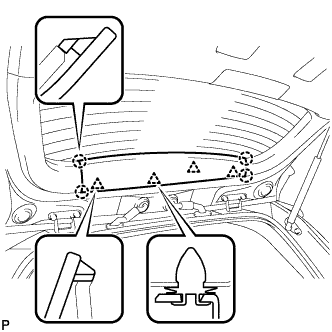 |
Engage the 4 clips and 4 claws to install the upper back door trim panel assembly.
| 6. INSTALL NO. 3 ANTENNA CORD SUB-ASSEMBLY |
Engage the 5 clamps.
Install the No. 3 antenna cord sub-assembly with the bolt.
Connect the connector.
| 7. INSTALL NO. 2 ANTENNA CORD SUB-ASSEMBLY |
Apply new double-sided tape.
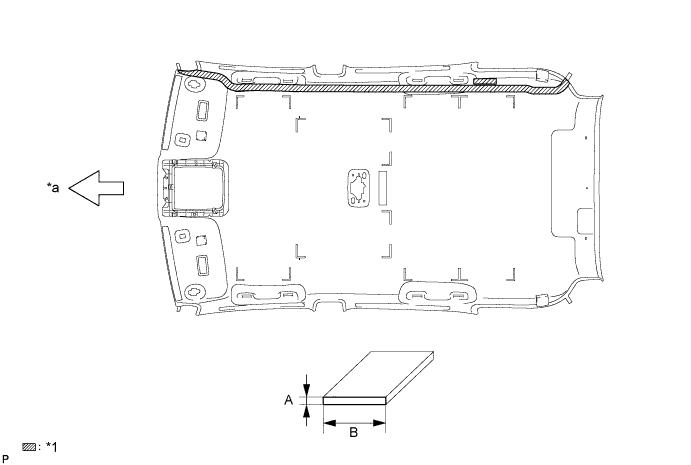
| *1 | Double-sided Tape | - | - |
| *a | Front Side | - | - |
Remove the old double-sided tape from the roof headlining assembly.
Prepare the appropriate amount of new double-sided tape.
| Area | Dimension |
| A | 1.0 mm (0.0394 in.) |
| B | 15.0 mm (0.591 in.) |
Apply the double-sided tape to the roof headlining while aligning the tape with the markings on the roof headlining assembly.
Peel off the release paper from the double-sided tape.
Install the No. 2 antenna cord sub-assembly to the roof headlining assembly from the front of the vehicle.
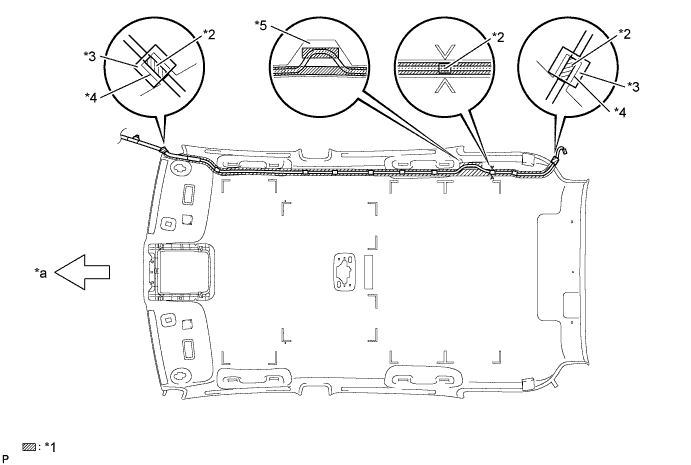
| *1 | Double-sided Tape | *2 | Marking Tape |
| *3 | Tape | *4 | Protrusion |
| *5 | Adjustment Area | - | - |
| *a | Front Side | - | - |
Put the strips of the tape back to the positions shown in the illustration in order to secure the antenna cord to the roof headlining assembly.
| 8. INSTALL ROOF HEADLINING ASSEMBLY |
| 9. INSTALL ANTENNA CORD SUB-ASSEMBLY (for LHD) |
Engage the 6 clamps.
Connect the connector.
Install the antenna cord sub-assembly with the bolt.
| 10. INSTALL UPPER INSTRUMENT PANEL ASSEMBLY (for LHD) |
| 11. INSTALL ANTENNA CORD SUB-ASSEMBLY (for RHD) |
Engage the 10 clamps.
Connect the connector.
Install the antenna cord sub-assembly with the bolt.
| 12. INSTALL LOWER INSTRUMENT PANEL SUB-ASSEMBLY (for RHD) |
