FUEL TANK > REMOVAL |
| 1. REMOVE FUEL SUCTION TUBE ASSEMBLY WITH PUMP AND GAUGE |
| 2. DRAIN FUEL |
| 3. REMOVE TAIL EXHAUST PIPE ASSEMBLY |
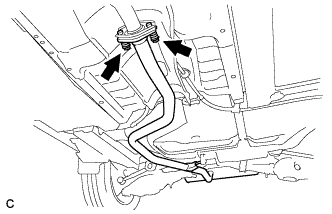 |
Remove the 2 bolts and 2 compression springs.
Remove the tail exhaust pipe assembly from the 3 exhaust pipe supports.
Remove the gasket from the front exhaust pipe assembly.
| 4. REMOVE REAR FLOOR SIDE MEMBER COVER LH (w/ Floor Under Cover) |
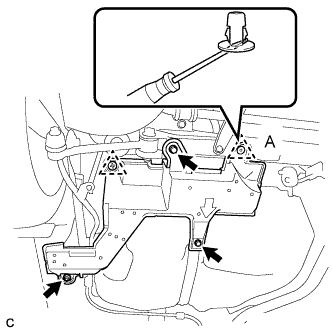 |
Remove the 2 bolts and nut.
Disconnect the 2 clips, and remove the rear floor side member cover LH.
| 5. REMOVE NO. 1 FUEL TANK PROTECTOR |
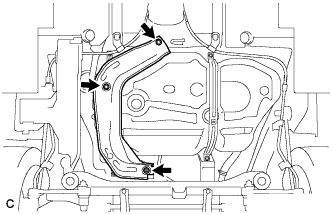 |
Remove the 2 bolts, nut and No. 1 fuel tank protector.
| 6. DISCONNECT FUEL TANK BREATHER TUBE |
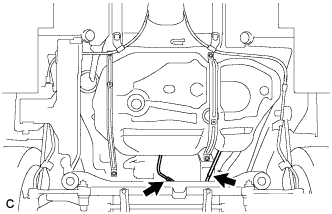 |
Loosen the clip, then disconnect the fuel tank breather tube from the fuel vent tube.
Disconnect the No. 1 charcoal canister outlet hose.
| 7. DISCONNECT FUEL TANK TO FILLER PIPE HOSE |
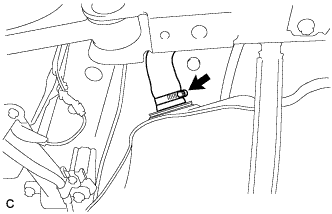 |
Loosen the clamp, then disconnect the fuel tank to filler pipe hose from the fuel tank.
| 8. REMOVE NO. 1 FUEL EVAPORATION TUBE SUB-ASSEMBLY |
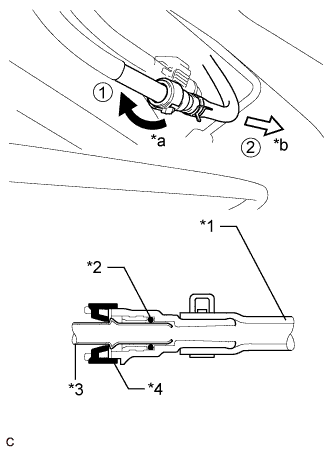 |
Pinch the projections of the retainer to disengage the lock claws, and pull it out as shown in the illustration.
| *1 | Rubber Hose |
| *2 | O-ring |
| *3 | Fuel Pipe |
| *4 | Retainer |
| *a | Turn |
| *b | Pull Out |
| 9. REMOVE FUEL TANK MAIN TUBE SUB-ASSEMBLY |
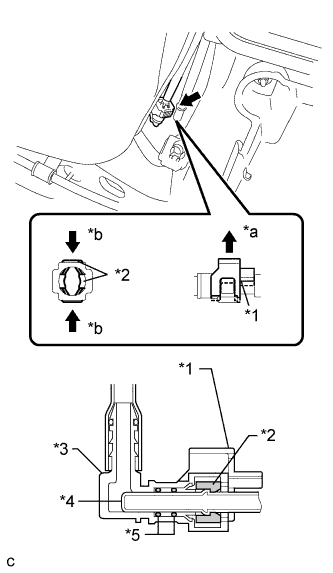 |
Release the lock as shown in the illustration, then pull and remove the fuel tank main tube sub-assembly.
| *1 | Lock Cover |
| *2 | Retainer |
| *3 | Fuel Tube Connector |
| *4 | Fuel Pipe |
| *5 | O-ring |
| *a | Pull |
| *b | Pinch |
Pull out the fuel tank main tube sub-assembly from the pipe.
| 10. REMOVE FUEL TANK ASSEMBLY |
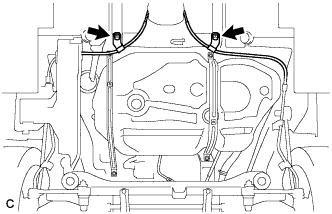 |
Remove the 2 bolts and disconnect the parking brake cable assembly.
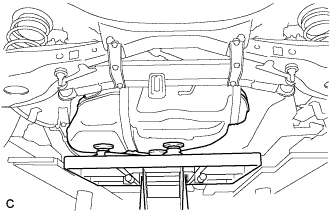 |
Support the fuel tank using an engine lifter.
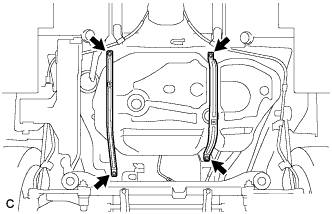 |
Remove the 4 set bolts of the 2 fuel tank bands.
Lower the engine lifter to remove the fuel tank.
| 11. REMOVE NO. 1 CHARCOAL CANISTER OUTLET HOSE |
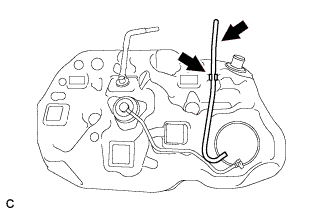 |
Remove the No. 1 charcoal canister outlet hose and the hose clamp.
| 12. REMOVE NO. 1 FUEL TANK CUSHION |
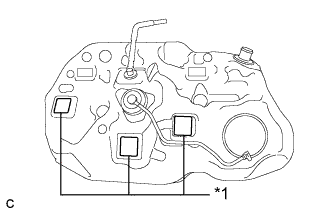 |
Remove the 3 No. 1 fuel tank cushions.
| *1 | No. 1 Fuel Tank Cushion |
| 13. REMOVE FUEL TANK COVER VENT CASE SUB-ASSEMBLY |
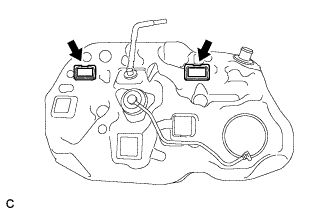 |
Remove the 2 fuel tank cover vent case sub-assemblies.
