REAR WIPER MOTOR > REMOVAL |
| 1. REMOVE UPPER BACK DOOR TRIM PANEL ASSEMBLY |
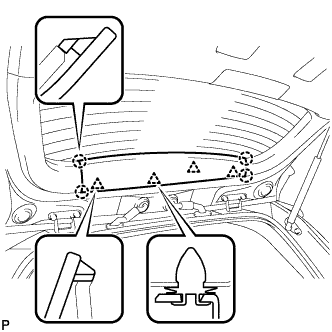 |
Using a moulding remover, disengage the 4 clips and 4 claws, and remove the upper back door trim panel assembly.
| 2. REMOVE BACK DOOR SIDE GARNISH LH |
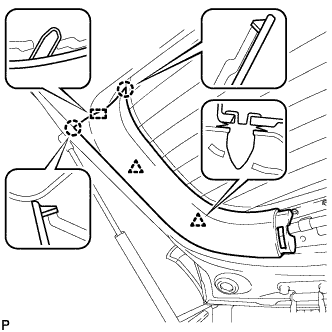 |
Disengage the 2 clips, 2 claws and guide, and remove the back door side garnish LH.
| 3. REMOVE BACK DOOR SIDE GARNISH RH |
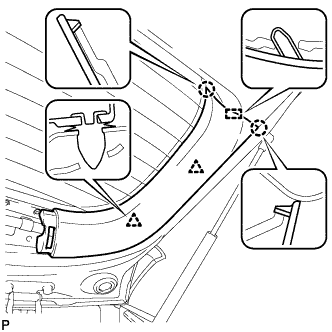 |
Disengage the 2 clips, 2 claws and guide, and remove the back door side garnish RH.
| 4. REMOVE BACK DOOR TRIM BOARD ASSEMBLY |
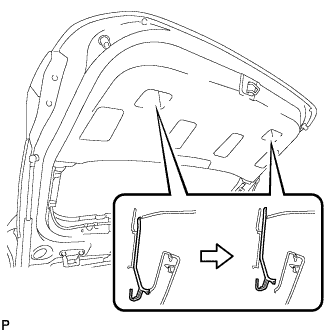 |
Using a screwdriver with its tip wrapped in protective tape, slide the handle plate of the back door trim board to disengage it.
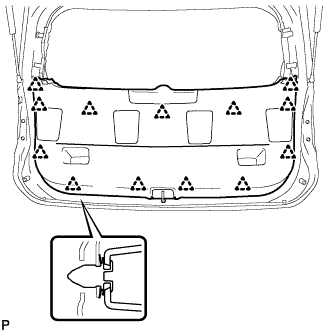 |
Disengage the 13 clips and remove the back door trim board assembly.
| 5. REMOVE REAR WIPER ARM HEAD CAP |
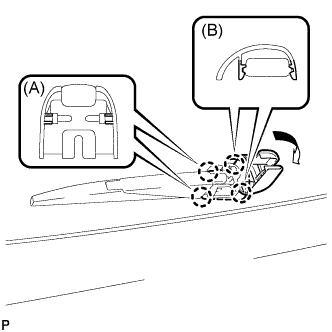 |
Disengage the 2 claws (A) and open the rear wiper arm head cap as shown in the illustration.
Disengage the 2 claws (B) and remove the rear wiper arm head cap.
| 6. REMOVE REAR WIPER ARM AND BLADE ASSEMBLY |
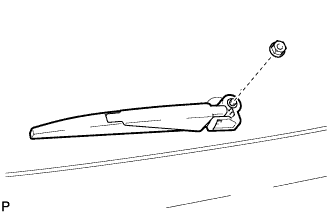 |
Remove the nut and the rear wiper arm and blade assembly.
| 7. REMOVE REAR WIPER MOTOR GROMMET |
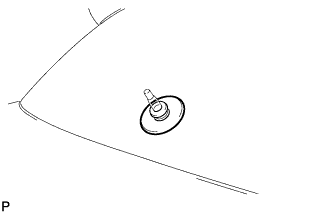 |
Remove the rear wiper motor grommet.
| 8. REMOVE REAR WIPER MOTOR ASSEMBLY |
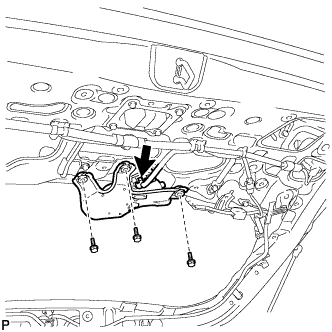 |
Disconnect the connector.
Remove the 3 bolts and the rear wiper motor assembly.
