CONDENSER > REMOVAL |
| 1. PRECAUTION |
| 2. RECOVER REFRIGERANT FROM AIR CONDITIONING SYSTEM |
Turn the A/C switch on.
Operate the air conditioning with a set temperature of 25°C (77°F) and the blower at low for 10 minutes to circulate the refrigerant. This causes most of the compressor oil from the various components of the air conditioning system to collect in the air conditioning compressor.
Turn the power switch off.
Recover the refrigerant from the air conditioning system using a refrigerant recovery unit.
| 3. REMOVE REAR NO. 2 FLOOR BOARD |
Remove the rear No. 2 floor board.
| 4. REMOVE REAR DECK FLOOR BOX |
Remove the rear deck floor box.
| 5. REMOVE REAR NO. 3 FLOOR BOARD |
Remove the rear No. 3 floor board.
| 6. REMOVE DECK FLOOR BOX RH |
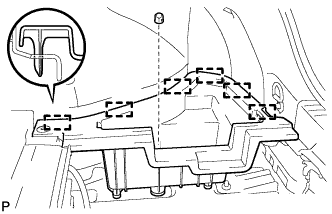 |
Remove the clip.
Disengage the 6 guides and remove the deck floor box RH.
| 7. REMOVE REAR FLOOR BOARD UPPER NO. 3 PLATE |
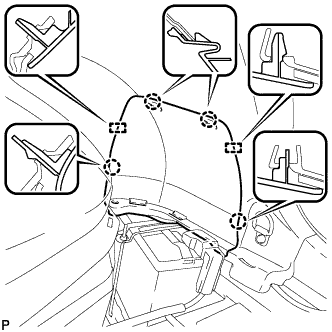 |
Disengage the 4 claws and 2 guides, and remove the rear floor board upper No. 3 plate.
| 8. DISCONNECT CABLE FROM NEGATIVE BATTERY TERMINAL |
| 9. REMOVE FRONT BUMPER ASSEMBLY |
| 10. REMOVE MILLIMETER WAVE RADAR SENSOR ASSEMBLY (w/ Dynamic Radar Cruise Control System) |
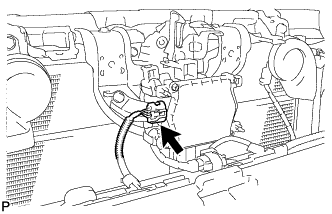 |
Disconnect the connector.
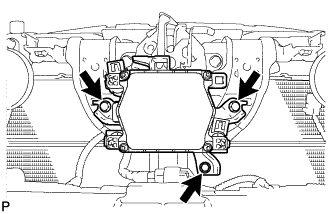 |
Remove the 3 bolts and the millimeter wave radar sensor assembly.
| 11. REMOVE HOOD LOCK ASSEMBLY (w/o Engine Hood Courtesy Switch) |
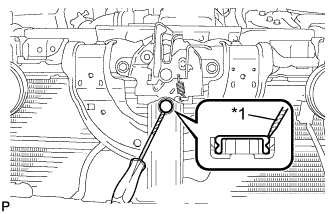 |
Using a screwdriver, remove the hood lock nut cap.
| *1 | Protective Tape |
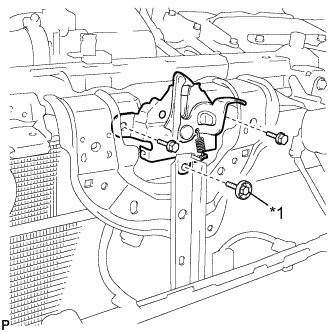 |
Remove the 2 bolts and hood lock bolt.
| *1 | Hood Lock Bolt |
for LHD:
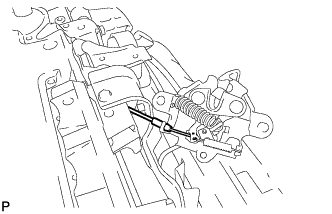 |
Disconnect the hood lock control cable and remove the hood lock assembly.
For RHD:
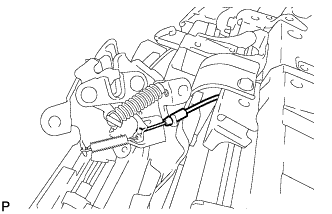 |
Disconnect the hood lock control cable and remove the hood lock assembly.
| 12. REMOVE HOOD LOCK ASSEMBLY (w/ Engine Hood Courtesy Switch) |
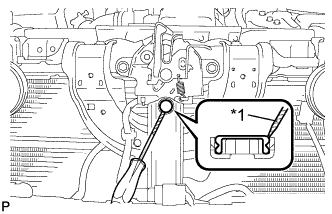 |
Using a screwdriver, remove the hood lock nut cap.
| *1 | Protective Tape |
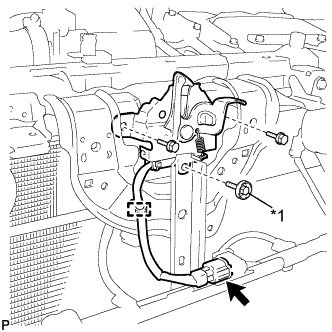 |
Disconnect the connector.
| *1 | Hood Lock Bolt |
Disengage the clamp.
Remove the 2 bolts and hood lock bolt.
for LHD:
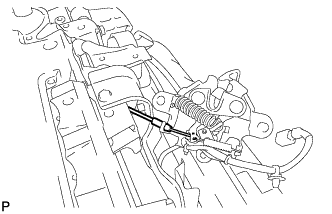 |
Disconnect the hood lock control cable and remove the hood lock assembly.
For RHD:
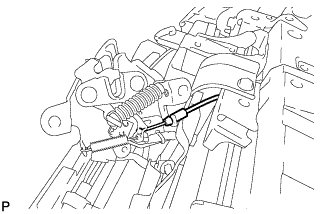 |
Disconnect the hood lock control cable and remove the hood lock assembly.
| 13. REMOVE COOL AIR INTAKE DUCT RETAINER SUB-ASSEMBLY |
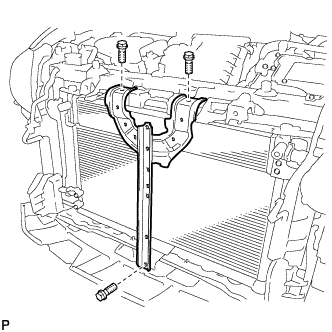 |
Remove the 3 bolts and cool air intake duct retainer sub-assembly.
| 14. REMOVE HIGH PITCHED HORN ASSEMBLY |
Disconnect the connector.
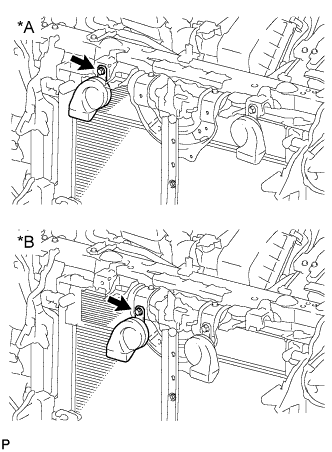 |
Remove the bolt and high pitched horn assembly.
| *A | for Outer Mounted Type |
| *B | for Inner Mounted Type |
| 15. REMOVE LOW PITCHED HORN ASSEMBLY |
Disconnect the connector.
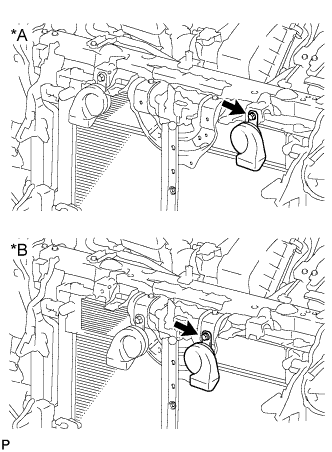 |
Remove the bolt and low pitched horn assembly.
| *A | for Outer Mounted Type |
| *B | for Inner Mounted Type |
| 16. REMOVE HOOD LOCK SUPPORT SUB-ASSEMBLY |
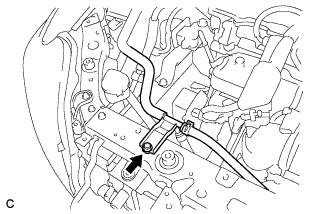 |
Remove the bolt and No. 2 water by-pass hose from the hood lock support sub-assembly.
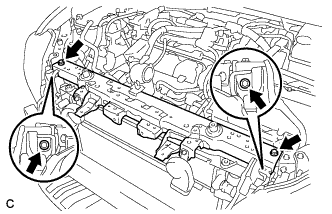 |
Remove the 4 bolts and hood lock support sub-assembly.
| 17. DISCONNECT COOLER REFRIGERANT DISCHARGE HOSE |
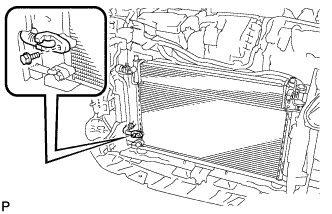 |
Remove the bolt and disconnect the cooler refrigerant discharge hose.
Remove the O-ring from the cooler refrigerant discharge hose.
| 18. DISCONNECT AIR CONDITIONING TUBE AND ACCESSORY ASSEMBLY |
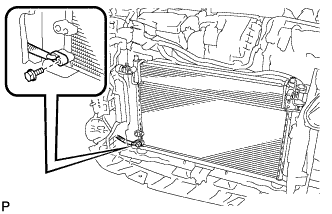 |
Remove the bolt and disconnect the air conditioning tube and accessory assembly.
Remove the O-ring from the air conditioning tube and accessory assembly.
| 19. DISCONNECT NO. 5 INVERTER COOLING HOSE |
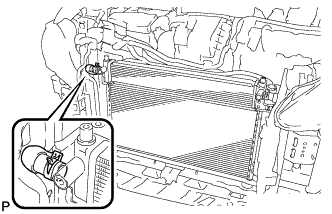 |
Using pliers, grip the claws of the clip and slide the clip to disconnect the No. 5 inverter cooling hose.
| 20. DISCONNECT NO. 1 INVERTER COOLING HOSE |
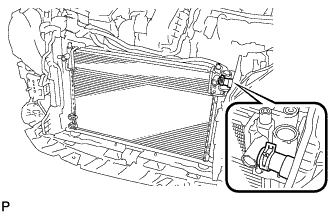 |
Using pliers, grip the claws of the clip and slide the clip to disconnect the No. 1 inverter cooling hose.
| 21. REMOVE NO. 1 INVERTER BRACKET |
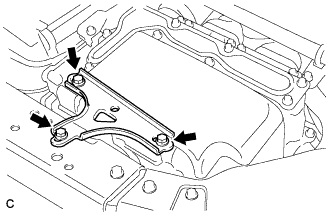 |
Remove the 3 bolts and No. 1 inverter bracket.
| 22. REMOVE NO. 2 FAN SHROUD |
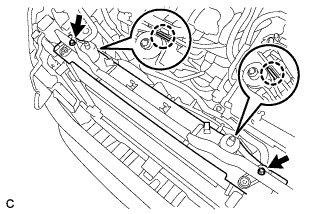 |
Remove the 2 bolts, 2 claws and No. 2 fan shroud.
| 23. REMOVE COOLER CONDENSER ASSEMBLY |
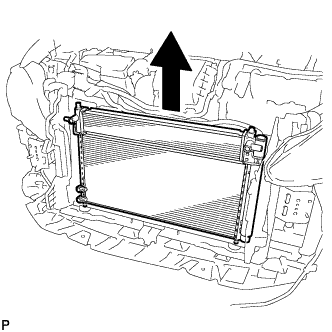 |
Remove the cooler condenser assembly with hybrid radiator assembly.
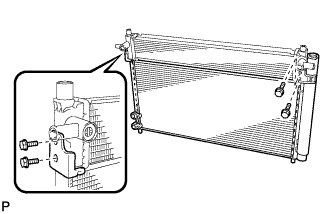 |
Remove the 4 bolts and cooler condenser assembly from the hybrid radiator assembly.
