FRONT SEAT ASSEMBLY (for Power Seat) > REASSEMBLY |
| 1. INSTALL SEPARATE TYPE FRONT SEATBACK SPRING ASSEMBLY |
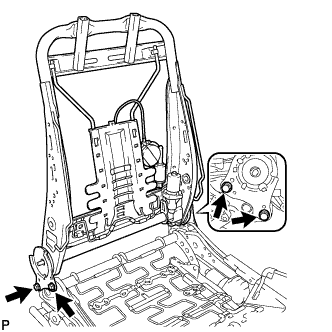 |
Install the separate type front seatback spring assembly with the 4 bolts.
| 2. INSTALL NO. 2 FRONT SEAT WIRE |
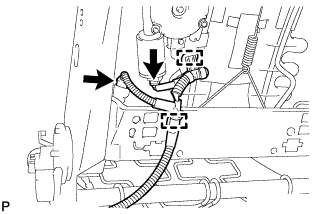 |
Engage the 2 clamps to install the No. 2 front seat wire.
Connect the 2 connectors.
| 3. INSTALL FRONT SEAT WIRE |
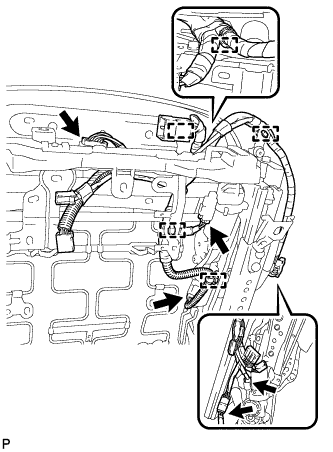 |
Engage the 5 clamps to install the front seat wire.
Connect the 5 connectors.
| 4. INSTALL SEAT HEATER CONTROL SUB-ASSEMBLY |
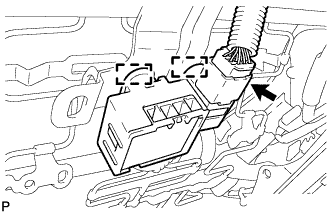 |
Engage the 2 clamps to install the seat heater control sub-assembly.
Connect the connector.
| 5. INSTALL SEAT POSITION AIRBAG SENSOR |
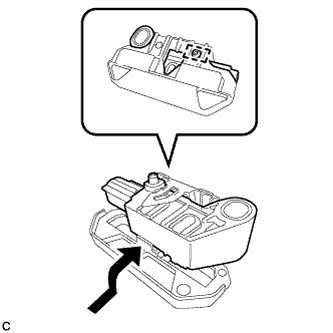 |
Install the seat position airbag sensor to the seat slide position sensor protector with the pin as shown in the illustration.
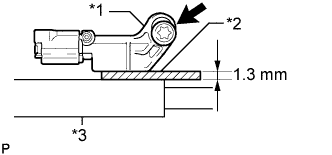 |
Using a 1.3 mm (0.0512 in.) feeler gauge, temporarily install the seat position airbag sensor with the "TORX" screw and nut.
| *1 | Seat Position Airbag Sensor |
| *2 | Feeler Gauge |
| *3 | Seat Rail |
Using a T30 "TORX" socket wrench, install the seat position airbag sensor with the "TORX" screw and nut.
Make sure that the clearance between the seat position airbag sensor and seat rail is between 0.6 mm (0.0236 in.) and 2.0 mm (0.0787 in.).
Connect the connector.
Install the wire harness to the 2 hooks.
Check that there is no looseness in the installation parts of the seat position airbag sensor.
| 6. INSTALL LOWER RECLINING ADJUSTER INSIDE COVER LH |
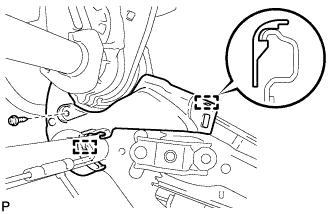 |
Engage the 2 guides.
Install the lower reclining adjuster inside cover LH with the screw.
| 7. INSTALL LOWER RECLINING ADJUSTER INSIDE COVER RH |
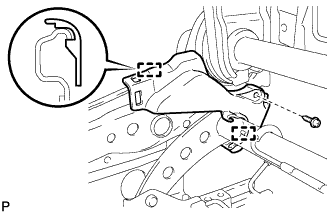 |
Engage the 2 guides.
Install the lower reclining adjuster inside cover RH with the screw.
| 8. INSTALL FRONT SEAT LOWER CUSHION SHIELD LH |
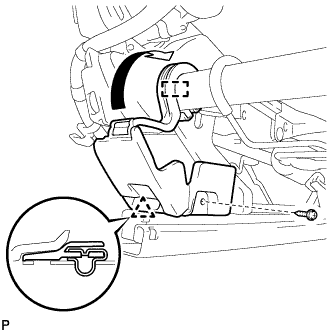 |
Engage the clip.
Engage the hook as shown in the illustration.
Install the front seat lower cushion shield LH with the screw.
| 9. INSTALL FRONT SEAT LOWER CUSHION SHIELD RH |
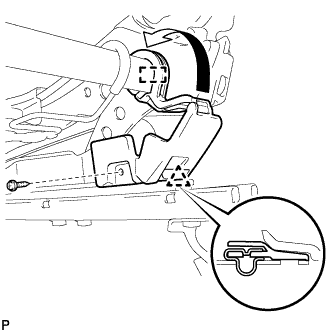 |
Engage the clip.
Engage the hook as shown in the illustration.
Install the front seat lower cushion shield RH with the screw.
| 10. INSTALL UPPER RECLINING ADJUSTER INSIDE COVER LH |
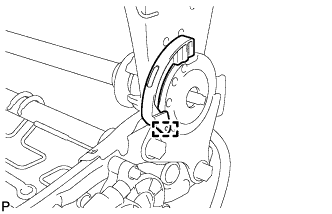 |
Engage the guide to install the upper reclining adjuster inside cover LH.
| 11. INSTALL UPPER RECLINING ADJUSTER INSIDE COVER RH |
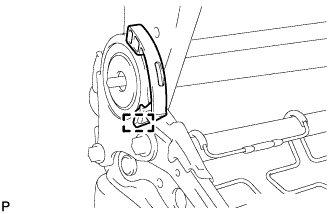 |
Engage the guide to install the upper reclining adjuster inside cover RH.
| 12. INSTALL FRONT SEAT AIRBAG ASSEMBLY |
| 13. INSTALL FRONT SEATBACK COVER |
Clean the installation surface of the separate type front seatback spring assembly.
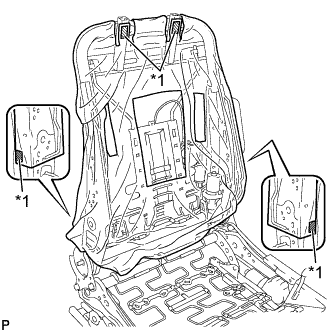 |
Remove the 4 pieces of release paper, and install the front seatback cover with the 4 pieces of double-sided tape.
| *1 | Double-sided Tape |
| 14. INSTALL FRONT SEAT CUSHION COVER |
Clean the installation surface of the separate type front seat cushion spring assembly.
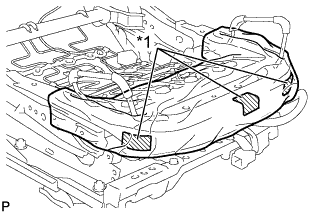 |
Remove the 3 pieces of release paper, and install the front seat cushion cover with the 3 pieces of double-sided tape.
| *1 | Double-sided Tape |
| 15. INSTALL SEPARATE TYPE FRONT SEATBACK COVER |
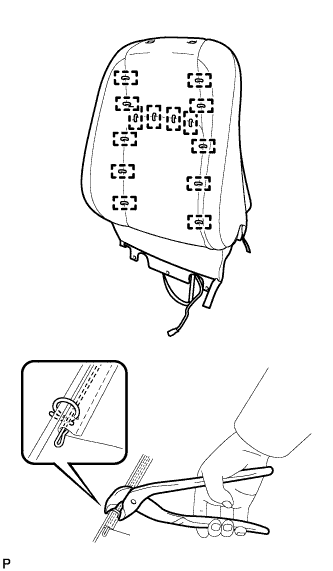 |
Using hog ring pliers, install the separate type front seatback cover to the separate type front seatback pad with 14 new hog rings.
| 16. INSTALL SEPARATE TYPE FRONT SEATBACK COVER WITH PAD |
Temporarily install the separate type front seatback cover with pad to the front seatback spring assembly.
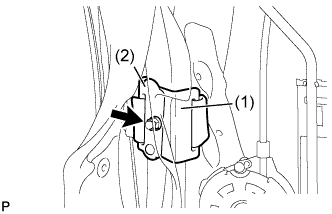 |
Attach the bracket of the separate type front seatback cover to the front seatback spring assembly in the order indicated in the illustration.
Install the separate type front seatback cover bracket with the nut.
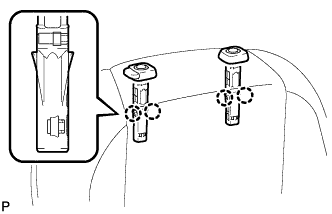 |
Engage the 4 claws to install the 2 front seat headrest supports.
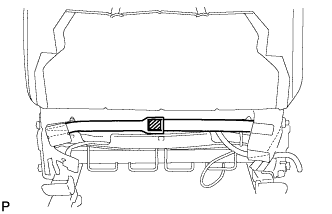 |
Engage the fastener.
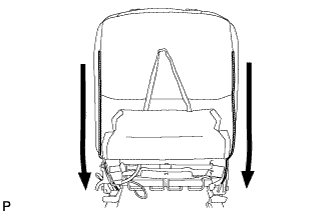 |
Close the 2 fasteners.
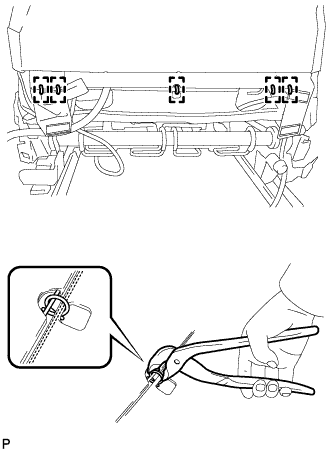 |
Using hog ring pliers, install 5 new hog rings.
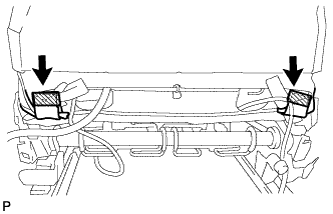 |
Engage the 2 fasteners.
| 17. INSTALL SEPARATE TYPE FRONT SEAT CUSHION COVER |
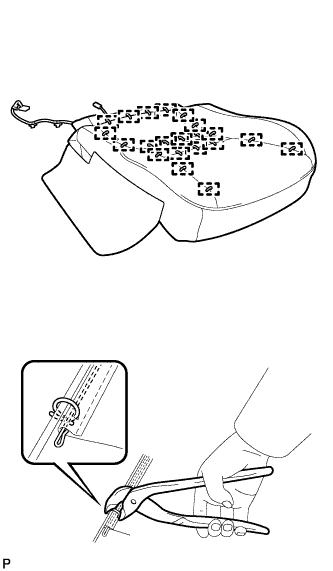 |
Using hog ring pliers, install 21 new hog rings.
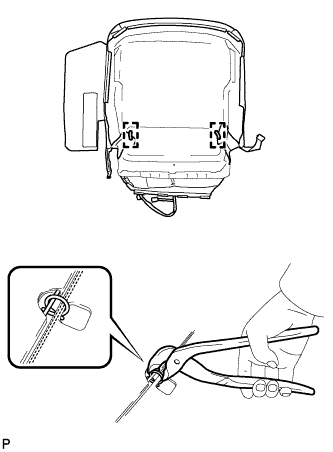 |
Using hog ring pliers, install the separate type front seat cushion cover to the separate type front seat cushion pad with 2 new hog rings.
| 18. INSTALL SEPARATE TYPE FRONT SEAT CUSHION COVER WITH PAD |
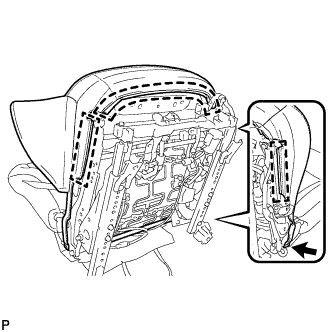 |
Engage each hook.
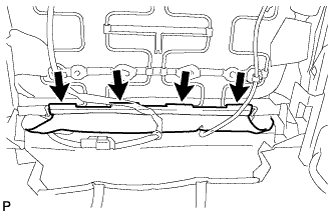 |
Engage the 4 hooks.
w/ Seat Heater System:
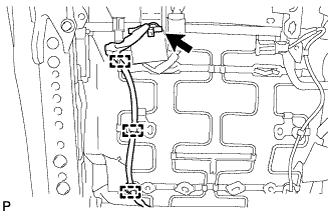 |
Connect the connector.
Engage the 3 clamps to connect the seat heater wire harness.
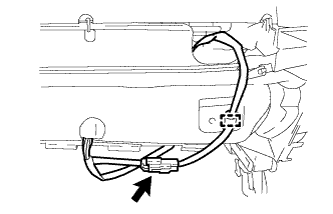 |
Engage the clamp to connect the seat heater wire harness.
Connect the connector.
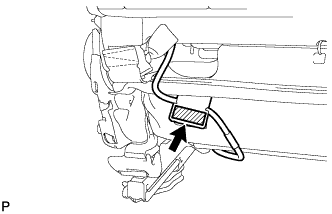 |
Engage the fastener to secure the side airbag wire harness.
| 19. INSTALL FRONT SEAT INNER CUSHION SHIELD |
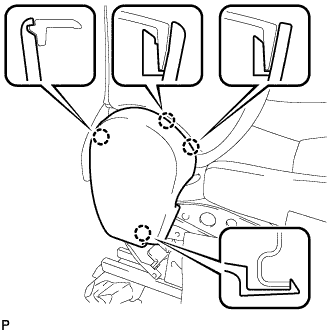 |
Engage the 4 claws to install the front seat inner cushion shield.
| 20. INSTALL LUMBAR SWITCH |
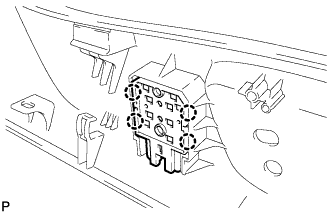 |
Engage the 4 claws to install the lumbar switch.
| 21. INSTALL FRONT POWER SEAT SWITCH |
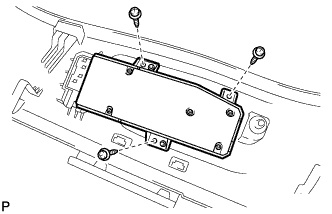 |
Install the front power seat switch with the 3 screws.
| 22. INSTALL FRONT SEAT CUSHION SHIELD |
w/o Seat Position Memory System:
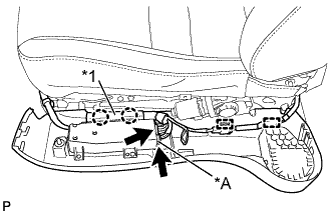 |
Connect the connector.
| *A | w/ Seat Position Memory System: |
| *1 | Wire Harness Cover |
w/ Seat Position Memory System:
Connect the 2 connectors.
Engage the 2 clamps.
Install the wire harness to the wire harness cover.
Engage the 2 claws to close the wire harness cover.
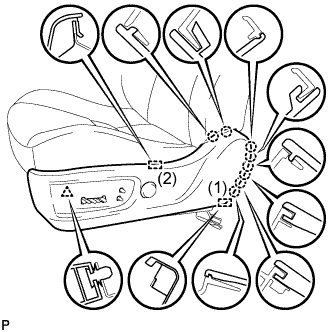 |
Engage the clip and guide (1).
Engage the guide (2) and 8 claws to install the front seat cushion shield.
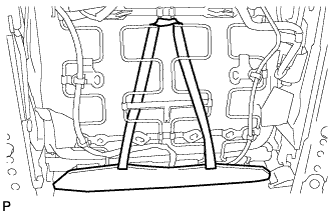 |
Connect the rubber band.
| 23. INSTALL FRONT INNER NO. 1 SEAT CUSHION SHIELD |
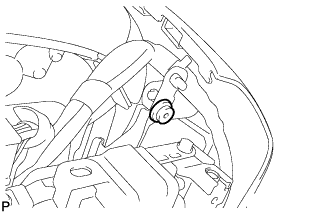 |
Install the clip.
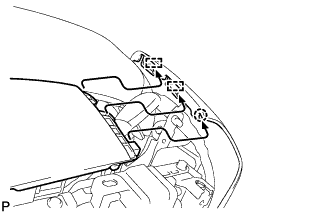 |
Engage the 2 guides and claw as shown in the illustration.
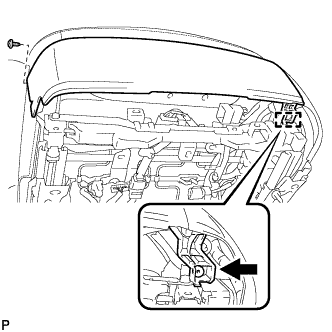 |
Engage the guide as shown in the illustration.
Install the front inner No. 1 seat cushion shield with the screw.
| 24. INSTALL RECLINING POWER SEAT SWITCH KNOB |
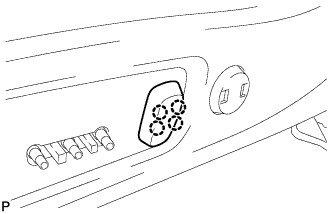 |
Engage the 4 claws to install the reclining power seat switch knob.
| 25. INSTALL SLIDE AND VERTICAL POWER SEAT SWITCH KNOB |
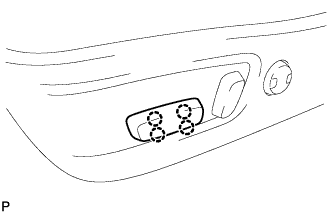 |
Engage the 4 claws to install the slide and vertical power seat switch knob.
| 26. INSTALL SEAT ADJUSTER COVER CAP |
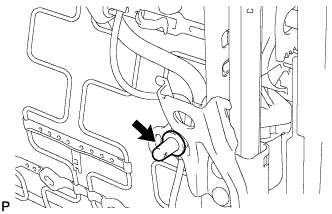 |
Install the seat adjuster cover cap.
| 27. INSTALL FRONT SEAT INNER BELT ASSEMBLY |
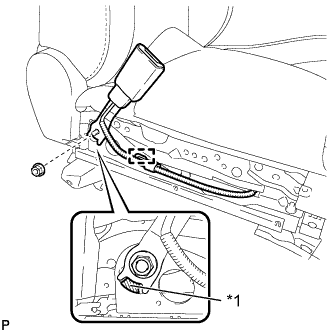 |
Install the front seat inner belt assembly with the nut.
| *1 | Protruding Part |
Engage the clamp.
Engage each clamp under the front seat assembly.
Connect each connector.
