BACK DOOR OUTSIDE GARNISH > INSTALLATION |
| 1. INSTALL SYMBOL EMBLEM |
Clean the vehicle body surface.
Using a heat light, heat the vehicle body surface.
Remove the double-sided tape from the vehicle body.
Wipe off any tape adhesive residue with cleaner.
Clean the symbol emblem. (If reusing the symbol emblem)
Using a heat light, heat the symbol emblem.
Remove the double-sided tape from the symbol emblem.
Wipe off any tape adhesive residue with cleaner.
Apply new double-sided tape to the symbol emblem.
Install the symbol emblem.
Using a heat light, heat the vehicle body and symbol emblem.
Remove the release paper from the symbol emblem.
Install the symbol emblem.
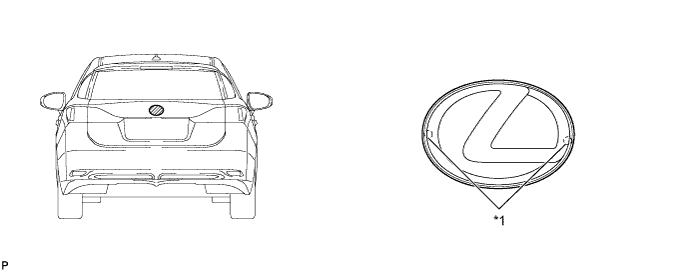
| *1 | Location Pin | - | - |
| 2. INSTALL BACK DOOR OUTSIDE GARNISH PROTECTOR |
Wipe off any tape adhesive residue with cleaner.
Remove the release paper from the back door outside garnish protector.
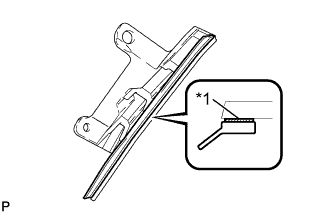 |
Install a new back door outside garnish protector as shown in the illustration.
| *1 | Double-sided Tape |
| 3. INSTALL BACK DOOR UPPER OUTSIDE GARNISH LH |
Clean the back door outside garnish sub-assembly surface.
Remove any double-sided tape from the luggage compartment door outside garnish sub-assembly.
Wipe off any tape adhesive residue with cleaner.
Install the back door upper outside garnish LH.
Remove the release paper from the back door upper outside garnish LH.
Install a new back door upper outside garnish LH as shown in the illustration.
Install the screw.
| 4. INSTALL BACK DOOR UPPER OUTSIDE GARNISH RH |
| 5. INSTALL BACK DOOR OUTSIDE GARNISH SUB-ASSEMBLY |
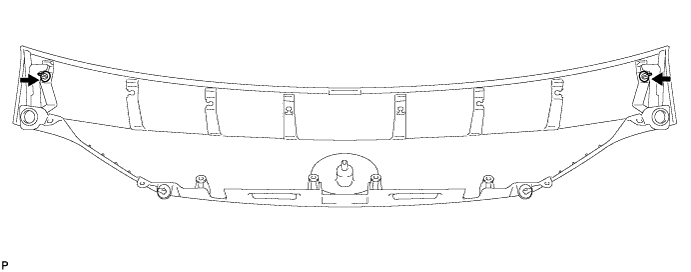
Install the new 2 clips (back door outside garnish clips) as shown in the illustration.
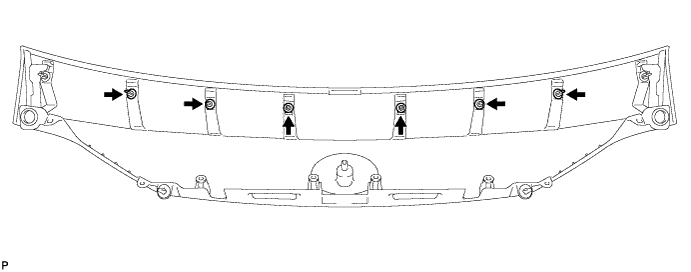
Install the new 6 clips (No. 2 back door outside garnish clips) as shown in the illustration.
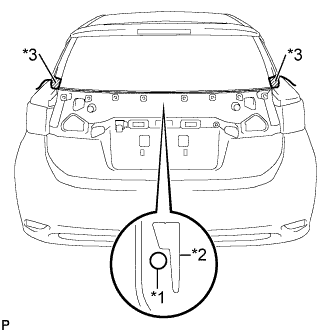 |
Pass a string behind the back window lower moulding and tape both ends with masking tape as shown in the illustration.
| *1 | String |
| *2 | Back Window Lower Moulding |
| *3 | Masking Tape |
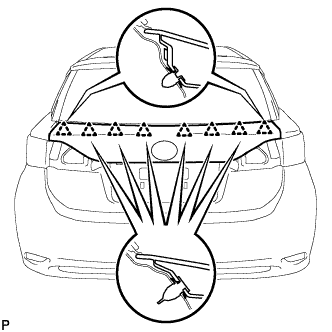 |
Engage the 8 clips to install the back door outside garnish sub-assembly.
Apply soapy water to the back window lower moulding.
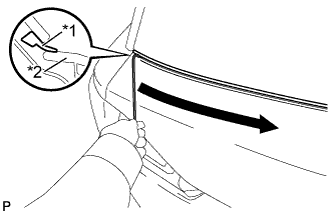 |
Pull out the string slowly, starting from one end and working to the other end, as shown in the illustration.
| *1 | Back Window Lower Moulding |
| *2 | Back Door Outside Garnish Sub-assembly |
Check that the back window lower moulding is not caught behind the back door outside garnish sub-assembly.
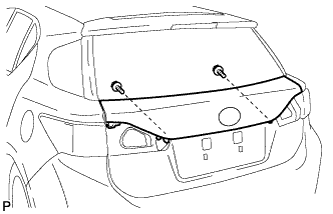 |
Install the 2 screws.
| 6. INSTALL BACK DOOR OPENER SWITCH ASSEMBLY |
Install the back door opener switch assembly with the 2 bolts.
Connect the connector.
| 7. INSTALL REAR LIGHT ASSEMBLY LH |
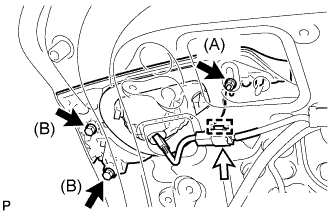 |
Install the rear light assembly with the 3 nuts.
Connect the connector and engage the clamp.
| 8. INSTALL REAR LIGHT ASSEMBLY RH |
| 9. INSTALL BACK DOOR TRIM BOARD ASSEMBLY |
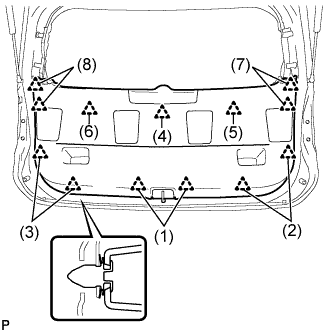 |
Engage the 13 clips to install the back door trim board assembly.
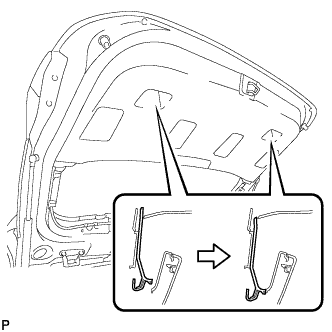 |
Slide the handle plate of the back door trim board to engage it.
| 10. INSTALL BACK DOOR SIDE GARNISH LH |
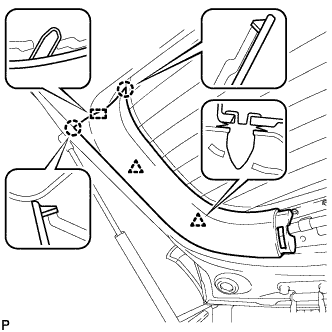 |
Engage the 2 clips, 2 claws and guide to install the back door side garnish LH.
| 11. INSTALL BACK DOOR SIDE GARNISH RH |
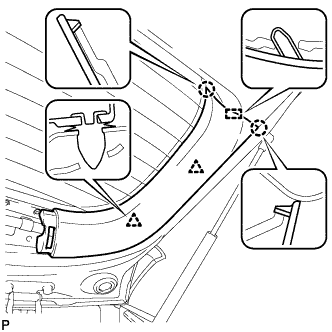 |
Engage the 2 clips, 2 claws and guide to install the back door side garnish RH.
| 12. INSTALL UPPER BACK DOOR TRIM PANEL ASSEMBLY |
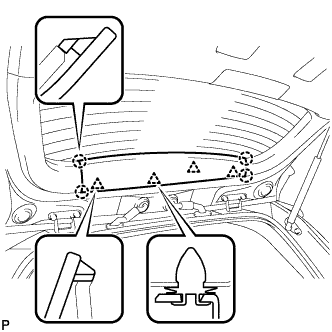 |
Engage the 4 clips and 4 claws to install the upper back door trim panel assembly.
