BACK DOOR OUTSIDE GARNISH > REMOVAL |
| 1. REMOVE UPPER BACK DOOR TRIM PANEL ASSEMBLY |
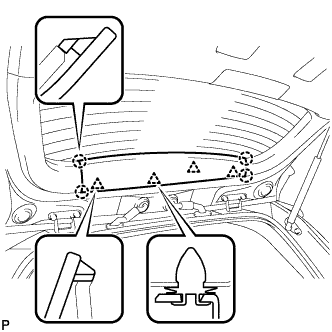 |
Using a moulding remover, disengage the 4 clips and 4 claws, and remove the upper back door trim panel assembly.
| 2. REMOVE BACK DOOR SIDE GARNISH LH |
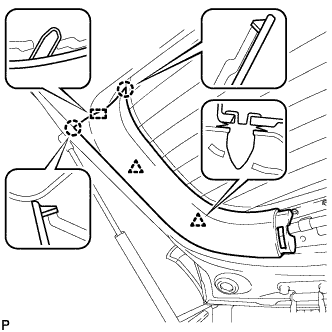 |
Disengage the 2 clips, 2 claws and guide, and remove the back door side garnish LH.
| 3. REMOVE BACK DOOR SIDE GARNISH RH |
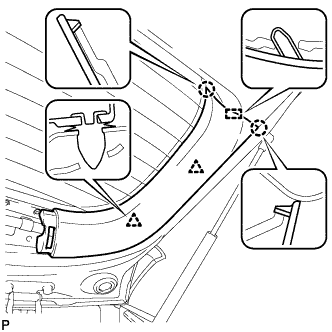 |
Disengage the 2 clips, 2 claws and guide, and remove the back door side garnish RH.
| 4. REMOVE BACK DOOR TRIM BOARD ASSEMBLY |
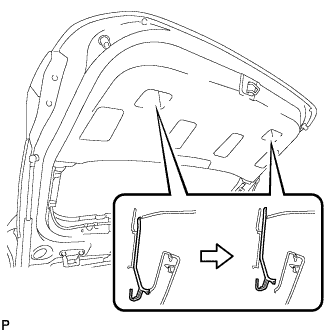 |
Using a screwdriver with its tip wrapped in protective tape, slide the handle plate of the back door trim board to disengage it.
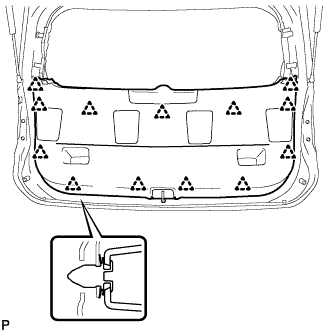 |
Disengage the 13 clips and remove the back door trim board assembly.
| 5. REMOVE REAR LIGHT ASSEMBLY LH |
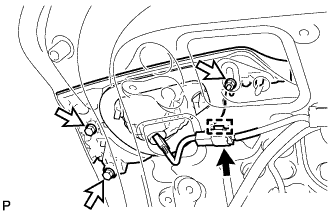 |
Disengage the clamp and disconnect the connector.
Remove the 3 nuts and rear light assembly.
| 6. REMOVE REAR LIGHT ASSEMBLY RH |
| 7. REMOVE BACK DOOR OPENER SWITCH ASSEMBLY |
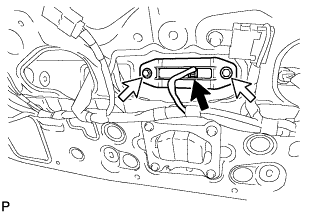 |
Disconnect the connector.
Remove the 2 bolts and back door opener switch assembly.
| 8. REMOVE BACK DOOR OUTSIDE GARNISH SUB-ASSEMBLY |
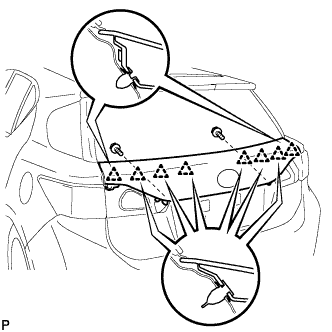 |
Remove the 2 screws.
Disengage the 8 clips and remove the back door outside garnish sub-assembly.
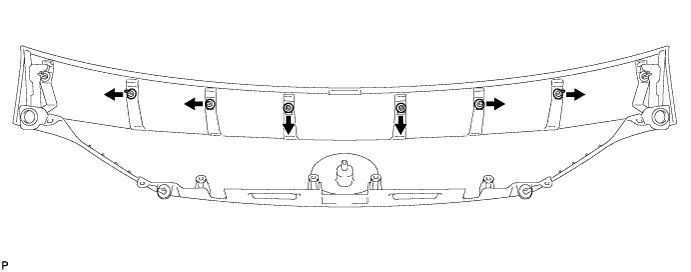
Remove the 6 clips (No. 2 back door outside garnish clips) as shown in the illustration.
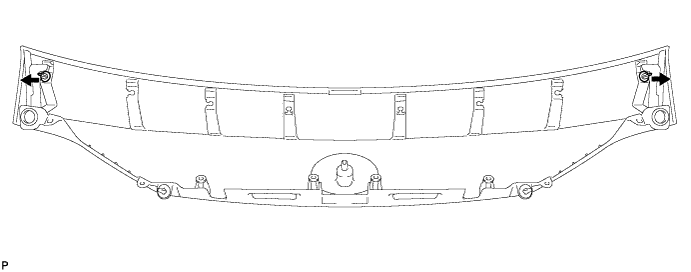
Remove the 2 clips (back door outside garnish clips) as shown in the illustration.
| 9. REMOVE BACK DOOR UPPER OUTSIDE GARNISH LH |
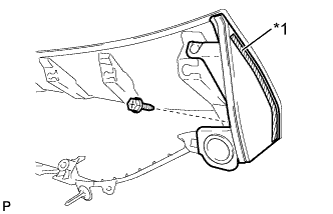 |
Remove the screw and remove the back door upper outside garnish LH.
| *1 | Double-sided Tape |
| 10. REMOVE BACK DOOR UPPER OUTSIDE GARNISH RH |
| 11. REMOVE BACK DOOR OUTSIDE GARNISH PROTECTOR |
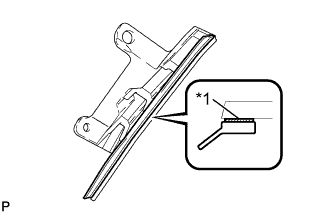 |
Remove the back door outside garnish protector.
| *1 | Double-sided Tape |
| 12. REMOVE SYMBOL EMBLEM |
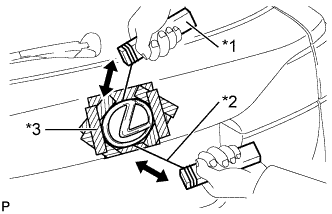 |
Put protective tape around the symbol emblem.
| *1 | Wooden Block |
| *2 | Piano Wire |
| *3 | Protective Tape |
Insert a piano wire between the vehicle body and symbol emblem.
Tie objects that can serve as handles (for example, wooden blocks) to both wire ends.
Pull the piano wire and scrape off the double-sided tape that holds the symbol emblem to the vehicle body.
Remove the symbol emblem.
