FRONT BLOWER MOTOR > REMOVAL |
| 1. REMOVE NO. 2 INSTRUMENT PANEL UNDER COVER SUB-ASSEMBLY (for LHD) |
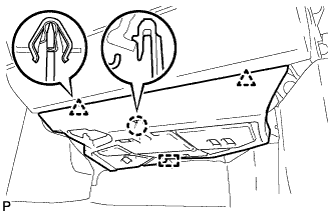 |
Disengage the 2 clips, claw and guide.
Disengage the clamp.
Disconnect the connector and remove the No. 2 instrument panel under cover sub-assembly.
| 2. REMOVE NO. 2 INSTRUMENT PANEL UNDER COVER SUB-ASSEMBLY (for RHD) |
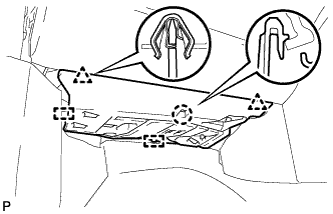 |
Disengage the 2 clips, claw and 2 guides.
Disengage the clamp.
Disconnect the connector and remove the No. 2 instrument panel under cover sub-assembly.
| 3. REMOVE FRONT BLOWER MOTOR SUB-ASSEMBLY (w/o PTC Heater) |
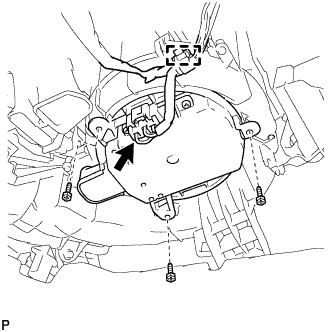 |
Disengage the clamp and disconnect the connector.
Remove the 3 screws and front blower motor sub-assembly.
| 4. REMOVE FRONT BLOWER MOTOR SUB-ASSEMBLY (w/ PTC Heater) |
Remove the felt tape to the extent that the screw can be removed.
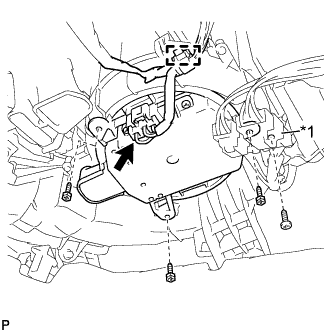 |
Remove the quick heater connector screw.
| *1 | Quick Heater Connector |
Disengage the clamp and disconnect the connector.
Remove the 3 screws and front blower motor sub-assembly.
