EXHAUST HEAT RECIRCULATION SYSTEM > ON-VEHICLE INSPECTION |
| 1. INSPECT FRONT EXHAUST PIPE ASSEMBLY |
Inspect the exhaust flow control valve operation.
Remove the exhaust pipe gas control actuator (Click here).
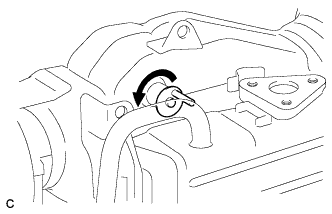 |
Using a screwdriver, move the exhaust flow control valve towards the bottom of the vehicle. Check that the valve moves smoothly.
Install the exhaust pipe gas control actuator (Click here).
Inspect the exhaust pipe gas control actuator.
Connect the intelligent tester to the DLC3.
Turn the power switch on (IG).
Turn the tester on.
Enter the following menus: Powertrain / Engine and ECT / Data List / Coolant Temp.
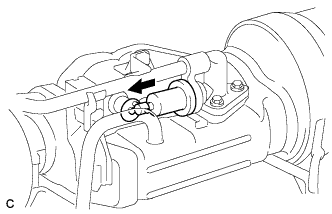 |
While checking the engine coolant temperature with the intelligent tester, check the operation of the exhaust pipe gas control actuator rod when the temperature rises.
| Condition | Rod Operation |
| Cold (below approx. 71°C (160°F)) → Warmed up (approx. 80°C (176°F) or higher) | Rod gradually extends smoothly as the temperature rises |
Check for any cracks or damage on the exhaust pipe gas control actuator rod.
| 2. INSPECT FOR ENGINE COOLANT LEAK FROM FRONT EXHAUST PIPE ASSEMBLY |
Turn the power switch off. Check for engine coolant leaks from the front exhaust pipe assembly and the heater hose around the engine coolant temperature sensor.
Add engine coolant to the reserve tank and install a radiator cap tester.
Pump the cap tester to 118 kPa (1.2 kgf/cm2, 17 psi), and then check that the pressure does not drop.
If the reading drops, check for leaks from the front exhaust pipe assembly and the heater hose around the engine coolant temperature sensor.
