REAR UPPER ARM > REMOVAL |
| 1. REMOVE REAR WHEEL |
| 2. REMOVE REAR SUSPENSION ARM COVER |
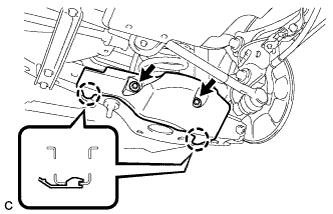 |
Remove the 2 bolts and disengage the 2 claws to remove the rear suspension arm cover from the rear No. 2 suspension arm assembly.
| 3. REMOVE REAR FLOOR SIDE MEMBER COVER (w/ Floor Under Cover) |
for LH Side:
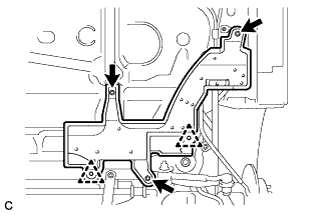 |
Remove the 2 bolts, nut and clip.
Disengage the clip and remove the rear floor side member cover LH.
for RH Side:
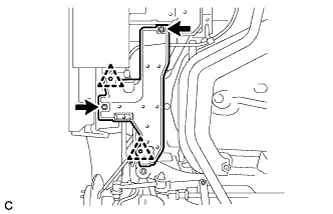 |
Remove the bolt and nut.
Disengage the 2 clips and remove the rear floor side member cover RH.
| 4. REMOVE REAR UPPER CONTROL ARM ASSEMBLY |
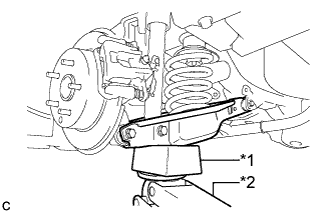 |
Use a jack and wooden block to keep the rear No. 2 suspension arm assembly level.
| *1 | Wooden Block |
| *2 | Jack |
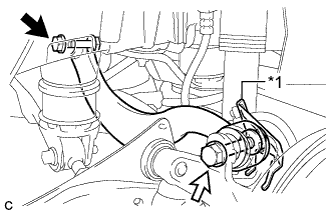 |
Remove the bolt (B), nut and No. 2 flexible hose bracket, and then separate the rear upper control arm assembly from the rear axle assembly.
| *1 | No. 2 Flexible Hose Bracket |
 | Bolt (A) |
 | Bolt (B) |
Remove the bolt (A), nut and rear upper control arm assembly from the rear suspension member sub-assembly.
