REMOTE TOUCH > INSTALLATION |
| 1. INSTALL REMOTE TOUCH |
Engage the 6 claws to install the remote touch.
| 2. INSTALL UPPER CONSOLE PANEL SUB-ASSEMBLY |
Connect each connector.
Engage the clamp.
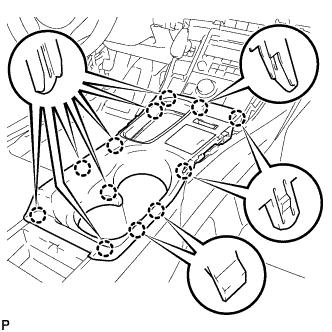 |
Engage the 12 claws to install the upper console panel sub-assembly.
Close the console compartment door.
| 3. INSTALL UPPER NO. 1 CONSOLE PANEL GARNISH |
Engage the 3 guides, clip and 4 claws to install the upper No. 1 console panel garnish.
| 4. INSTALL UPPER NO. 2 CONSOLE PANEL GARNISH |
Engage the 2 guides, clip and 5 claws to install the upper No. 2 console panel garnish.
| 5. INSTALL LOWER CENTER INSTRUMENT PANEL FINISH PANEL |
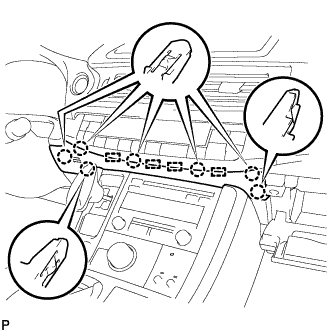 |
Engage the 4 guides and 7 claws to install the lower center instrument panel finish panel.
Close the glove compartment door.
| 6. ADJUST CLOCK |
