INTEGRATION RELAY > REMOVAL |
| 1. PRECAUTION |
| 2. REMOVE REAR NO. 2 FLOOR BOARD |
Remove the rear No. 2 floor board.
| 3. REMOVE REAR DECK FLOOR BOX |
Remove the rear deck floor box.
| 4. REMOVE REAR NO. 3 FLOOR BOARD |
Remove the rear No. 3 floor board.
| 5. REMOVE DECK FLOOR BOX RH |
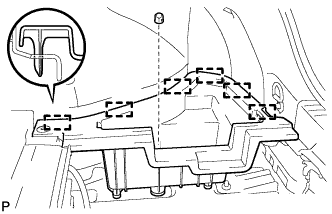 |
Remove the clip.
Disengage the 6 guides and remove the deck floor box RH.
| 6. REMOVE REAR FLOOR BOARD UPPER NO. 3 PLATE |
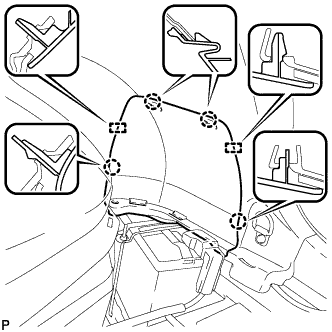 |
Disengage the 4 claws and 2 guides, and remove the rear floor board upper No. 3 plate.
| 7. DISCONNECT CABLE FROM NEGATIVE BATTERY TERMINAL |
| 8. REMOVE NO. 1 RELAY BLOCK COVER |
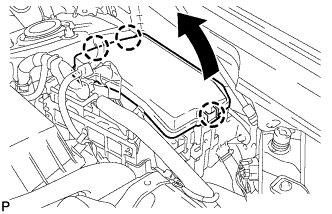 |
Disengage the 3 claws and remove the No. 1 relay block cover as shown in the illustration.
| 9. REMOVE NO. 1 INTEGRATION RELAY |
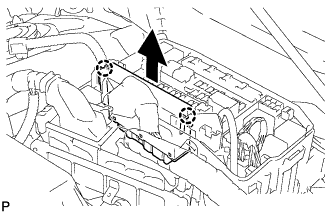 |
Disengage the 2 claws and pull up the No. 1 integration relay as shown in the illustration.
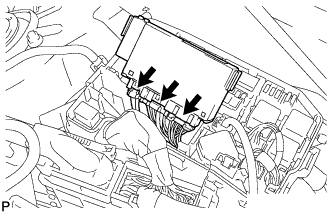 |
Disconnect the 3 connectors and remove the No. 1 integration relay.
