PARKING ASSIST MONITOR SYSTEM > DIAGNOSIS SYSTEM

for Preparation Click here


PARKING ASSIST MONITOR DIAGNOSIS SYSTEM
  1. For parking assist monitor system diagnosis, signals received by the parking assist ECU can be checked and the parking assist monitor system can be calibrated, adjusted and checked using the multi-display.

    NOTICE:
    Depending on the parts that are replaced or operations that are performed during vehicle inspection or maintenance, calibration of other systems as well as the parking assist monitor system may be needed (Click here).

    HINT:
    The displayed screens and items may differ depending on vehicle specifications.


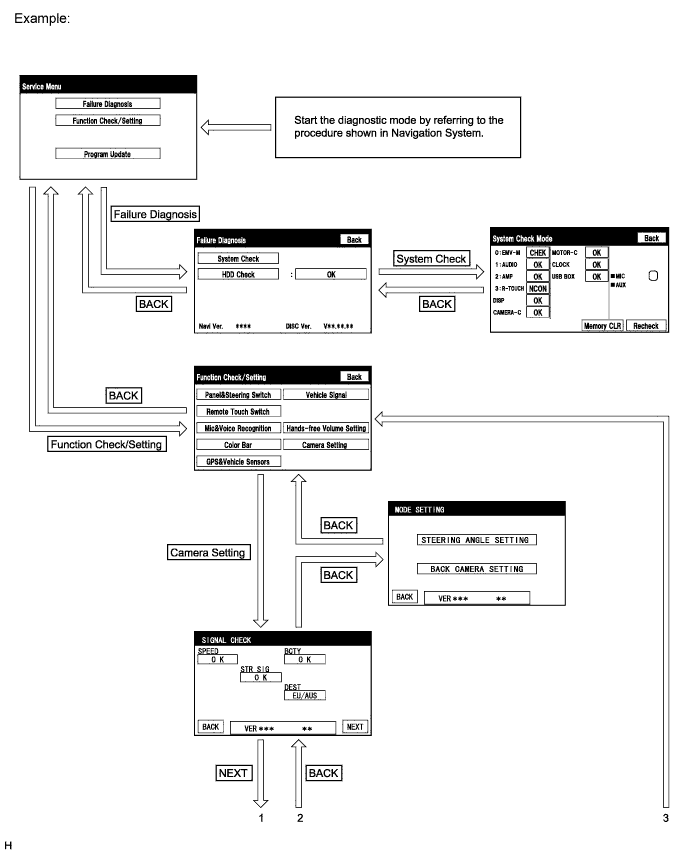
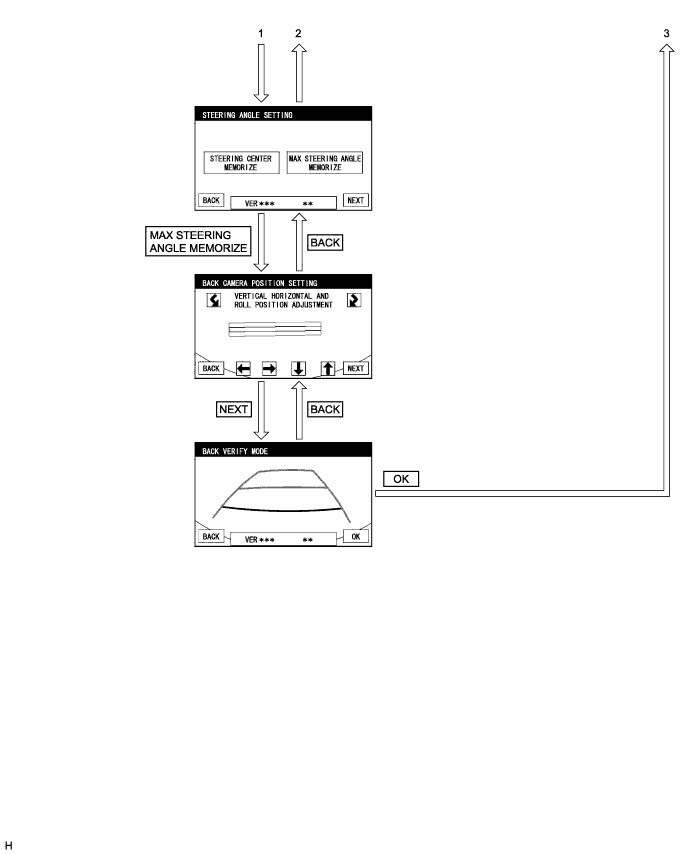
DIAGNOSIS SCREEN TRANSITION (during parking assist ECU initialization)

E222385E01


E222368


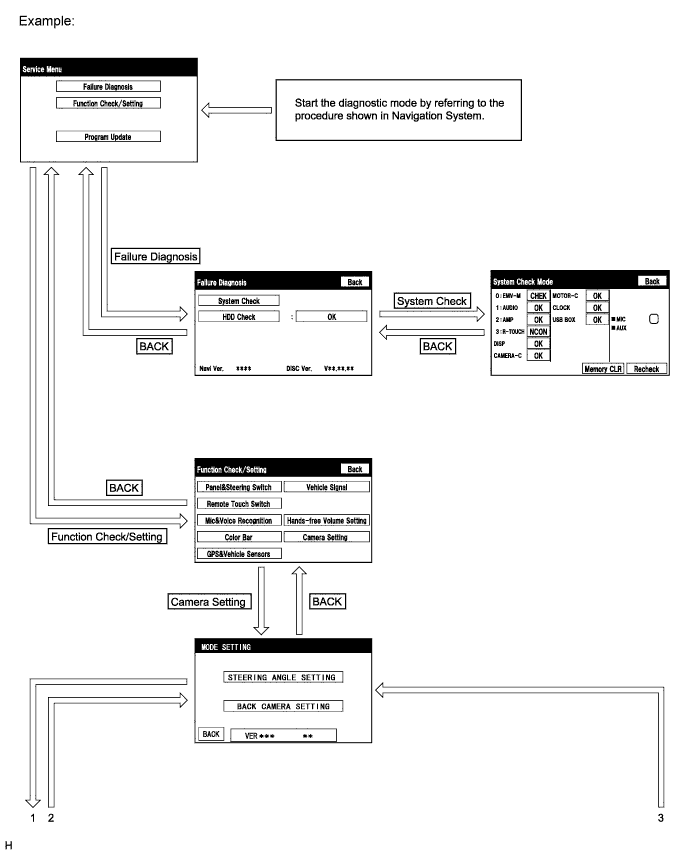
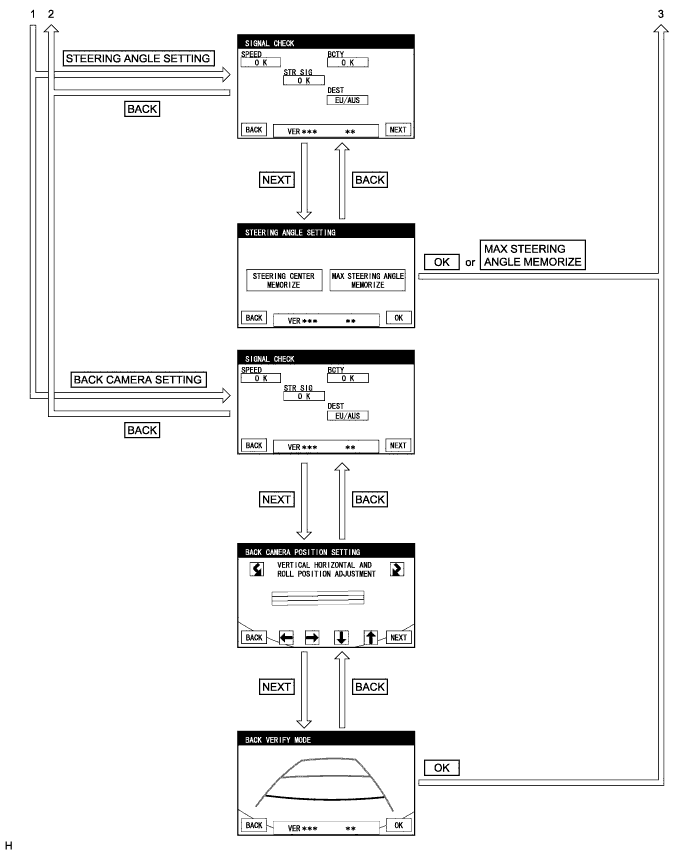
DIAGNOSIS SCREEN TRANSITION (after parking assist ECU initialization)

E222369E01


E222386


DIAGNOSTIC MODE
  1. Start diagnostic mode (Click herefor DVD) (Click here for HDD).
  2. Failure diagnosis (Click herefor DVD) (Click here for HDD).


  3. E222976
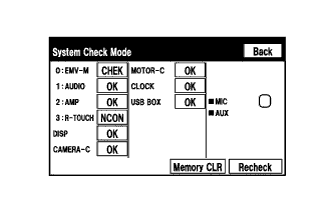
  4. System check (check using the System Check Mode screen) (Click herefor DVD) (Click here for HDD).

  5. Finish diagnostic mode (Click herefor DVD) (Click here for HDD).


SIGNAL CHECK (parking assist ECU input signals)


  1. Start diagnostic mode (Click herefor DVD) (Click here for HDD).


      E222372E01
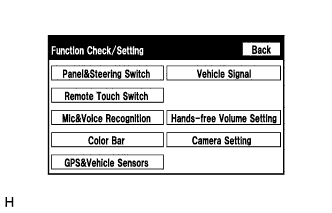
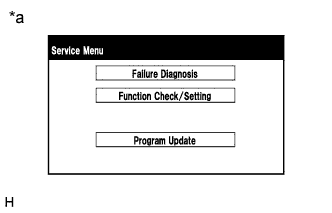
    1. Select "Function Check/Setting" on the Service Menu screen to display the Function Check/Setting screen.

      HINT:
      Some items are not displayed depending on the country.

      Test in Illustration 
      *a
      Example


    2. E222373
    3. Select "Camera Setting" on the Function Check/Setting screen.

      HINT:
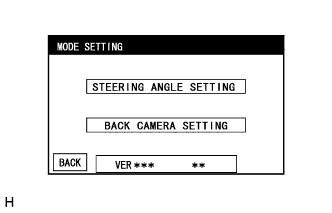
      After "Camera Setting" is selected, the screen transitions differ depending on whether initialization of the parking assist ECU was performed after parking assist ECU replacement.
      Parking Assist ECU Initialization
      Screen Transition
      Not performed
      SIGNAL CHECK screen
      Performed
      MODE SETTING screen


    4. E222374
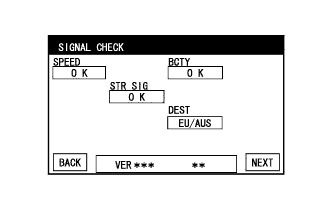
    5. When the screen changes to the MODE SETTING screen, select "BACK CAMERA SETTING" to display the SIGNAL CHECK screen.
      HINT:
      To select a grayed out item, select and hold the item for 2 seconds or more.


  2. E222384
  3. SIGNAL CHECK

    1. On the SIGNAL CHECK screen, it is possible to inspect the state of signals sent to the parking assist ECU and check the settings.

      Item
      Inspection Detail
      Note
      SPEED
      Speed signal input
      When "CHK" (red) is displayed, selecting "NEXT" will not change to the next screen.
      BCTY
      Back door courtesy light switch signal input
      STR SIG
      Steering angle sensor signal input
      DEST
      Destination information signal input

      HINT:
      1. When "CHK" (red) is displayed, perform inspections based on the result of the following inspections.
      2. If performing the adjustment after proceeding to the next screen, confirm that all items display "OK" (blue) before selecting "NEXT".

  4. SPEED inspection

    HINT:
    If "CHK" (red) is displayed for "SPEED", check for DTCs and perform troubleshooting based on the output DTCs (Click here).

  5. BCTY inspection

    HINT:
    If "CHK" (red) is displayed for "BCTY", check for DTCs and perform troubleshooting based on the output DTCs (Click here).

  6. STR SIG inspection

    HINT:
    If "CHK" (red) is displayed for "STR SIG", check for DTCs and perform troubleshooting based on the output DTCs (Click here).

  7. DEST inspection

    HINT:
    If "CHK" (red) is displayed for "DEST", check for DTCs and perform troubleshooting based on the output DTCs (Click here).

  8. Finish diagnostic mode (Click herefor DVD) (Click here for HDD).


CALIBRATION WHEN SERVICING VEHICLE

NOTICE:
Depending on the parts that are replaced or operations that are performed during vehicle inspection or maintenance, calibration of other systems as well as the parking assist monitor system may be needed (Click here).


STEERING ANGLE SETTING (after parking assist ECU is initialized)

HINT:
If the vehicle width extension lines and predicted path lines are not aligned when the steering wheel is centered, or if the predicted path line does not move before the steering wheel is fully turned to either the left or right, perform STEERING ANGLE SETTING.

  1. Center the steering wheel and stop the vehicle.


  2. Start diagnostic mode (Click herefor DVD) (Click here for HDD).

    NOTICE:
    The following must be carried out with the hybrid system started. Apply the parking brake, depress the brake pedal, push the P position switch, and ensure that the vehicle is not moving.


      E222372E01
    1. Select "Function Check/Setting" on the Service Menu screen.

      HINT:
      Some items are not displayed depending on the country.

      Test in Illustration 
      *a
      Example


    2. E222373
    3. Select "Camera Setting" on the Function Check/Setting screen.


    4. E222374
    5. Select "STEERING ANGLE SETTING" on the MODE SETTING screen.

      HINT:
      To select a grayed out item, select and hold the item for 2 seconds or more.


    6. E222384
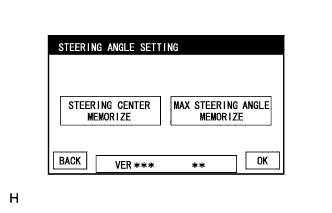
    7. Select "NEXT" on the SIGNAL CHECK screen to display the STEERING ANGLE SETTING screen.
      NOTICE:
      1. When "CHK" (red) is displayed for any items on the SIGNAL CHECK screen, selecting "NEXT" will not change the screen to the STEERING ANGLE SETTING screen.
      2. When "CHK" is displayed for any items on the SIGNAL CHECK screen, perform inspections using the SIGNAL CHECK screen.


  3. E180084
  4. STEERING ANGLE SETTING

    1. Check that the steering wheel is centered (approximately +/- 5 degrees or less) and select "STEERING CENTER MEMORIZE".

    2. After the centered steering position is memorized, turn the steering wheel to the left and then to the right full lock positions and select "MAX STEERING ANGLE MEMORIZE" or "OK".

      HINT:
      It is also possible to start by initially turning the steering wheel to the right side.

    3. Select "MAX STEERING ANGLE MEMORIZE" or "OK" to store the steering angle adjustment value and change the screen to the MODE SETTING screen.

      HINT:
      1. When "MAX STEERING ANGLE MEMORIZE" or "OK" is selected, a beep will sound to confirm that the steering angle adjustment values have been stored.
      2. The adjustment values will not be stored unless "MAX STEERING ANGLE MEMORIZE" or "OK" is selected.
      3. When "BACK" is selected, the screen changes to SIGNAL CHECK without storing the set values.
      4. If the steering angle settings have not been adjusted, selecting "MAX STEERING ANGLE MEMORIZE" or "OK" will not cause the adjustment values to be stored.
      5. Even if no DTCs are detected, selecting "MAX STEERING ANGLE MEMORIZE" or "OK" may not cause the adjustment value to be stored if the steering angle sensor (spiral with sensor cable assembly) is malfunctioning.
      6. If selecting "MAX STEERING ANGLE MEMORIZE" or "OK" does not cause the adjustment value to be stored after adjusting the steering angle, replace the spiral with sensor cable sub-assembly (Click here).

  5. Finish diagnostic mode (Click herefor DVD) (Click here for HDD).

  6. Confirm steering angle adjustment.

    HINT:
    If the steering angle has been adjusted, confirm the steering angle adjustment on the parking assist monitor screen after finishing diagnosis mode.


    1. Check on the parking assist screen that the predicted path line moves until the steering wheel is fully turned to either the left or right.

      HINT:
      If the predicted path line stops moving before the steering wheel is fully turned to either the left or right, the steering angle adjustment values have not been stored correctly. In this case, perform "STEERING CENTER MEMORIZE" and "MAX STEERING ANGLE MEMORIZE" again.