 |
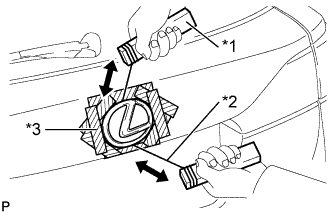
Put protective tape around the symbol emblem.
| *1 | Wooden Block |
| *2 | Piano Wire |
| *3 | Protective Tape |
NAME PLATE > REMOVAL |
| Item | Temperature |
| Vehicle Body | 40 to 60°C (104 to 140°F) |
| Name Plate or Emblem | 20 to 30°C (68 to 86°F) |
| 1. REMOVE SYMBOL EMBLEM |
|
Put protective tape around the symbol emblem.
| *1 | Wooden Block |
| *2 | Piano Wire |
| *3 | Protective Tape |
Insert a piano wire between the vehicle body and symbol emblem.
Tie objects that can serve as handles (for example, wooden blocks) to both wire ends.
Pull the piano wire and scrape off the double-sided tape that holds the symbol emblem to the vehicle body.
Remove the symbol emblem.
| 2. REMOVE NO. 1 BACK DOOR NAME PLATE |
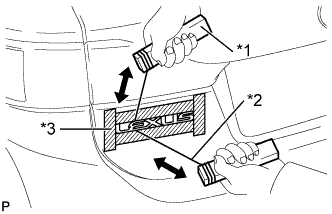 |
Put protective tape around the No. 1 back door name plate.
| *1 | Wooden Block |
| *2 | Piano Wire |
| *3 | Protective Tape |
Insert a piano wire between the vehicle body and No. 1 back door name plate.
Tie objects that can serve as handles (for example, wooden blocks) to both wire ends.
Pull the piano wire and scrape off the double-sided tape that holds the No. 1 back door name plate to the vehicle body.
Remove the No. 1 back door name plate.
| 3. REMOVE NO. 2 BACK DOOR NAME PLATE |
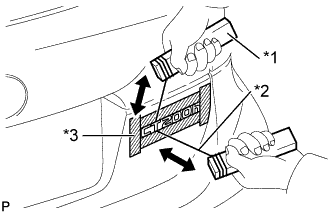 |
Put protective tape around the No. 2 back door name plate.
| *1 | Wooden Block |
| *2 | Piano Wire |
| *3 | Protective Tape |
Insert a piano wire between the vehicle body and No. 2 back door name plate.
Tie objects that can serve as handles (for example, wooden blocks) to both wire ends.
Pull the piano wire and scrape off the double-sided tape that holds the No. 2 back door name plate to the vehicle body.
Remove the No. 2 back door name plate.
| 4. REMOVE BODY SIDE NAME PLATE |
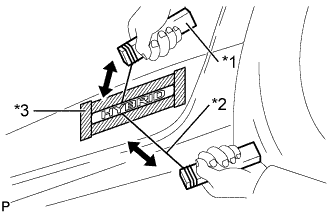 |
Put protective tape around the body side name plate.
| *1 | Wooden Block |
| *2 | Piano Wire |
| *3 | Protective Tape |
Insert a piano wire between the vehicle body and body side name plate.
Tie objects that can serve as handles (for example, wooden blocks) to both wire ends.
Pull the piano wire and scrape off the double-sided tape that holds the body side name plate to the vehicle body.
Remove the body side name plate.
| 5. REMOVE NO. 2 FRONT FENDER NAME PLATE |
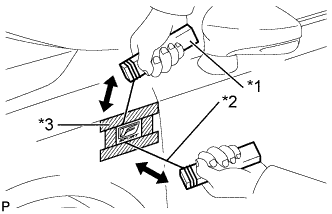 |
Put protective tape around the No. 2 front fender name plate.
| *1 | Wooden Block |
| *2 | Piano Wire |
| *3 | Protective Tape |
Insert a piano wire between the vehicle body and No. 2 front fender name plate.
Tie objects that can serve as handles (for example, wooden blocks) to both wire ends.
Pull the piano wire and scrape off the double-sided tape that holds the No. 2 front fender name plate to the vehicle body.
Remove the No. 2 front fender name plate.
| 6. REMOVE NO. 1 FRONT FENDER NAME PLATE |
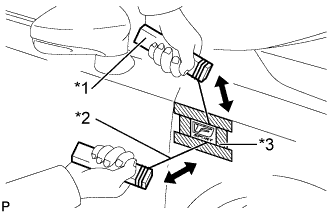 |
Put protective tape around the No. 1 front fender name plate.
| *1 | Wooden Block |
| *2 | Piano Wire |
| *3 | Protective Tape |
Insert a piano wire between the vehicle body and No. 1 front fender name plate.
Tie objects that can serve as handles (for example, wooden blocks) to both wire ends.
Pull the piano wire and scrape off the double-sided tape that holds the No. 1 front fender name plate to the vehicle body.
Remove the No. 1 front fender name plate.