ROOF DRIP SIDE FINISH MOULDING > INSTALLATION |
| 1. INSTALL ROOF DRIP SIDE FINISH MOULDING CLIP |
![]() |
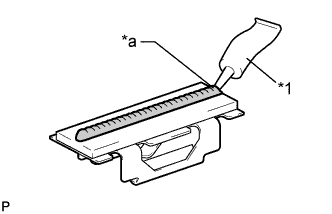
Apply a 2 to 3 mm (0.0787 to 0.118 in.) bead of adhesive (3M DP-105 or equivalent) to new roof drip side finish moulding clips.
| *1 | Adhesive |
| *a | 2 to 3 mm Bead of Adhesive |
Press and install the 2 roof drip side finish moulding clips.
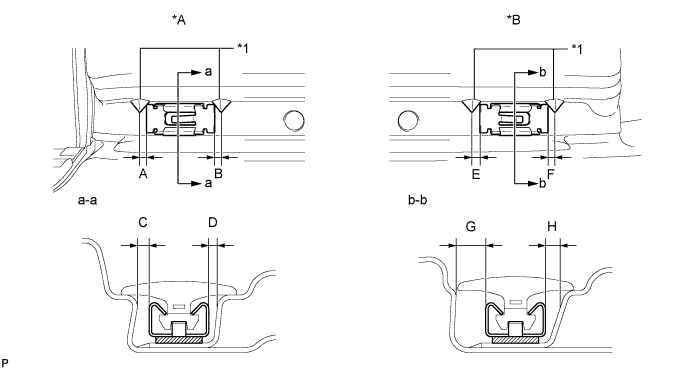
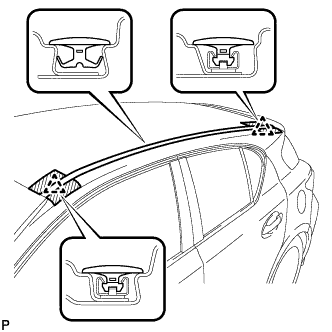
Install the clips to the positions on the roof panel shown in the illustration. Determine the locations and firmly press and install the 2 roof drip side finish moulding clips after lightly applying adhesive (3M DP-105 or equivalent).

| *A | for Front Side | *B | for Rear Side |
| *1 | Protruding Part | - | - |
| Installation Area | Dimension | Measurement |
| for Front Side | A | 3.4 mm (0.134 in.) |
| B | 2.6 mm (0.102 in.) | |
| C | 1.9 mm (0.0748 in.) | |
| D | 1.2 mm (0.0472 in.) | |
| for Rear Side | E | 3.0 mm (0.118 in.) |
| F | 3.0 mm (0.118 in.) | |
| G | 3.7 mm (0.146 in.) | |
| H | 2.0 mm (0.0787 in.) |
Install the roof drip center side finish moulding when 20 minutes or more have elapsed after pressing and installing 2 new roof drip side finish moulding clips.
| 2. INSTALL CENTER ROOF DRIP SIDE FINISH MOULDING |
![]() |
Engage the 2 clips and install the center roof drip side finish moulding.