Home Vehicle Exterior EXTERIOR PANELS / TRIM WINDSHIELD OUTSIDE MOULDING

WINDSHIELD OUTSIDE MOULDING > INSTALLATION

for Preparation Click here


1. INSTALL WINDSHIELD NO. 1 OUTSIDE MOULDING CLIP


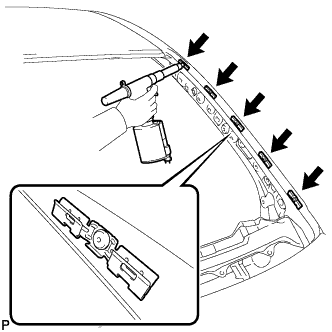
    B270382
  1. Using an air riveter or a hand riveter with a nose piece, install the 5 windshield No. 1 outside moulding clips with 5 new rivets.

    HINT:
    If the mandrel of the rivet does not come off on the first operation of the rivet gun, slide the rivet gun forward on the mandrel and operate it again.

    NOTICE:

    1. B125583E09
      Do not pry the rivet with the riveter, as this will cause damage to the riveter and mandrel.
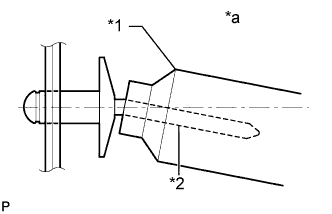
      Text in Illustration 
      *1
      Riveter
      *2
      Mandrel
      *a
      Incorrect

    2. B125584E10
      Confirm that the rivets are seated properly against the roof drip side finish moulding clip.
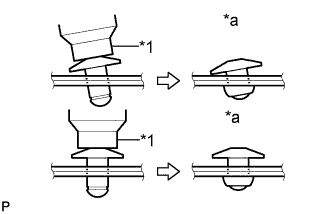
      Text in Illustration 
      *1
      Riveter
      *a
      Incorrect
    3. Do not tilt the riveter when installing the rivet to the roof drip side finish moulding clip.
    4. Do not leave any clearance between the rivet head and roof drip side finish moulding clip.

    5. B125585E12
      Do not leave any clearance between the roof drip side finish moulding clip and front pillar. Firmly hold the 2 items together while installing the rivet.
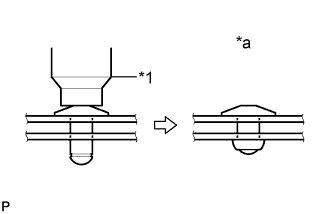
      Text in Illustration 
      *1
      Riveter
      *a
      Incorrect


2. INSTALL WINDSHIELD GLASS
  1. Install the windshield glass (Click here).


3. INSTALL WINDSHIELD OUTSIDE MOULDING


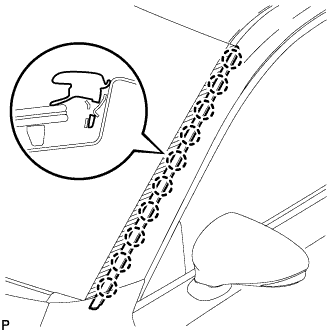
    B270380
  1. Engage the guide and 10 claws to install the windshield outside moulding.


4. INSTALL COWL TOP VENTILATOR LOUVER SUB-ASSEMBLY


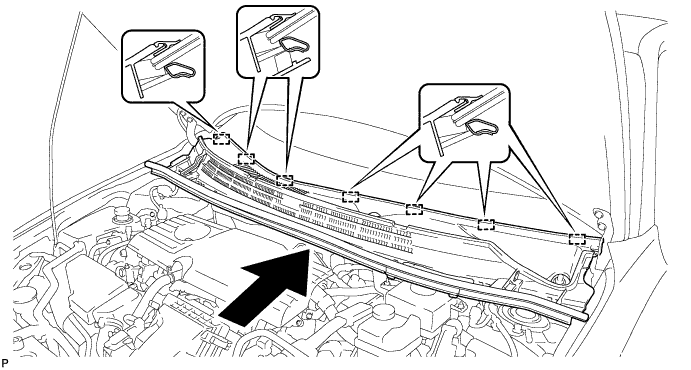
  1. Engage the 7 guides as shown in the illustration.


    E220020


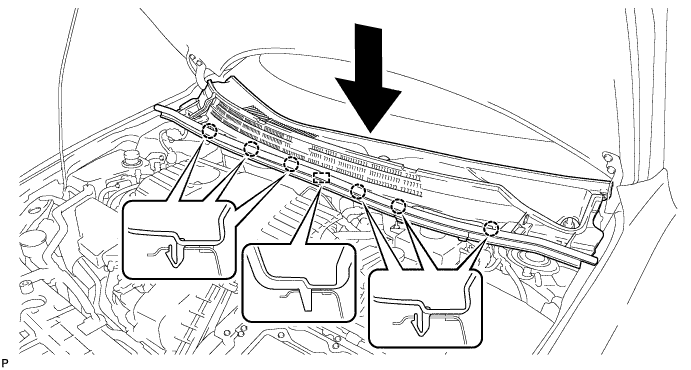
  1. Engage the 6 claws and guide to install the cowl top ventilator louver sub-assembly as shown in the illustration.


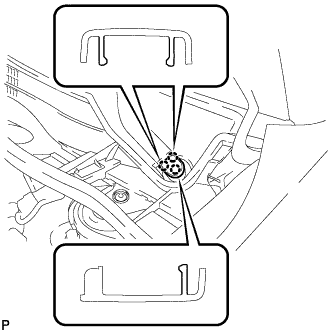
    E220018

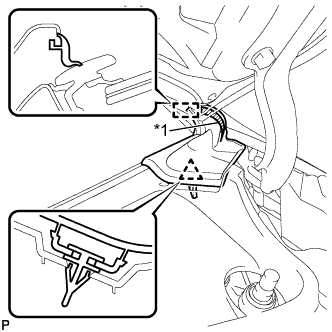
  1. Install the 2 clips.


5. INSTALL FRONT NO. 2 SIDE PANEL PROTECTOR LH


    E220015E01
  1. Wipe off any tape adhesive residue with cleaner.
    Text in Illustration 
    *1
    Double-sided Tape

  1. Remove the release paper from a new front No. 2 side panel protector LH.

    HINT:
    After removing the release paper, keep the exposed adhesive free from foreign matter.

  1. Engage the guide and clip to install the front No. 2 side panel protector LH as shown in the illustration.


6. INSTALL FRONT NO. 2 SIDE PANEL PROTECTOR RH

HINT:
Use the same procedure as for the LH side.


7. INSTALL FRONT WIPER ARM AND BLADE ASSEMBLY LH


    E220967E01
  1. When reusing the front wiper arm and blade assembly LH:

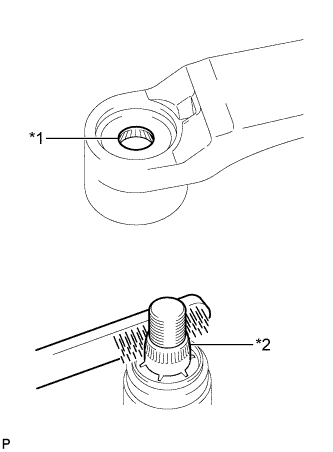
    1. Clean the wiper arm serrations.
      Text in Illustration 
      *1
      Wiper Arm Serration
      *2
      Wiper Pivot Serration

  1. When reusing the windshield wiper link assembly:

    1. Clean the wiper pivot serrations with a wire brush.


    E220033E01
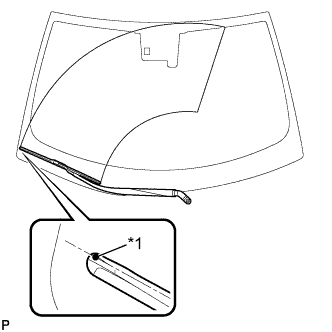
  1. Install the front wiper arm and blade assembly LH with the nut to the position shown in the illustration.

    Torque:
    26 N*m{ 265 kgf*cm , 19 ft.*lbf }

    Text in Illustration 
    *1
    Ceramic Dot

    HINT:
    Hold the wiper arm by hand while tightening the nut.


8. INSTALL FRONT WIPER ARM AND BLADE ASSEMBLY RH


    E220967E01
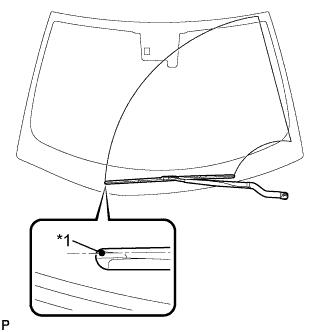
  1. When reusing the front wiper arm and blade assembly RH:

    1. Clean the wiper arm serrations.
      Text in Illustration 
      *1
      Wiper Arm Serration
      *2
      Wiper Pivot Serration

  1. When reusing the windshield wiper link assembly:

    1. Clean the wiper pivot serrations with a wire brush.


    E220032E01
  1. Install the front wiper arm and blade assembly RH with the nut to the position shown in the illustration.

    Torque:
    26 N*m{ 265 kgf*cm , 19 ft.*lbf }

    Text in Illustration 
    *1
    Ceramic Dot

    HINT:
    Hold the wiper arm by hand while tightening the nut.

  1. Turn the power switch on (IG).

  1. Operate the front wiper while spraying washer fluid onto the windshield glass. Make sure that the front wiper functions properly and the wiper does not come into contact with the vehicle body.

  1. Lift each wiper arm twice after the wipers stop and check the wiper set position.

  1. Turn the power switch off.


9. INSTALL FRONT WIPER ARM HEAD CAP


    E220012
  1. Engage the 3 claws to install the front wiper arm head cap.

    HINT:
    Use the same procedure for the RH side and LH side.