 |
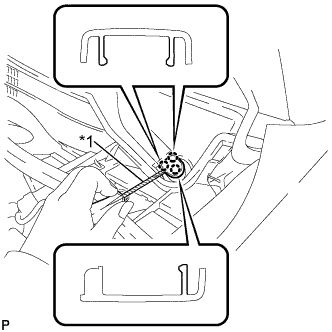
Using a screwdriver, disengage the 3 claws and remove the front wiper arm head cap.
| *1 | Protective Tape |
- HINT:
- Tape the screwdriver tip before use.
- Use the same procedure for the RH side and LH side.
WINDSHIELD OUTSIDE MOULDING > REMOVAL |
| 1. REMOVE FRONT WIPER ARM HEAD CAP |
|
Using a screwdriver, disengage the 3 claws and remove the front wiper arm head cap.
| *1 | Protective Tape |
| 2. REMOVE FRONT WIPER ARM AND BLADE ASSEMBLY LH |
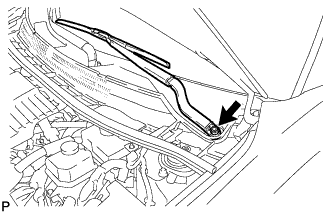 |
Remove the nut and the front wiper arm and blade assembly LH.
| 3. REMOVE FRONT WIPER ARM AND BLADE ASSEMBLY RH |
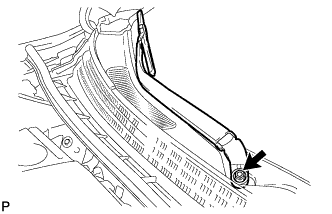 |
Remove the nut and the front wiper arm and blade assembly RH.
| 4. REMOVE FRONT NO. 2 SIDE PANEL PROTECTOR LH |
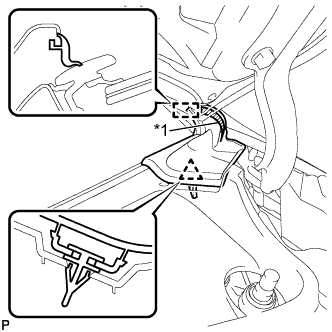 |
Disengage the clip and guide, and remove the front No. 2 side panel protector LH.
| *1 | Double-sided Tape |
| 5. REMOVE FRONT NO. 2 SIDE PANEL PROTECTOR RH |
| 6. REMOVE COWL TOP VENTILATOR LOUVER SUB-ASSEMBLY |
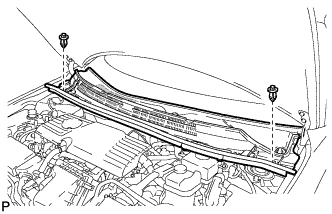 |
Remove the 2 clips.
Disengage the 6 claws and guide as shown in the illustration.
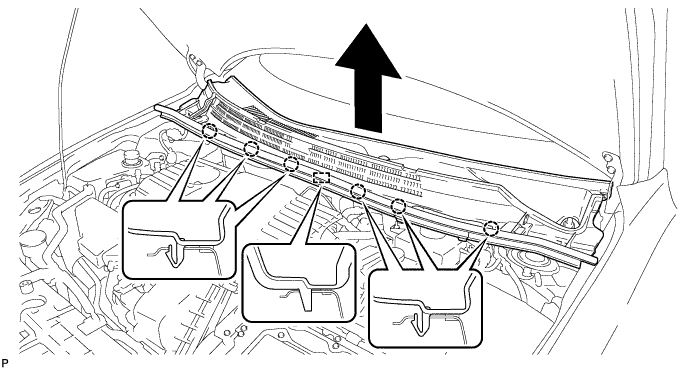
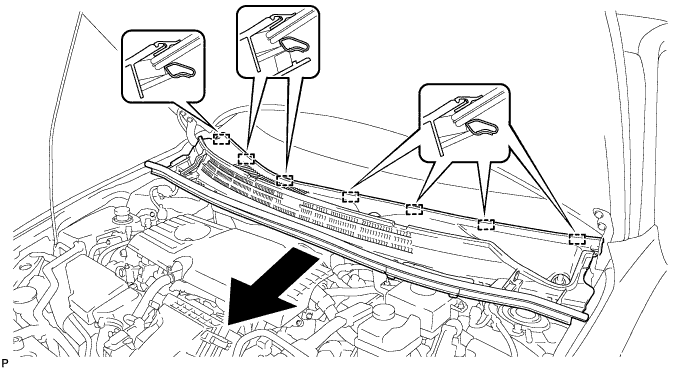
Disengage the 7 guides and pull out the cowl top ventilator louver sub-assembly as shown in the illustration.
| 7. REMOVE WINDSHIELD OUTSIDE MOULDING |
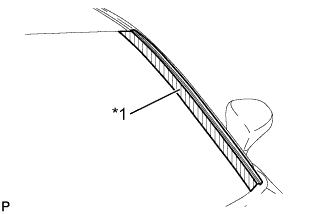 |
Put protective tape around the windshield outside moulding.
| *1 | Protective Tape |
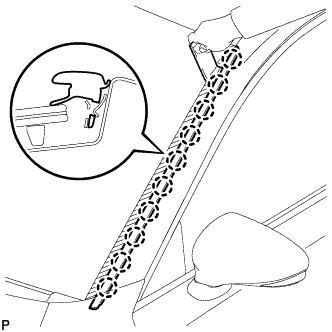 |
Using a moulding remover, disengage the 10 claws.
Disengage the guide and remove the windshield outside moulding.
| 8. REMOVE WINDSHIELD GLASS |
Remove the windshield glass (Click here).
| 9. REMOVE WINDSHIELD NO. 1 OUTSIDE MOULDING CLIP |
Insert a 4.0 mm (0.157 in.) drill bit into a drill.
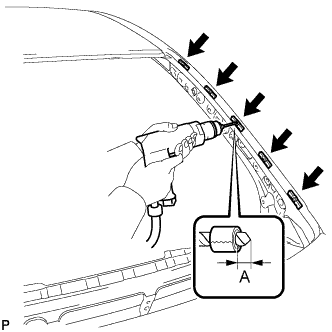 |
Tape a 4.0 mm (0.157 in.) drill bit 5.0 mm (0.197 in.) from the tip as shown in the illustration.
| Area | Dimension |
| A | 5.0 mm |
Lightly press the drill bit against the rivets to drill off the rivet flanges, and remove the 5 windshield No. 1 outside moulding clips.
Using a vacuum cleaner, remove the rivet fragments and shavings from the drilled areas.