 |
Remove the clip.
HEADLIGHT LEVELING ECU (for RHD) > REMOVAL |
| 1. PRECAUTION |
| 2. REMOVE REAR NO. 2 FLOOR BOARD |
Remove the rear No. 2 floor board.
| 3. REMOVE REAR DECK FLOOR BOX |
Remove the rear deck floor box.
| 4. REMOVE REAR NO. 3 FLOOR BOARD |
Remove the rear No. 3 floor board.
| 5. REMOVE DECK FLOOR BOX RH |
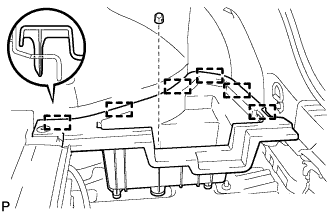
|
Remove the clip.
Disengage the 6 guides and remove the deck floor box RH.
| 6. REMOVE REAR FLOOR BOARD UPPER NO. 3 PLATE |
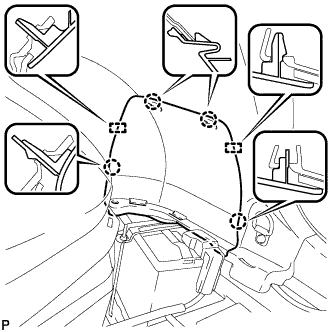 |
Disengage the 4 claws and 2 guides, and remove the rear floor board upper No. 3 plate.
| 7. DISCONNECT CABLE FROM NEGATIVE BATTERY TERMINAL |
| 8. REMOVE NO. 1 INSTRUMENT PANEL UNDER COVER SUB-ASSEMBLY |
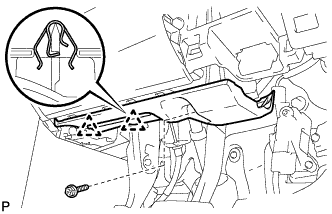 |
Remove the screw <E>.
Disengage the 2 clips.
Disengage the clamp.
Disconnect each connector and remove the No. 1 instrument panel under cover sub-assembly.
| 9. DISCONNECT FRONT DOOR OPENING TRIM WEATHERSTRIP RH |
| 10. REMOVE INSTRUMENT SIDE PANEL RH |
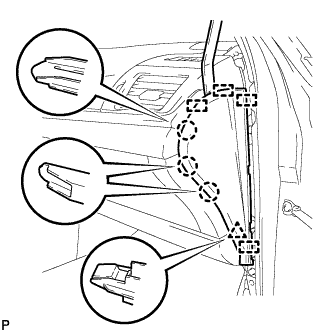 |
Using a moulding remover, disengage the 3 claws, clip and 4 guides, and remove the instrument side panel RH.
Disconnect the connector.
| 11. REMOVE LOWER INSTRUMENT PANEL FINISH PANEL SUB-ASSEMBLY |
| 12. REMOVE HEADLIGHT LEVELING ECU ASSEMBLY |
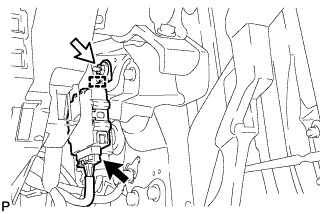 |
Disconnect the connector.
Remove the nut.
Disengage the guide and remove the headlight leveling ECU assembly.