 |
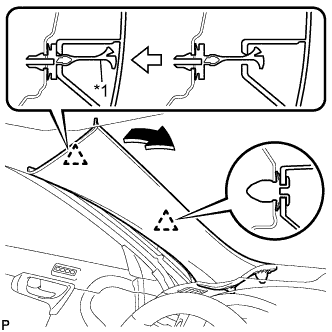
Pull the upper part of the garnish toward the inside of the cabin and disengage the 2 clips.
| *1 | Front Pillar Garnish Clip |
- HINT:
- Make the front pillar garnish LH hang down from the front pillar garnish clip.
PILLAR SPEAKER (for Front Side) > REMOVAL |
| 1. REMOVE FRONT PILLAR GARNISH |
|
Pull the upper part of the garnish toward the inside of the cabin and disengage the 2 clips.
| *1 | Front Pillar Garnish Clip |
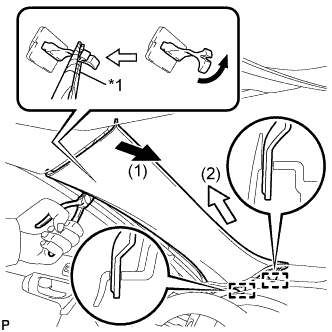 |
Turn the end of the front pillar garnish clip 90° with needle-nosed pliers and remove it from the front pillar garnish LH.
| *1 | Protective Tape |
Disengage the 2 guides.
w/o Front Center Speaker:
Remove the front pillar garnish LH by pulling it in the direction indicated by the arrow (2) in the illustration.
w/ Front Center Speaker:
Disconnect the front pillar garnish LH by pulling it in the direction indicated by the arrow (2) in the illustration.
Disconnect the connector and remove the front pillar garnish LH.
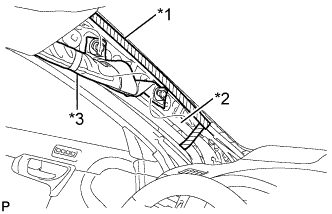 |
Protect the curtain shield airbag assembly.
| *1 | Adhesive Tape |
| *2 | Protective Cover |
| *3 | Curtain Shield Airbag Assembly |
Cover the airbag with a cloth or piece of nylon and secure the ends of the cover with tape as shown in the illustration.
| 2. REMOVE FRONT NO. 3 SPEAKER ASSEMBLY |
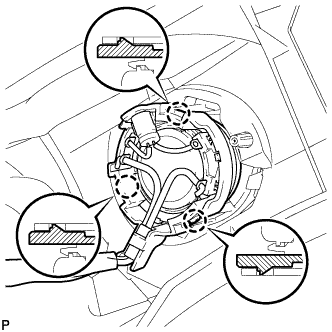 |
Disengage the 3 claws and remove the front No. 3 speaker assembly.