 |
Remove the clip.
FUEL LID OPENER MOTOR ASSEMBLY > REMOVAL |
| 1. REMOVE REAR NO. 2 FLOOR BOARD |
Remove the rear No. 2 floor board.
| 2. REMOVE REAR DECK FLOOR BOX |
Remove the rear deck floor box.
| 3. REMOVE REAR NO. 3 FLOOR BOARD |
Remove the rear No. 3 floor board.
| 4. REMOVE DECK FLOOR BOX RH |
|
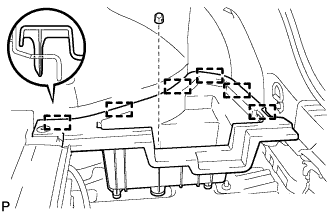
Remove the clip.
Disengage the 6 guides and remove the deck floor box RH.
| 5. REMOVE REAR NO. 4 FLOOR BOARD (w/o Woofer) |
Remove the rear No. 4 floor board.
| 6. REMOVE REAR NO. 4 FLOOR BOARD (w/ Woofer) |
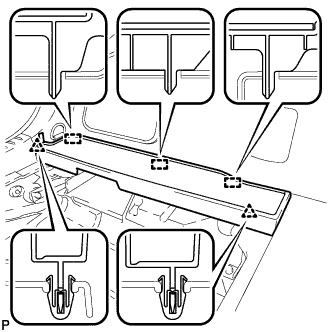 |
Disengage the 2 clips and 3 guides, and remove the rear No. 4 floor board.
| 7. REMOVE DECK FLOOR BOX LH (w/o Woofer) |
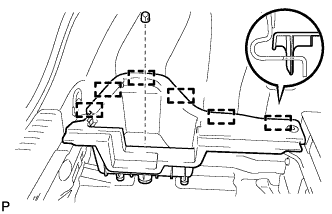 |
Remove the clip.
Disengage the 6 guides and remove the deck floor box LH.
| 8. REMOVE TONNEAU COVER ASSEMBLY (w/ Tonneau Cover) |
Remove the tonneau cover assembly.
| 9. REMOVE REAR NO. 1 FLOOR BOARD SUB-ASSEMBLY |
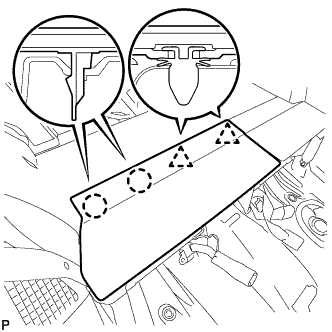 |
Disengage the 2 claws and 2 clips, and remove the rear No. 1 floor board sub-assembly.
| 10. REMOVE REAR NO. 2 FLOOR BOARD SUB-ASSEMBLY |
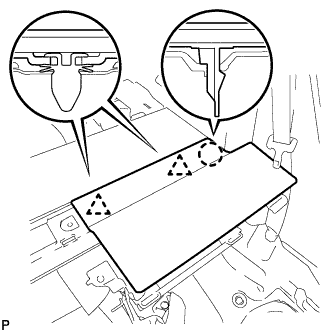 |
Disengage the claw and 2 clips, and remove the rear No. 2 floor board sub-assembly.
| 11. REMOVE REAR NO. 1 FLOOR BOARD |
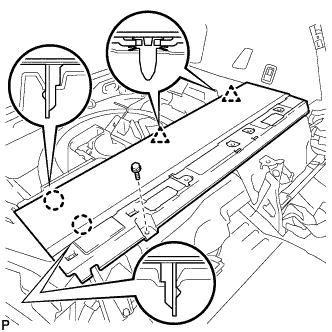 |
Remove the bolt.
Disengage the 2 claws and 2 clips, and remove the rear No. 1 floor board.
| 12. REMOVE DECK TRIM SERVICE HOLE COVER |
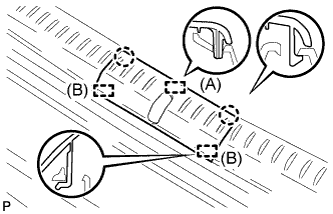 |
Disengage the 2 claws and guide (A).
Disengage the 2 guides (B) and remove the deck trim service hole cover.
| 13. REMOVE REAR DECK TRIM COVER |
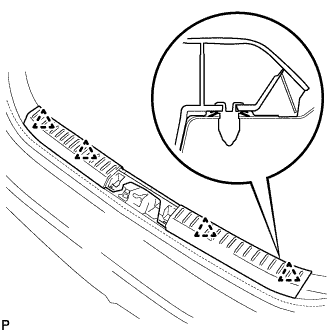 |
Disengage the 4 clips and remove the rear deck trim cover.
| 14. REMOVE REAR DOOR SCUFF PLATE LH |
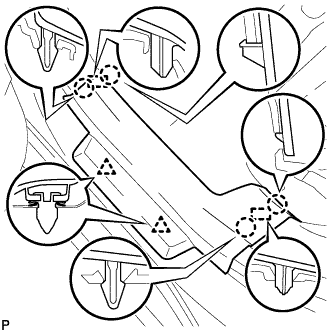 |
Disengage the 4 claws, 2 guides and 2 clips, and remove the rear door scuff plate LH.
| 15. REMOVE REAR DOOR OPENING TRIM WEATHERSTRIP LH |
Remove the rear door opening trim weatherstrip LH.
Remove the residual weatherstrip sealant from the body of the vehicle using cleaner.
| 16. REMOVE REAR SEAT CUSHION ASSEMBLY |
Disengage the hook of the seat cushion from the vehicle body as shown in the illustration.
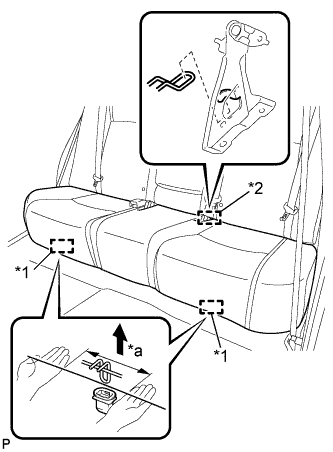 |
Choose a hook to disengage first. Place your hands near the hook as shown in the illustration. Then lift the seat cushion to disengage the hook.
| *1 | Hook |
| *2 | Guide |
| *a | 100 mm (3.94 in.) or less |
Repeat the step above for the other hook.
Disengage the guide of the seat cushion from the seatback.
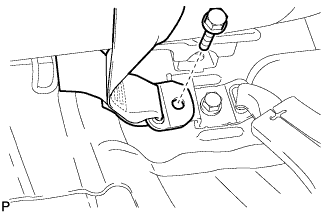 |
Remove the bolt and disconnect the rear center seat outer belt assembly.
Pull out the rear center seat outer belt assembly from the rear seat cushion assembly.
Remove the rear seat cushion assembly.
| 17. REMOVE REAR SEAT CUSHION LOCK HOOK |
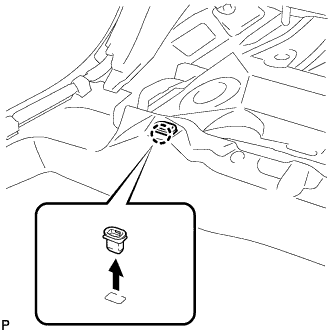 |
Disengage the claw and remove the rear seat cushion lock hook.
| 18. REMOVE REAR SEATBACK ASSEMBLY LH |
Disengage the fastener and disconnect the rear No. 2 floor board sub-assembly.
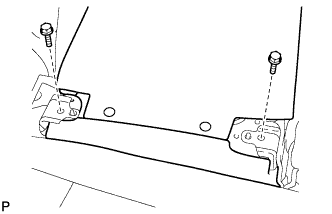 |
Remove the 2 bolts and rear seatback assembly LH.
| 19. REMOVE REAR SEAT SIDE GARNISH LH |
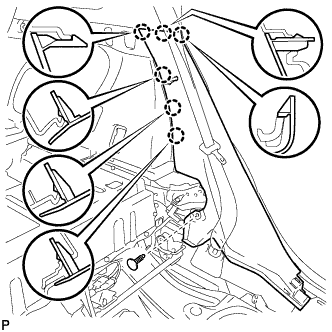 |
Remove the clip.
Disengage the 6 claws and remove the rear seat side garnish LH.
| 20. REMOVE ROPE HOOK ASSEMBLY |
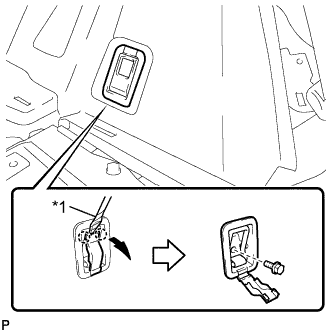 |
Using a screwdriver, disengage the 2 claws.
| *1 | Protective Tape |
Remove the bolt and the rope hook assembly.
| 21. REMOVE LUGGAGE HOLD BELT STRIKER ASSEMBLY |
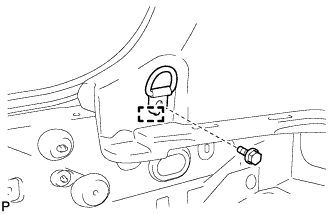 |
Remove the bolt.
Disengage the guide and remove the luggage hold belt striker assembly.
| 22. REMOVE TONNEAU COVER HOOK |
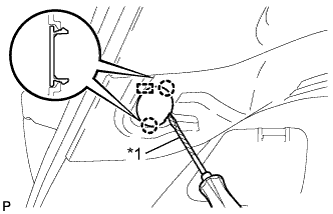 |
Using a screwdriver, disengage the 2 claws and pin, and remove the tonneau cover hook.
| *1 | Protective Tape |
| 23. REMOVE TONNEAU COVER HOLDER CAP |
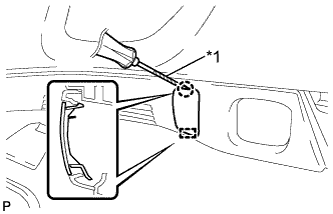 |
Using a screwdriver, disengage the claws and guide, and remove the tonneau cover holder cap.
| *1 | Protective Tape |
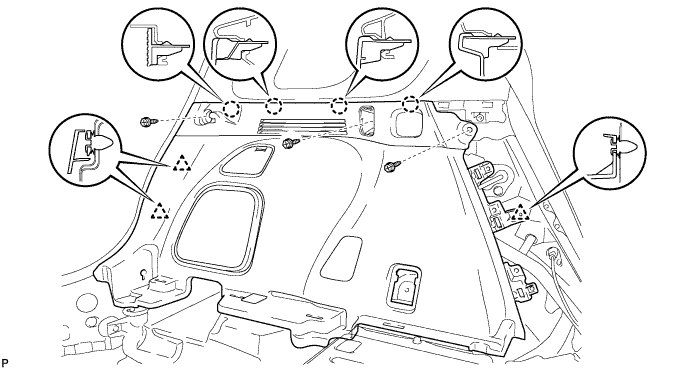
| 24. REMOVE DECK TRIM SIDE PANEL ASSEMBLY LH |
Remove the 3 screws.
Disengage the 4 claws and 3 clips, and remove the deck trim side panel assembly LH.
| 25. REMOVE NO. 1 SPEAKER ASSEMBLY WITH BOX (w/ Woofer) |
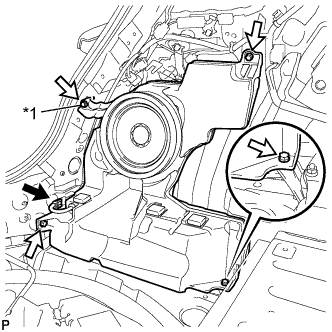 |
Disconnect the connector.
Remove the 3 bolts.
Remove the screw and No. 1 speaker assembly with box.
| *1 | Screw |
| 26. REMOVE FUEL LID WITH MOTOR LOCK ASSEMBLY |
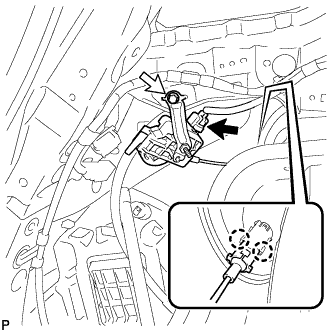 |
Disconnect the connector.
Disengage the 2 claws.
Remove the bolt and fuel lid with motor lock assembly.