FRONT DOOR WINDOW FRAME MOULDING > REMOVAL |
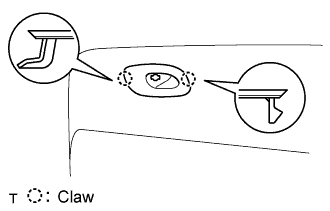
| 1. REMOVE FRONT DOOR INSIDE HANDLE BEZEL PLUG |
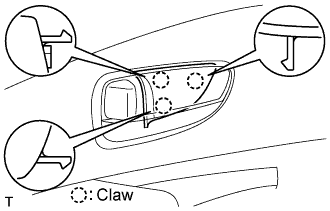 |
Using a screwdriver, detach the 3 claws and remove the bezel plug.
| 2. REMOVE FRONT DOOR TRIM COVER LOWER |
 |
Detach the 2 claws and remove the trim lower cover.
Disconnect the connector.
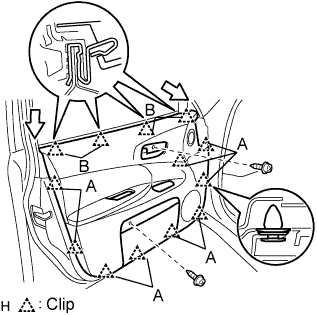 |
Remove the 2 screws.
Detach the 9 clips labeled A, and remove the trim together with the weather strip.
Detach the 4 clips labeled B to separate the weatherstrip and trim.
 |
Disconnect the 2 cables from the inside handle.
| 3. REMOVE FRONT DOOR TRIM BOARD SUB-ASSEMBLY |
|
Detach the 2 claws and remove the trim lower cover.
Disconnect the connector.
|
Remove the 2 screws.
Detach the 9 clips labeled A, and remove the trim together with the weather strip.
Detach the 4 clips labeled B to separate the weatherstrip and trim.
|
Disconnect the 2 cables from the inside handle.
| 4. REMOVE FRONT DOOR TRIM COVER |
 |
Remove the screw.
Using a clip remover, detach the 6 clips and remove the trim cover.
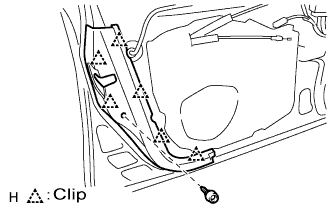
| 5. REMOVE DOOR FRAME GARNISH |
 |
Remove the screw.
Using a screwdriver, remove the 2 clips and garnish.
| 6. REMOVE OUTER REAR VIEW MIRROR ASSEMBLY |
 |
Disconnect the connector.
Detach the clip.
Remove the 3 bolts and mirror.
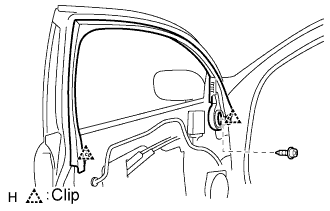
| 7. REMOVE FRONT DOOR WEATHERSTRIP |
Using a clip remover, detach the clips and remove the weatherstrip.
| 8. REMOVE FRONT DOOR WINDOW FRAME MOULDING UPPER |
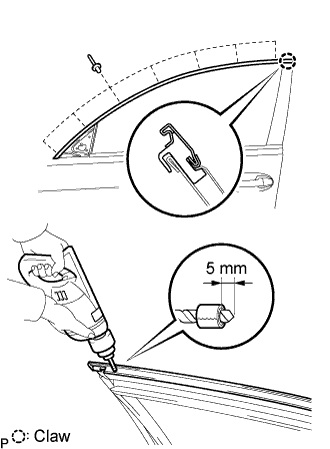 |
Using a drill bit with a diameter of less than 4 mm (0.16 in.), drill out the 7 rivet flanges.
Continue drilling and push out the remaining rivet fragments using the drill.
Using a vacuum cleaner, remove the rivet fragments and shavings from the drilled areas.
Remove the front door window frame moulding from the door frame.
| 9. REMOVE FRONT DOOR WINDOW FRAME MOULDING REAR |
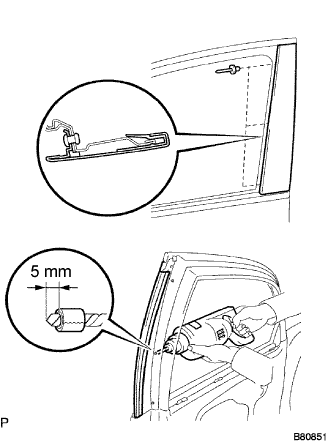 |
Using a drill bit with a diameter of less than 4 mm (0.16 in.), drill out the 3 rivet flanges.
Continue drilling and push out the remaining rivet fragments using the drill.
Using a vacuum cleaner, remove the rivet fragments and shavings from the drilled areas.
Remove the front door window frame moulding rear from the door frame.
