HEATED OXYGEN SENSOR (for Sensor 2) > INSTALLATION |
| 1. INSTALL HEATED OXYGEN SENSOR (for Bank 1) |
 |
Using SST, install the sensor.
 |
Pass the sensor connector through the floor panel and into the cabin, and install the grommet.
Connect the sensor connector.
| 2. INSTALL HEATED OXYGEN SENSOR (for Bank 2) |
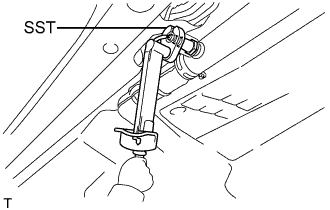 |
Using SST, install the sensor.
 |
Pass the sensor connector through the floor panel and into the cabin, and install the grommet.
Connect the sensor connector.
| 3. INSTALL INSTRUMENT PANEL FINISH PANEL END LH |
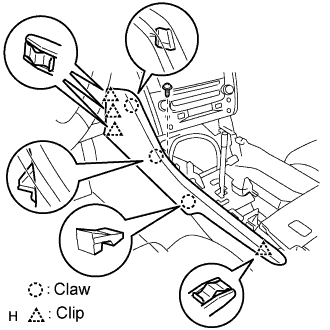 |
Attach the 4 clips and 3 claws to install the finish panel end.
Install the screw.
| 4. INSTALL INSTRUMENT PANEL FINISH PANEL END RH |
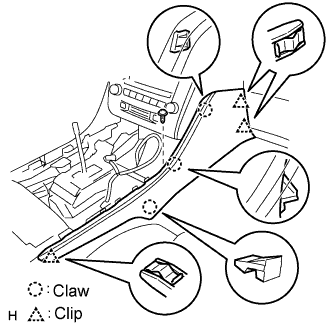 |
Attach the 3 clips and 3 claws to install the finish panel end.
Install the screw.
| 5. INSTALL FRONT ASH RECEPTACLE ASSEMBLY |
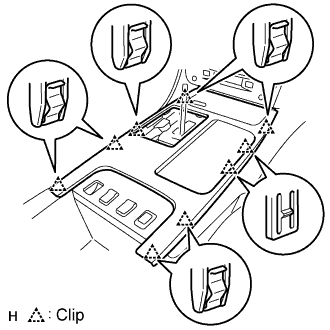 |
Connect the connector.
Attach the 9 clips to install the ash receptacle.
 |
Install the shift lever knob and twist it in the direction indicated by the arrow.
| 6. INSTALL FRONT CONSOLE UPPER PANEL GARNISH |
Attach the claws to install the garnish.
| 7. CONNECT CABLE TO NEGATIVE BATTERY TERMINAL |
| 8. PERFORM INITIALIZATION |
Perform initialization (Click here).
