CYLINDER HEAD > REASSEMBLY |
| 1. INSTALL CAMSHAFT SUB GEAR |
 |
Install the bolt washer (1), sub gear (2) and wave washer (3).
 |
Using snap ring pliers, install the snap ring.
 |
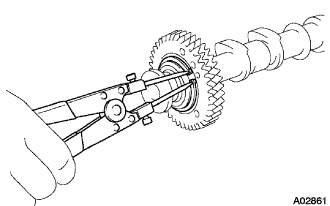
Mount the hexagon head portion of the camshaft in a vise.
 |
Using SST, align the holes of the driven main gear and sub gear by turning the sub gear clockwise, and temporarily install a service bolt.
Align the gear teeth of the driven main gear and sub gear, and tighten the service bolt.
| 2. INSTALL CAMSHAFT TIMING TUBE ASSEMBLY |
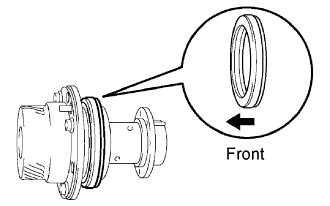 |
Insert a new oil seal into the camshaft timing tube until it reaches the stopper.
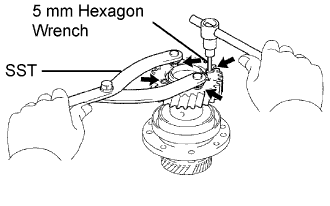 |
Align the timing tube knock pin with the knock pin groove of the drive gear, and temporarily install the drive gear with the 4 bolts.
Using SST and a 5 mm hexagon wrench, uniformly tighten the 4 bolts in several passes.
 |
Mount the hexagon head portion of the camshaft in a vise.
 |
Align the camshaft knock pin with the knock pin groove of the timing tube, and push the timing tube by hand until it touches the bottom.
Using a 10 mm hexagon wrench, install the bolt.
Install the seal washer and screw plug.
| 3. INSTALL SPARK PLUG TUBE |
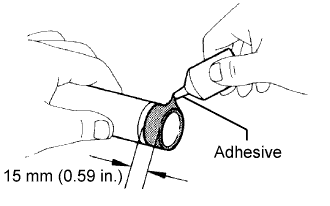 |
Apply adhesive to the end of the spark plug tube.
 |
Using a wooden block and hammer, tap in a new spark tube until there is 48.4 to 49.6 mm (1.906 to 1.953 in.) protruding from the camshaft bearing cap installation surface of the cylinder head.
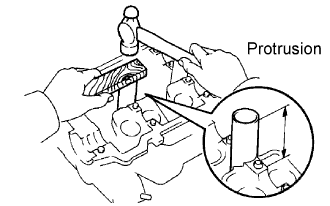
| 4. INSTALL NO. 1 TIGHT PLUG |
 |
Apply adhesive to the end of the spark plug tube.
Using SST and a hammer, tap in a new tight plug as shown in the illustration.
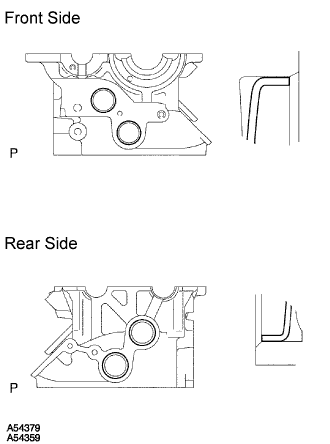
| 5. INSTALL RING PIN |

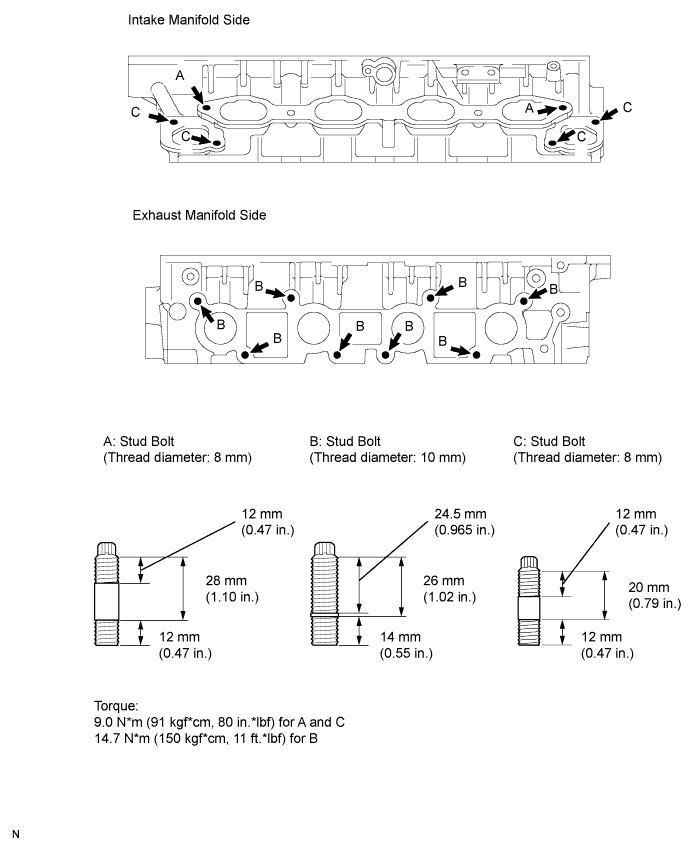
| 6. INSTALL STUD BOLT |
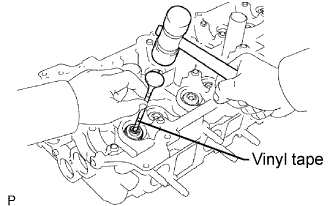
| 7. INSTALL VALVE STEM OIL SEAL |
 |
Using SST, push in a new oil seal.
 |
Apply a light coat of engine oil in a new oil seal.
| 8. INSTALL INTAKE VALVE |
 |
Install the valve, spring seat, compression spring and spring retainer.
Using SST, compress the compression spring and place the 2 keepers around the valve stem.
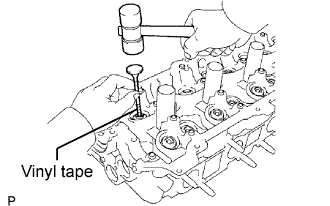 |
Using a plastic-faced hammer and a discarded valve with its tip wrapped in tape, lightly tap the installed valve to ensure that it is securely fit.
| 9. INSTALL EXHAUST VALVE |
 |
Install the valve, spring seat, compression spring and spring retainer.
Using SST, compress the compression spring and place the 2 keepers around the valve stem.
 |
Using a plastic-faced hammer and a discarded valve with its tip wrapped in tape, lightly tap the installed valve to ensure that it is securely fit.
| 10. INSTALL VALVE LIFTER |
Install the valve lifter and shim.
Check that the valve lifter rotates smoothly by hand.
